> ## Documentation Index
> Fetch the complete documentation index at: https://clickflare.com/docs/llms.txt
> Use this file to discover all available pages before exploring further.
# Adding a Path
> Setting up a default path
When setting up a Flow, the default path is required. You can then choose whether to add conditional paths or continue using only the default path. In this article, we’ll guide you through setting up and using the default path.
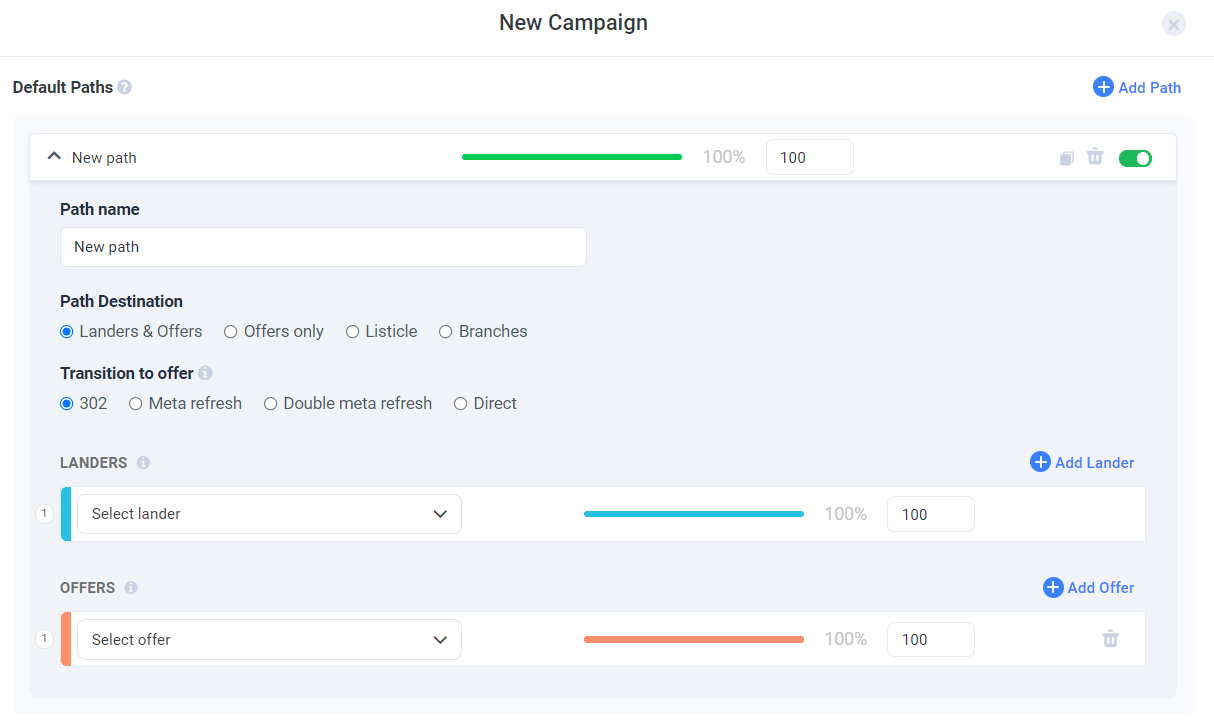 1. Begin by giving your path a **new name.**
Note: Each time you add a default path, its name will be automatically set as "**New Path**". Make sure to customize it in order to be able to reuse it when needed.
2. Designate its **Path Destination** among 4 options:
\- **Landers & Offers**
\- **Offers only**
\- **Listicle**
\- **Advanced Flow**
Note: Listicle allows you to create a more layered path for your visitors, extending the standard campaign funnel by adding an additional step with a lander. A visitor will first see a pre-lander that has links to subsequent landers, each of them containing links to different offers.
3. Proceed to selecting your **Transition to offer**.
4. Based on the path destination option you've chosen, add in other elements such as the path's lander and offers.
Note: The traffic distribution is governed by a weight value. The proportion of weight values is reflected in a percentage of traffic distribution. This percentage always sums up to 100%.
1. Begin by giving your path a **new name.**
Note: Each time you add a default path, its name will be automatically set as "**New Path**". Make sure to customize it in order to be able to reuse it when needed.
2. Designate its **Path Destination** among 4 options:
\- **Landers & Offers**
\- **Offers only**
\- **Listicle**
\- **Advanced Flow**
Note: Listicle allows you to create a more layered path for your visitors, extending the standard campaign funnel by adding an additional step with a lander. A visitor will first see a pre-lander that has links to subsequent landers, each of them containing links to different offers.
3. Proceed to selecting your **Transition to offer**.
4. Based on the path destination option you've chosen, add in other elements such as the path's lander and offers.
Note: The traffic distribution is governed by a weight value. The proportion of weight values is reflected in a percentage of traffic distribution. This percentage always sums up to 100%.