> ## Documentation Index
> Fetch the complete documentation index at: https://clickflare.com/docs/llms.txt
> Use this file to discover all available pages before exploring further.
# Creating a Campaign in ClickFlare
> A step-by-step guide to creating your first campaign in ClickFlare
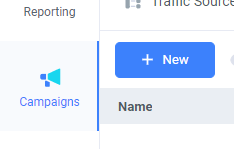
Once you have logged into your ClickFlare account, on the left side of your screen select **Campaigns**.
1. Begin by pressing the **+** **New** button.
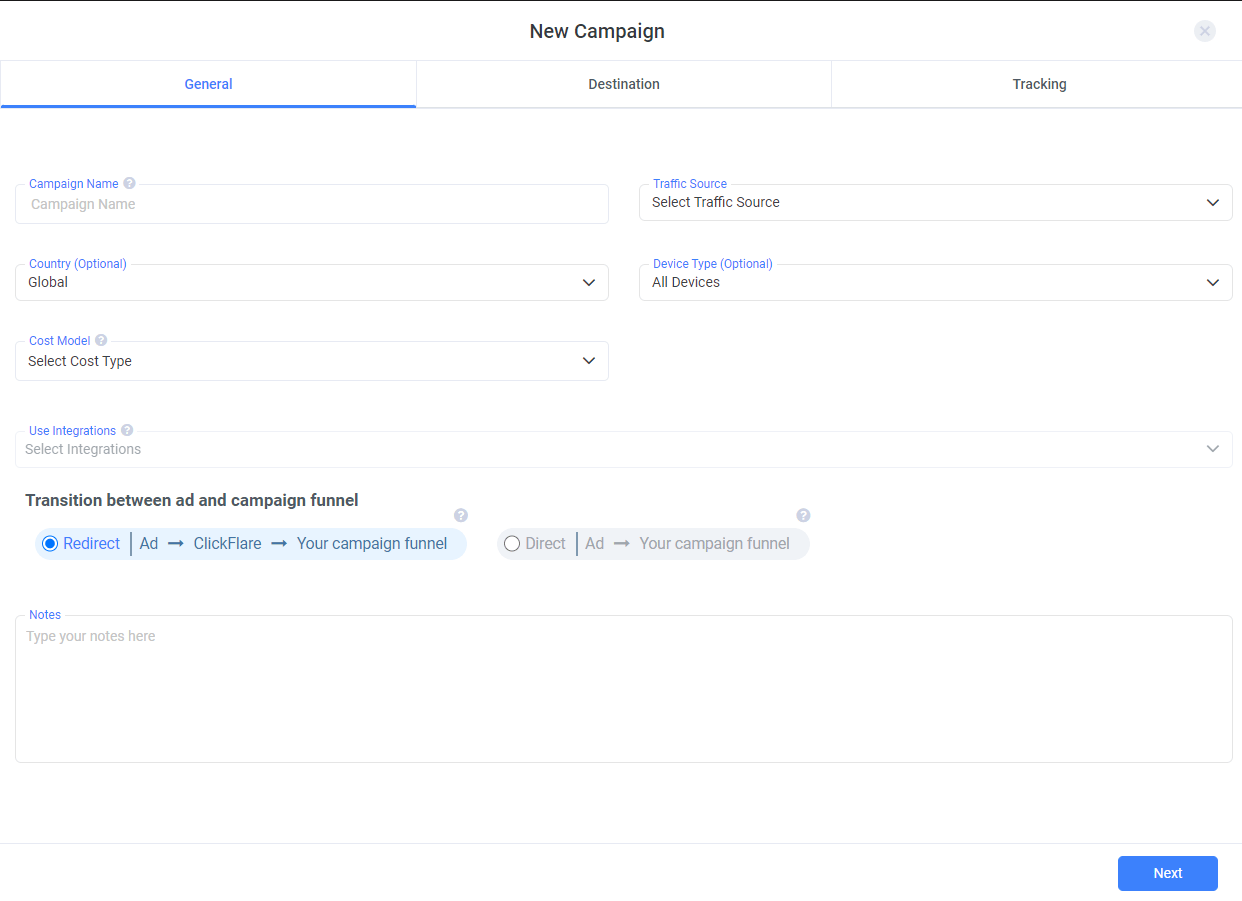 2. Continue by **naming** your campaign (try to think of something unique or rememberable, this can come in handy when you are running multiple campaigns).
3. Select your **Traffic Source** from the list of existing ones or see how you can add a new traffic source to ClickFlare [here](/docs/en/tracking/creating-a-traffic-source).
4. At this point, you can specify a **Country** and **Device Type** for better organization.
5. Next, choose your **Cost Model**. Depending on the cost model you have chosen (**CPC, CPM, CPA, RevShare**), a new box will appear, where you can designate the default Cost Value as well.
2. Continue by **naming** your campaign (try to think of something unique or rememberable, this can come in handy when you are running multiple campaigns).
3. Select your **Traffic Source** from the list of existing ones or see how you can add a new traffic source to ClickFlare [here](/docs/en/tracking/creating-a-traffic-source).
4. At this point, you can specify a **Country** and **Device Type** for better organization.
5. Next, choose your **Cost Model**. Depending on the cost model you have chosen (**CPC, CPM, CPA, RevShare**), a new box will appear, where you can designate the default Cost Value as well.
 6. Add in the **Integrations** you want to attach to this campaign.
Note: Each time you connect a *traffic source* with a *campaign*, its integrations will be applied to the campaign as well (you can modify them at any time).
7. Move below to pick your path's transition, be it either **Redirect** or **Direct**.
6. Add in the **Integrations** you want to attach to this campaign.
Note: Each time you connect a *traffic source* with a *campaign*, its integrations will be applied to the campaign as well (you can modify them at any time).
7. Move below to pick your path's transition, be it either **Redirect** or **Direct**.
 **Redirect Tracking** is a classic tracking method, in which a visitor is redirected through ClickFlare's servers, by applying path-altering options, such as rule-based paths, weights, A/B testing or AI.
**Direct Tracking** as the name suggests is a tracking method in which the visitor lands directly to a designated site, there is no redirection in the middle.
To learn more about Redirect and Direct Tracking, click [here](/docs/en/campaigns/direct-campaign-tracking).
Note: You can place a note on your campaign e.g. what its aims are.
8. In the **Destination** **menu**, you can choose to use an existing flow for this campaign, by selecting **Use Existing Flow**, you can work on an existing flow by selecting **Create From Existing Flow**, or create a **New Flow** on the spot. (Follow our guide on how to create a new flow [here](/docs/en/tracking/creating-a-flow)).
**Redirect Tracking** is a classic tracking method, in which a visitor is redirected through ClickFlare's servers, by applying path-altering options, such as rule-based paths, weights, A/B testing or AI.
**Direct Tracking** as the name suggests is a tracking method in which the visitor lands directly to a designated site, there is no redirection in the middle.
To learn more about Redirect and Direct Tracking, click [here](/docs/en/campaigns/direct-campaign-tracking).
Note: You can place a note on your campaign e.g. what its aims are.
8. In the **Destination** **menu**, you can choose to use an existing flow for this campaign, by selecting **Use Existing Flow**, you can work on an existing flow by selecting **Create From Existing Flow**, or create a **New Flow** on the spot. (Follow our guide on how to create a new flow [here](/docs/en/tracking/creating-a-flow)).
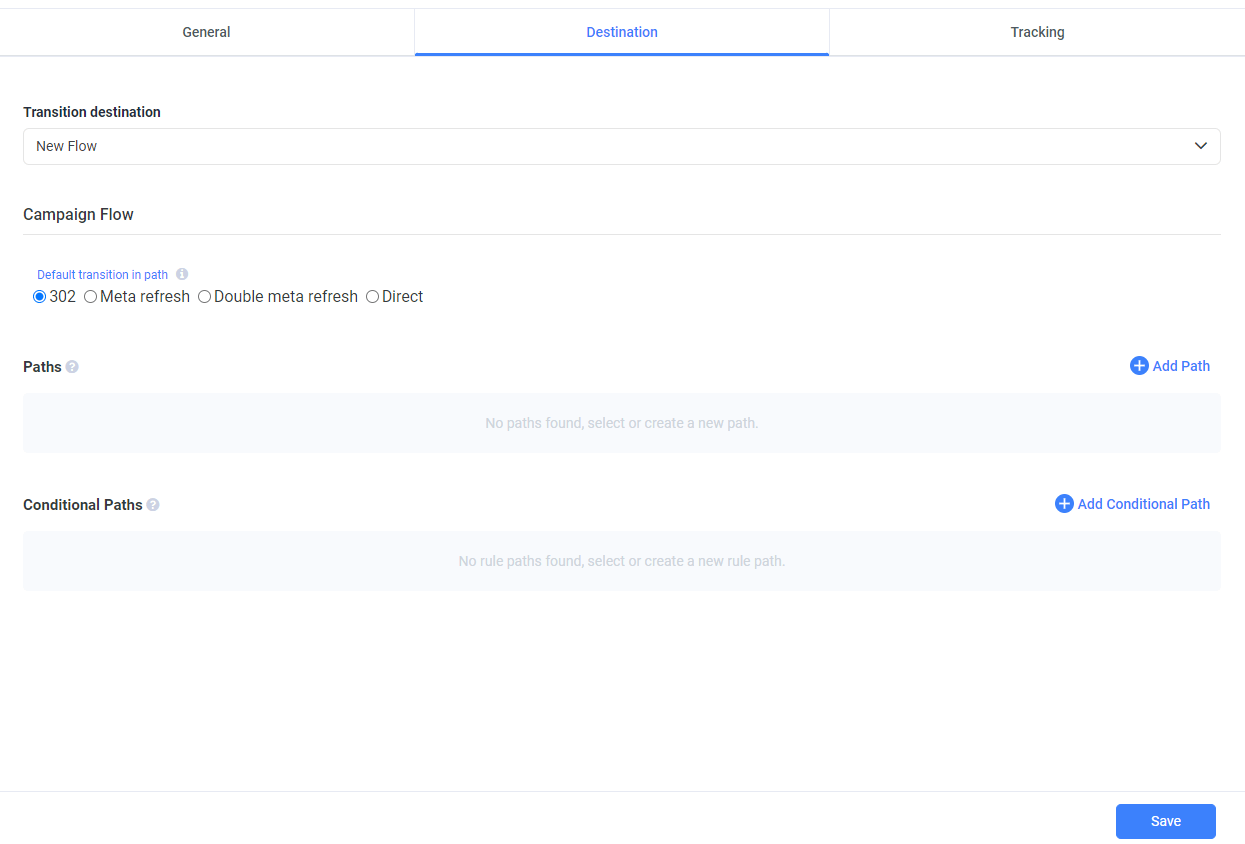 9. Pick one of the 4 provided **Redirect Modes**:
**- 302**
**- Meta refresh**
**- Double meta refresh**
**- Direct**
You can look [here](/docs/en/campaigns/redirect-modes), to learn more about each Redirect Mode.
10. From this point, you can proceed to add a [**Path**](/docs/en/campaigns/adding-default-paths)or a [**Conditional Path**](/docs/en/campaigns/adding-conditional-paths).
Tip: The respective links will give you a step-by-step guide in building each of them.
11. Once you are done, click on **Save**.
12. From here, after you have saved your *Destination settings*, you can move on to the **Tracking window**, where you can find all the tracking links required to set your campaigns running.
13. Begin by picking your tracking **domain**,
9. Pick one of the 4 provided **Redirect Modes**:
**- 302**
**- Meta refresh**
**- Double meta refresh**
**- Direct**
You can look [here](/docs/en/campaigns/redirect-modes), to learn more about each Redirect Mode.
10. From this point, you can proceed to add a [**Path**](/docs/en/campaigns/adding-default-paths)or a [**Conditional Path**](/docs/en/campaigns/adding-conditional-paths).
Tip: The respective links will give you a step-by-step guide in building each of them.
11. Once you are done, click on **Save**.
12. From here, after you have saved your *Destination settings*, you can move on to the **Tracking window**, where you can find all the tracking links required to set your campaigns running.
13. Begin by picking your tracking **domain**,
 Note: Your default domain will be selected, but if you wish you can select another domain and all the links will be automatically updated.
14. Copy any of the links/ids generated for your use.
15. Click **Save** when you are done. You'll be redirected to your **Campaigns**' window, where you can see your newly created campaign join the list.
16. You can **Preview**, **Edit**, **Clone** or **Archive** a campaign at any time.
Note: Your default domain will be selected, but if you wish you can select another domain and all the links will be automatically updated.
14. Copy any of the links/ids generated for your use.
15. Click **Save** when you are done. You'll be redirected to your **Campaigns**' window, where you can see your newly created campaign join the list.
16. You can **Preview**, **Edit**, **Clone** or **Archive** a campaign at any time.