> ## Documentation Index
> Fetch the complete documentation index at: https://clickflare.com/docs/llms.txt
> Use this file to discover all available pages before exploring further.
# Facebook Conversion API
> Adding Facebook's Conversion API Integration
By using **ClickFlare**’s Conversion API for **Meta Ads** (**aka Facebook Ads**), you’ll be able to report multiple conversion events from ClickFlare back to Meta Ads through Meta’s conversion reporting API. Just like you would do when using server-to-server postbacks, but even easier.
*Why should I use Conversion API for Meta Ads (Facebook Ads)?*
As a result of the tracking limitations introduced by Apple (with iOS 14 and 14.5), its ATT framework has limited the tracking capability of website tracking pixels. Such restrictions have resulted in an underreporting of conversions and, therefore, a limitation of optimization capabilities on Meta Ads’ algorithm. To address such limitations, Meta Ads has made available a Conversion API endpoint where you can report conversion events.
**What you'll need for the integration:**
* An active Facebook Account
* An active ClickFlare Account
* Facebook Pixel ID and Access Token
### **Where to Find Facebook Conversion API Information**
1. From your FB business account, go to **Business Settings**.
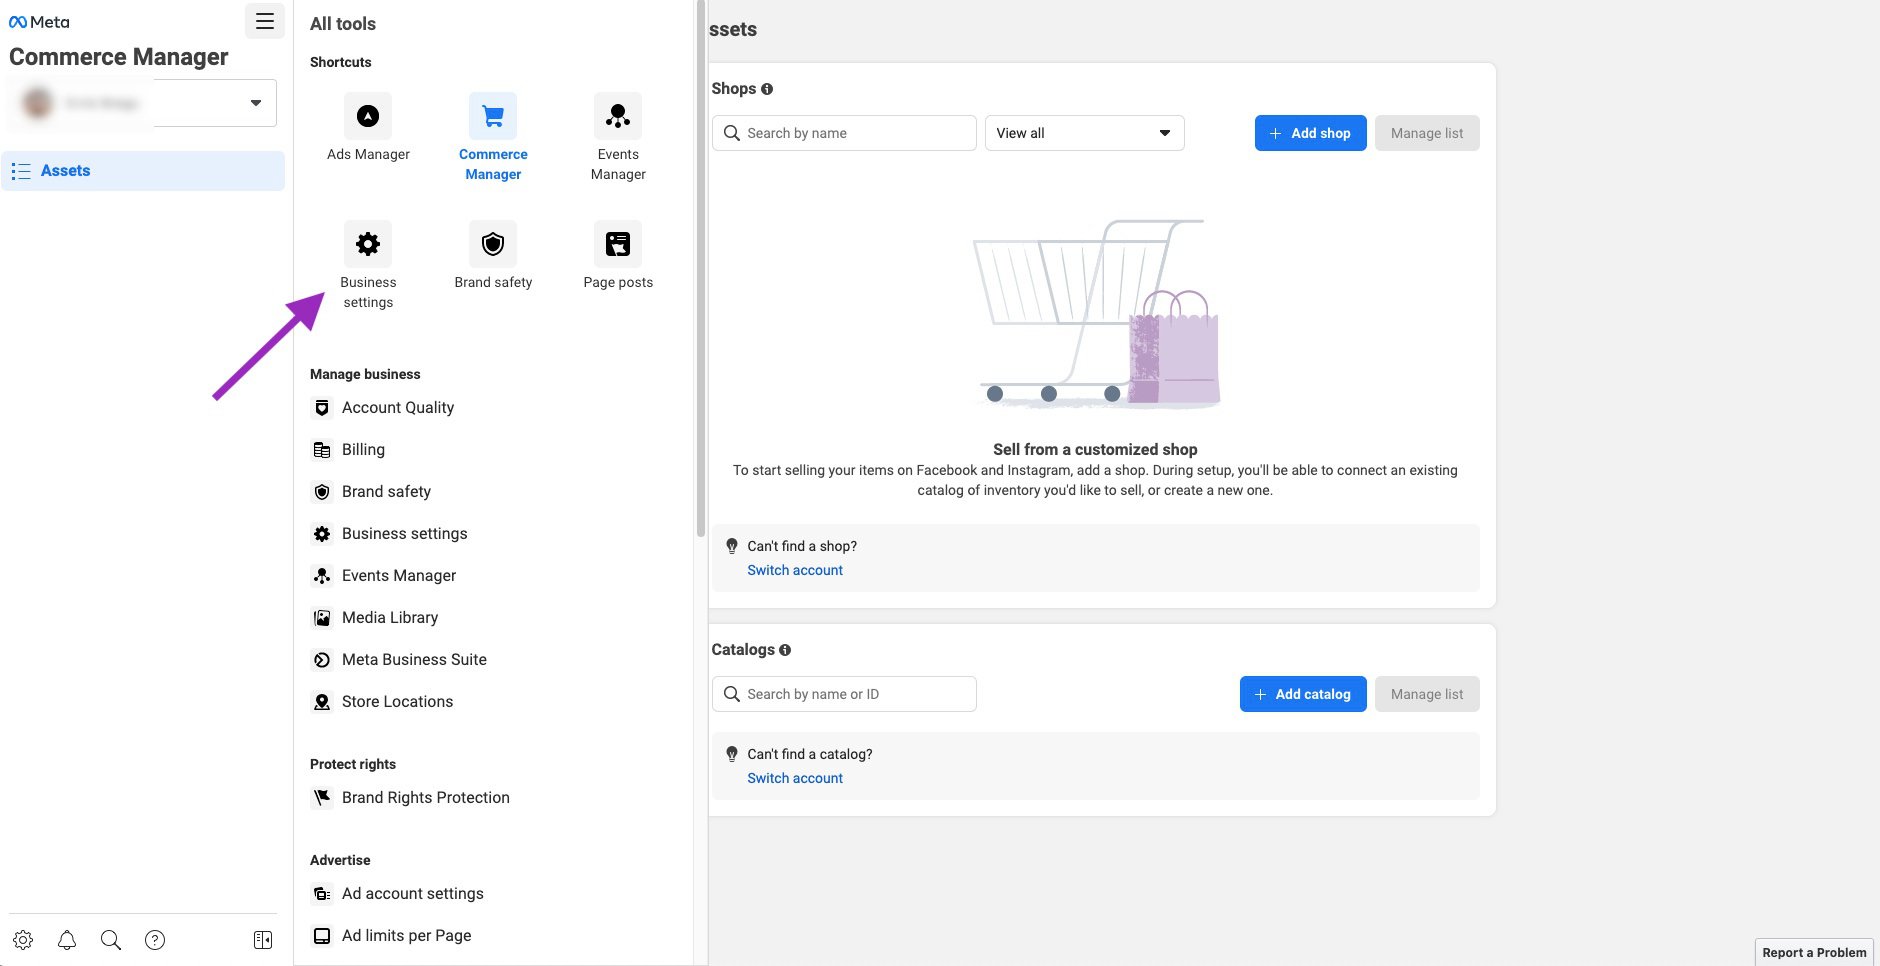 2. On the left ribbon, go to **Data Sources** and then click on **Pixels**.
3. A list of available Pixels should appear. Select the Pixel you would like to connect.
4. Click on the **Open in Events Manager** button.
2. On the left ribbon, go to **Data Sources** and then click on **Pixels**.
3. A list of available Pixels should appear. Select the Pixel you would like to connect.
4. Click on the **Open in Events Manager** button.
 Note: If you don’t have any pixels on FB, you’ll need to create one first. For more information on how to create a pixel, click [here](https://www.facebook.com/business/help/314143995668266).
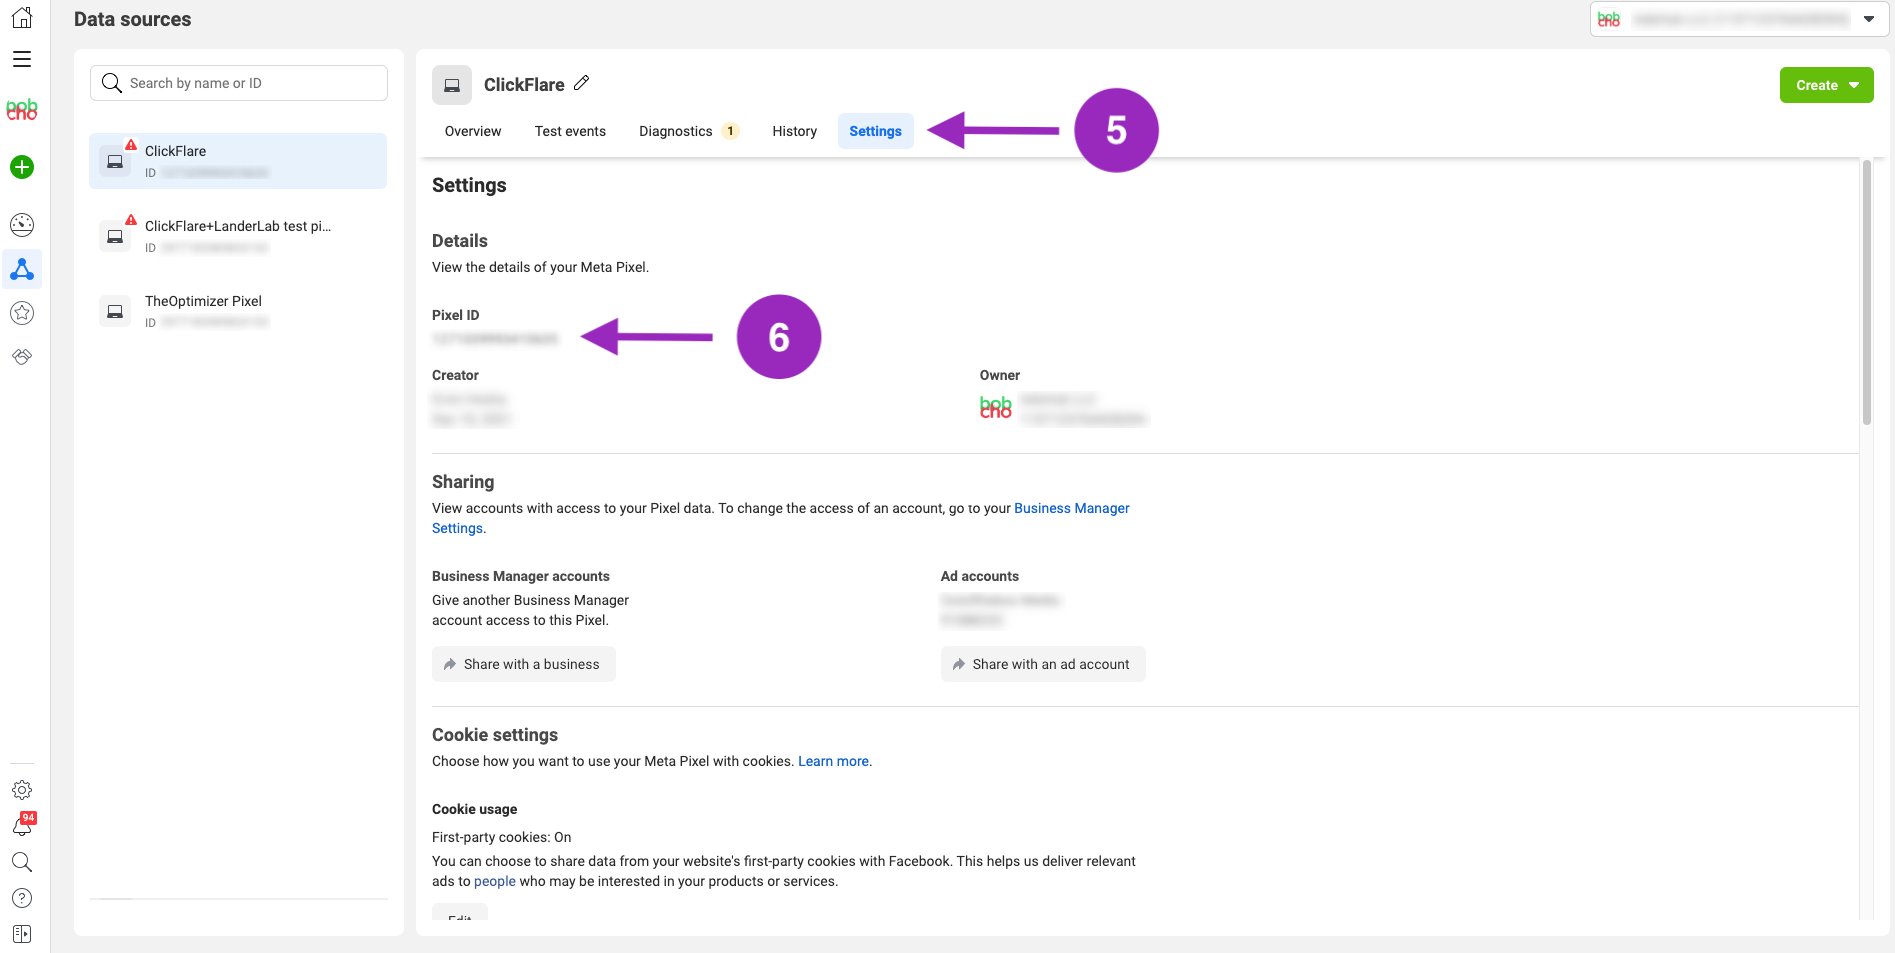
5. Once on the Event Manager Menu, click on the **Settings** tab.
6. In the **Details** section, you should see the **Pixel ID**. Copy it and be ready to use it.
Note: If you don’t have any pixels on FB, you’ll need to create one first. For more information on how to create a pixel, click [here](https://www.facebook.com/business/help/314143995668266).
5. Once on the Event Manager Menu, click on the **Settings** tab.
6. In the **Details** section, you should see the **Pixel ID**. Copy it and be ready to use it.
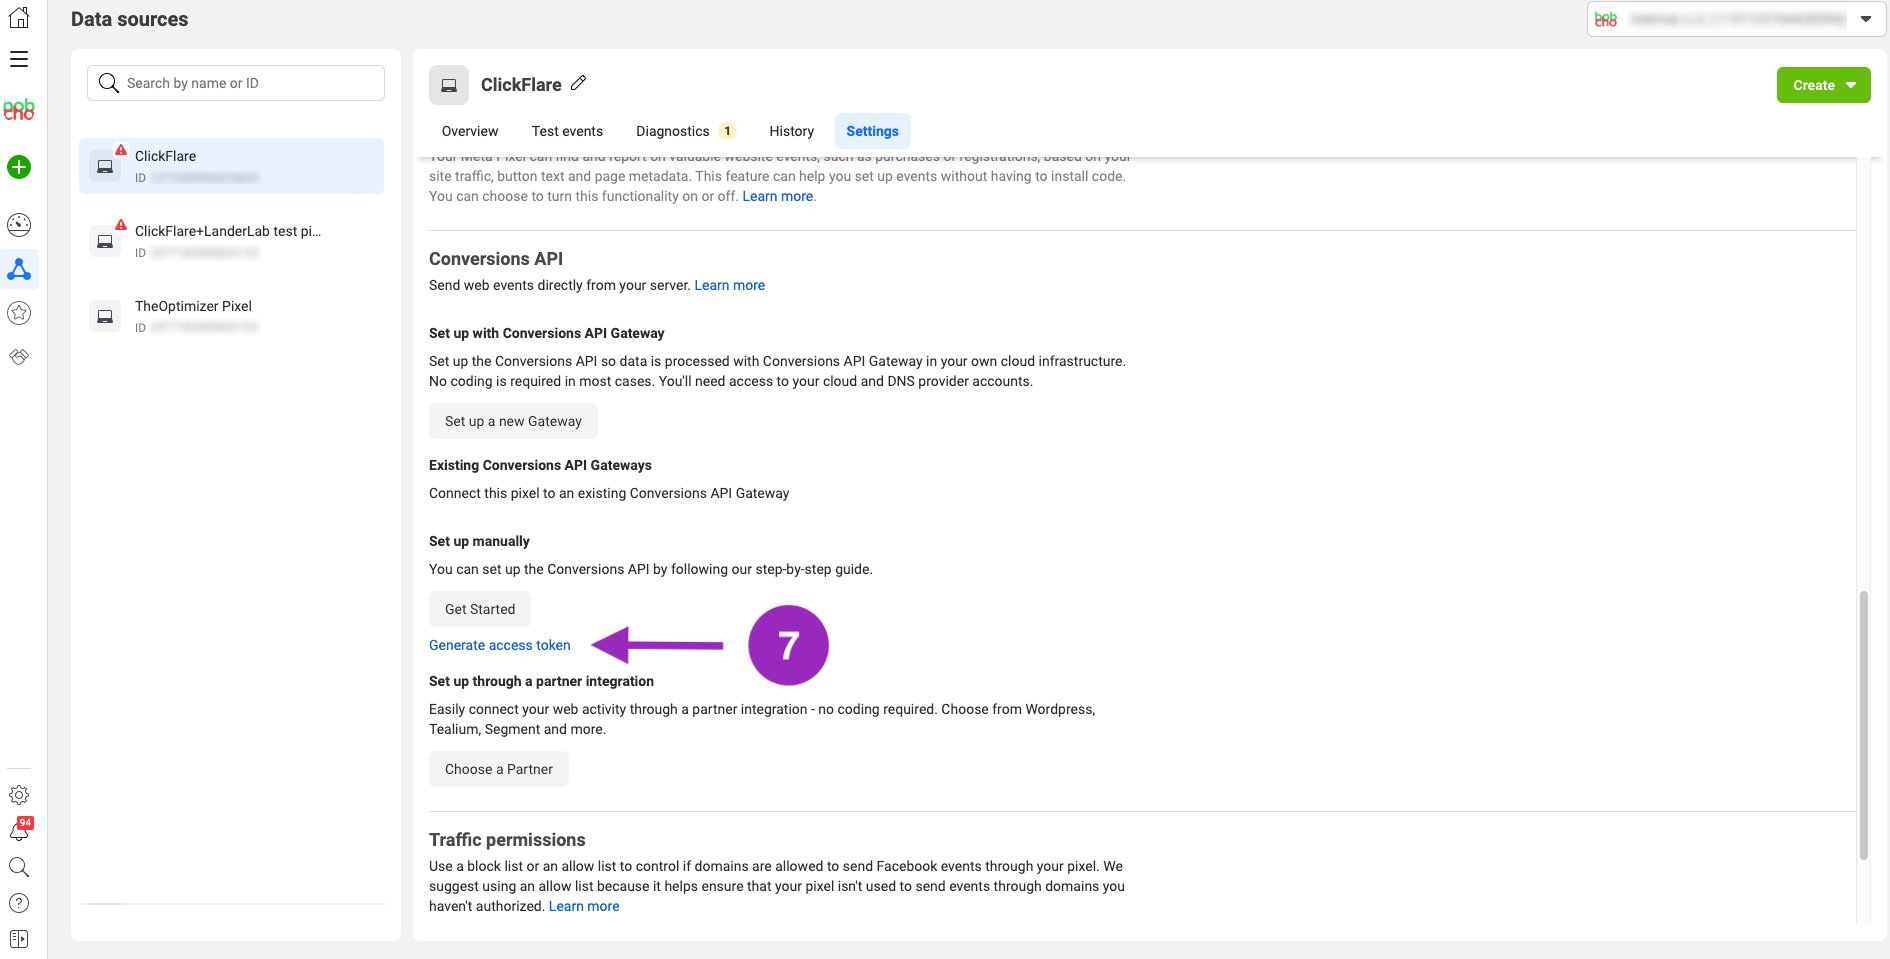
 7. Scroll down to the **Conversion API** Section and under “**Set up manually,**” click on ***Generate access token***. Copy the Access Token and paste it somewhere you can easily access.
 8. Now that you have all you need to integrate FB to ClickFlare, let’s continue with the integration.
### **Integrating Facebook Conversion API in ClickFlare**
Follow the steps below to add the Facebook Conversion API.
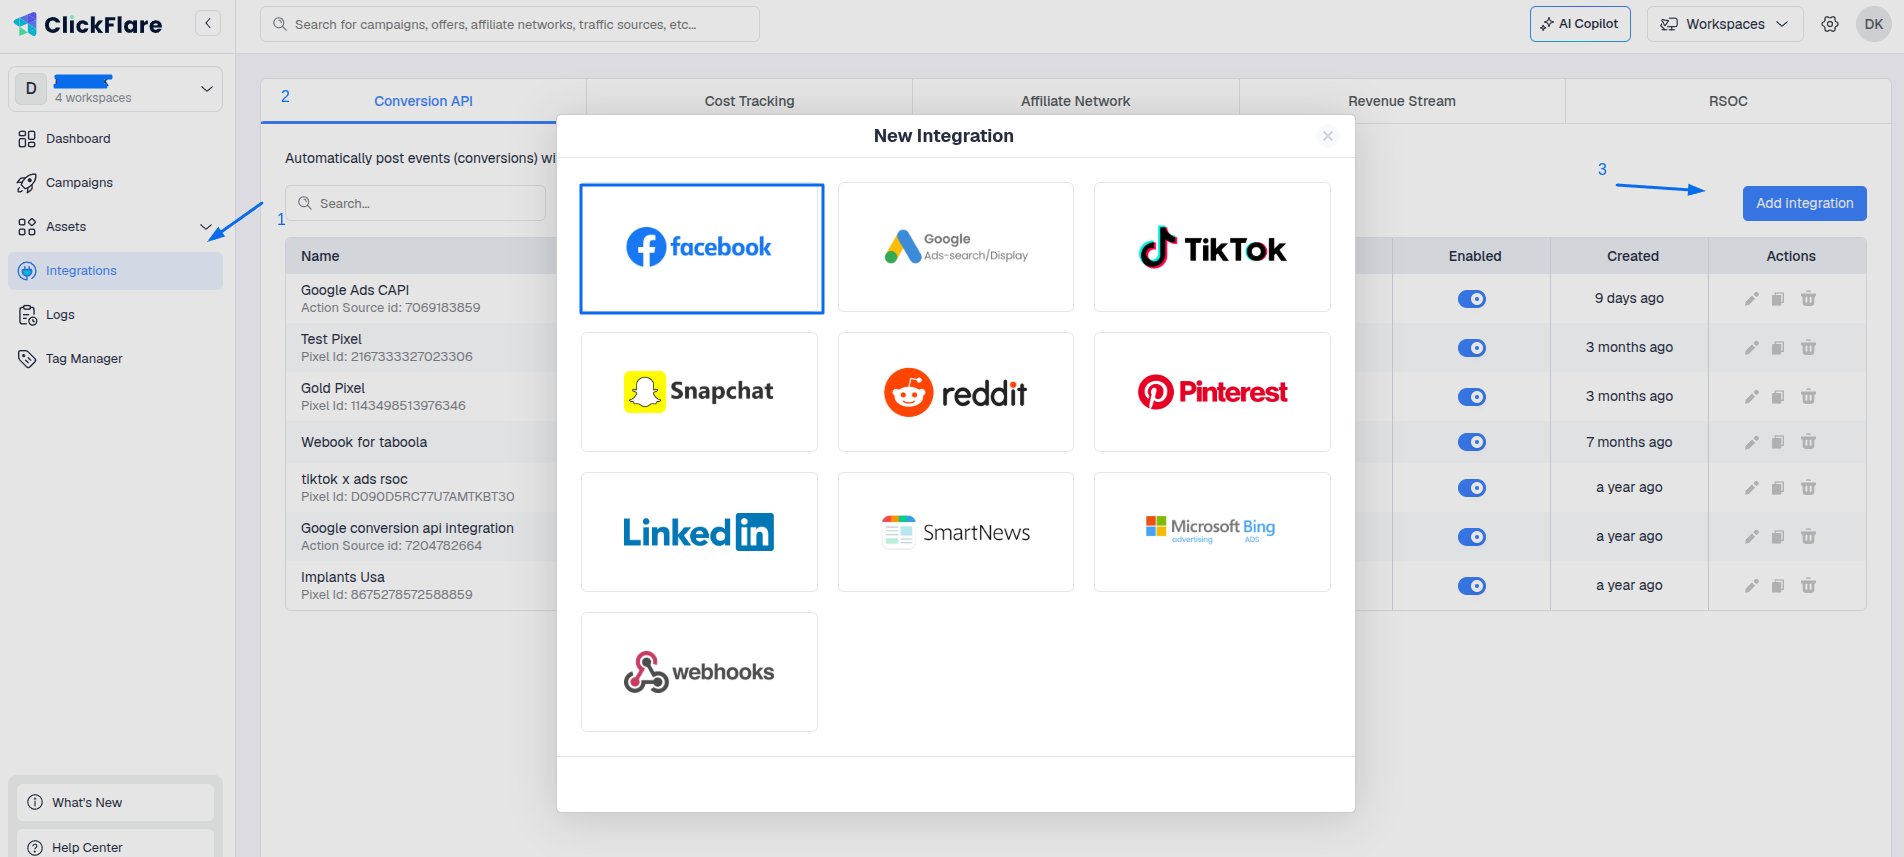
1. Open the ClickFlare left sidebar
2. Go to the **Integrations** tab.
3. In the **Conversion API Integrations** section, click on **Add Integration**.
4. Select **Facebook** from the list of available integrations.
8. Now that you have all you need to integrate FB to ClickFlare, let’s continue with the integration.
### **Integrating Facebook Conversion API in ClickFlare**
Follow the steps below to add the Facebook Conversion API.
1. Open the ClickFlare left sidebar
2. Go to the **Integrations** tab.
3. In the **Conversion API Integrations** section, click on **Add Integration**.
4. Select **Facebook** from the list of available integrations.
 5. In the integration screen, click on **Add a new Pixel.**
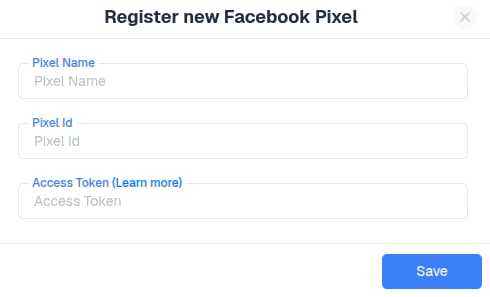
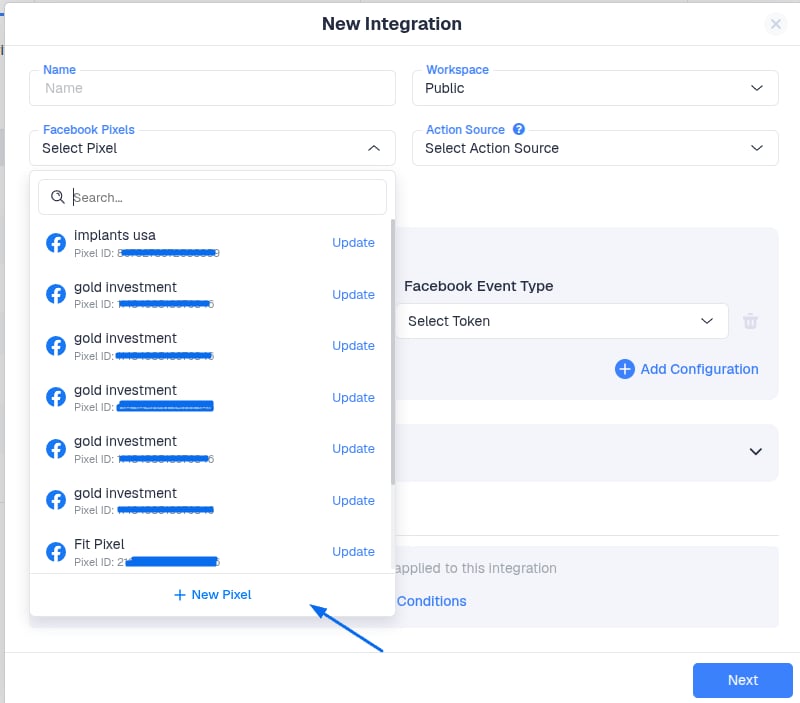 6. Give your pixel a **name** and paste the **Pixel ID** and **Access Token** you copied earlier.
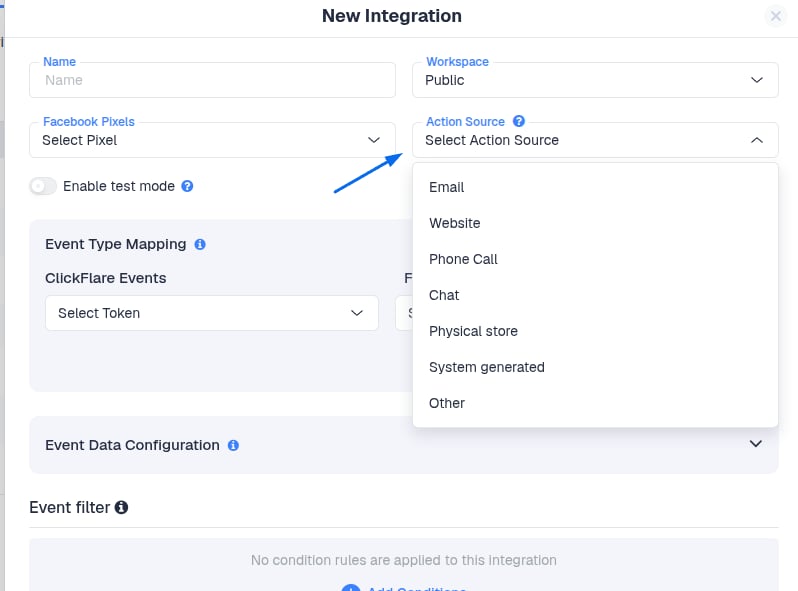
 7. Define the **Action Source**.
As per Facebook requirements, you need to define the action source of the events that will be posted to Facebook.
*For example, select Website if the collected data is coming from a website or a landing page, or select Email if the data has been collected via email, etc.*
7. Define the **Action Source**.
As per Facebook requirements, you need to define the action source of the events that will be posted to Facebook.
*For example, select Website if the collected data is coming from a website or a landing page, or select Email if the data has been collected via email, etc.*
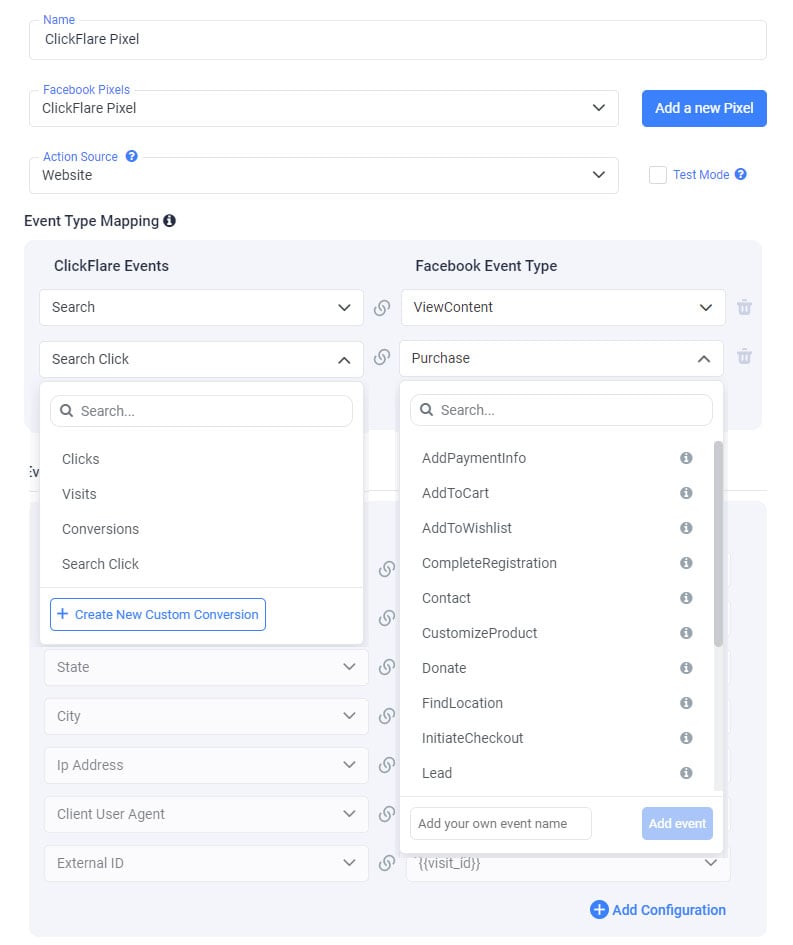
 8. Specify which ClickFlare tracked events are going to be posted on Facebook.
Using the **Event Type Mapping**, you can map ClickFlare-tracked events to specific Standard Facebook events or custom ones of your choice.
[Click here](/docs/en/settings/custom-conversions) to learn more about how to create custom events.
If you expect a conversion event to have a payout on the Facebook side, make sure to **map it to a Facebook event** that actually carries a value, such as **Purchase** or **Subscription**.
8. Specify which ClickFlare tracked events are going to be posted on Facebook.
Using the **Event Type Mapping**, you can map ClickFlare-tracked events to specific Standard Facebook events or custom ones of your choice.
[Click here](/docs/en/settings/custom-conversions) to learn more about how to create custom events.
If you expect a conversion event to have a payout on the Facebook side, make sure to **map it to a Facebook event** that actually carries a value, such as **Purchase** or **Subscription**.
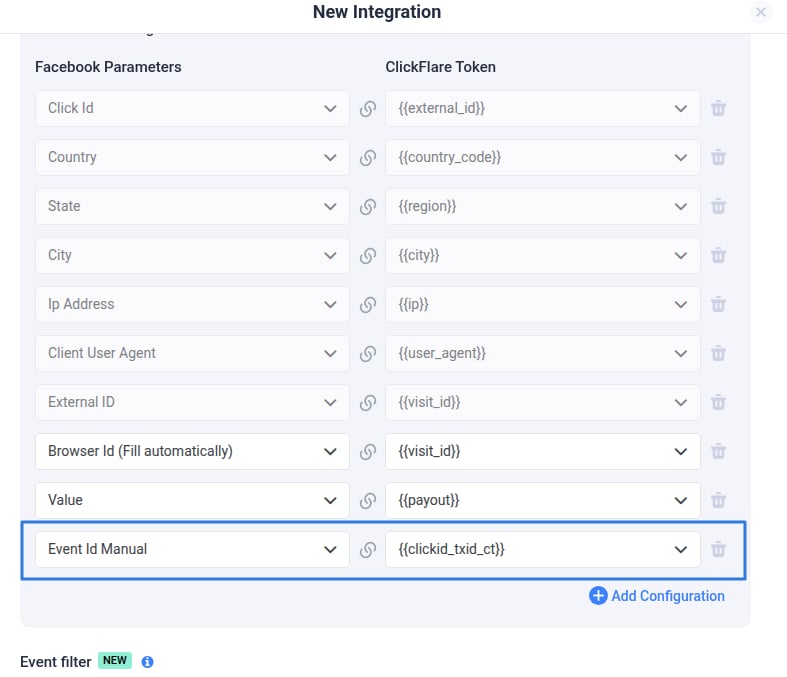
 9. Now that you have mapped the events that will be reported to Facebook, you need to define what information you want to send to Facebook CAPI.
As you may see in the screenshot below, the configuration comes with a few grayed-out fields. This means that the information is sent to Facebook CAPI by default. However, if you want to add more information to each event you report to Facebook CAPI, you can add it by adding it to the **Event Data Configuration**. See example below.
9. Now that you have mapped the events that will be reported to Facebook, you need to define what information you want to send to Facebook CAPI.
As you may see in the screenshot below, the configuration comes with a few grayed-out fields. This means that the information is sent to Facebook CAPI by default. However, if you want to add more information to each event you report to Facebook CAPI, you can add it by adding it to the **Event Data Configuration**. See example below.
 Note: Some parameters are required from the Traffic Source and can not be changed or deleted.
Learn how to add additional parameters [here](/docs/en/integrations/additional-parameters).
10. To prevent Facebook from deduplicating the conversion, you’ll need to map the Facebook **manual event ID** parameter to the ClickFlare token \{\{clickid\_txid\_ct}}
Note: Some parameters are required from the Traffic Source and can not be changed or deleted.
Learn how to add additional parameters [here](/docs/en/integrations/additional-parameters).
10. To prevent Facebook from deduplicating the conversion, you’ll need to map the Facebook **manual event ID** parameter to the ClickFlare token \{\{clickid\_txid\_ct}}
 11. Once done with all the configurations, click on **Save**.
You’ll see the new integration appear under the Conversion API section.
11. Once done with all the configurations, click on **Save**.
You’ll see the new integration appear under the Conversion API section.
