> ## Documentation Index
> Fetch the complete documentation index at: https://clickflare.com/docs/llms.txt
> Use this file to discover all available pages before exploring further.
# How to Create and Share ClickFlare Reports
> This is a step-by-step guide on how to create and share your reports with external members.
ClickFlare's Shared Reports feature gives you the ability to create and share reports with external members via a shareable link.
## **How to Create Shared Reports**
First, you need to decide what to include in your report.
* **Step 1:** Inside your ClickFlare account, go to **Campaigns**.
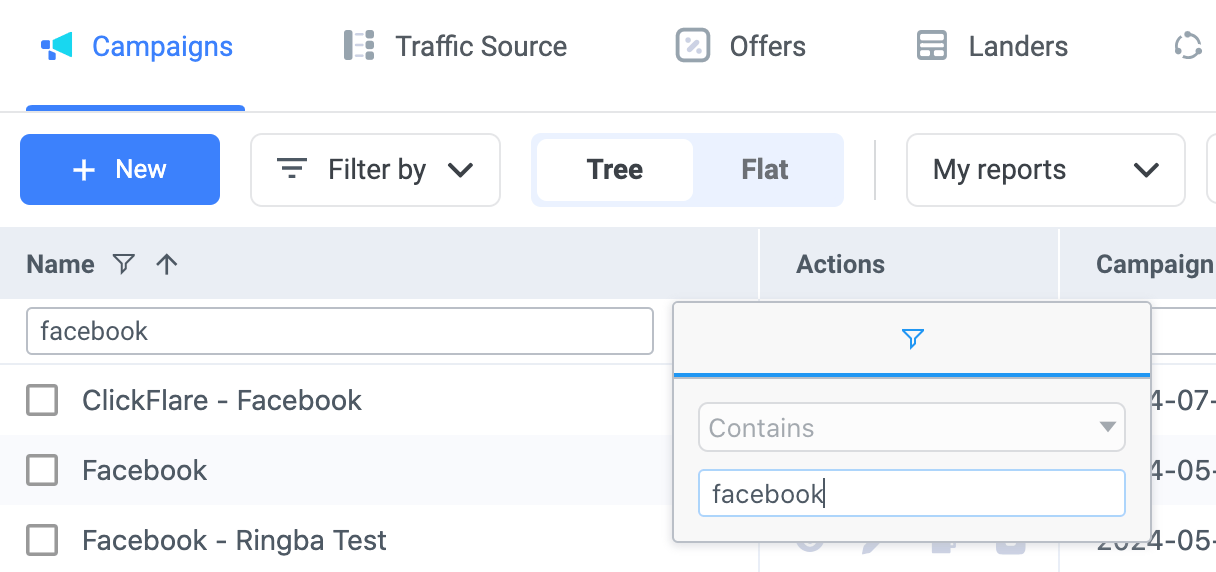
* **Step 2:** If you wish to only share specific campaigns, make sure to filter the rest out. For example, we will create a report featuring only campaigns that contain "Facebook" in their name".
 * **Step 3:** Optionally, you can specify the **timezone** and **time range** for the report (found on your top-right).
 * **Step 4:** Optionally, you can specify the element you need to generate a report on. You can choose between **different elements**, such as campaign, traffic source, offer, lander and more.
 * **Step 5:** Optionally, you can **group the data**. ClickFlare offers three different groupings which you can apply simultaneously.
 ## **How to Generate Shared Reports**
After you have determined what to include, you can generate the report.
* **Step 1:** In the same tab you created all your report filters and grouping, click on **Share**.
## **How to Generate Shared Reports**
After you have determined what to include, you can generate the report.
* **Step 1:** In the same tab you created all your report filters and grouping, click on **Share**.
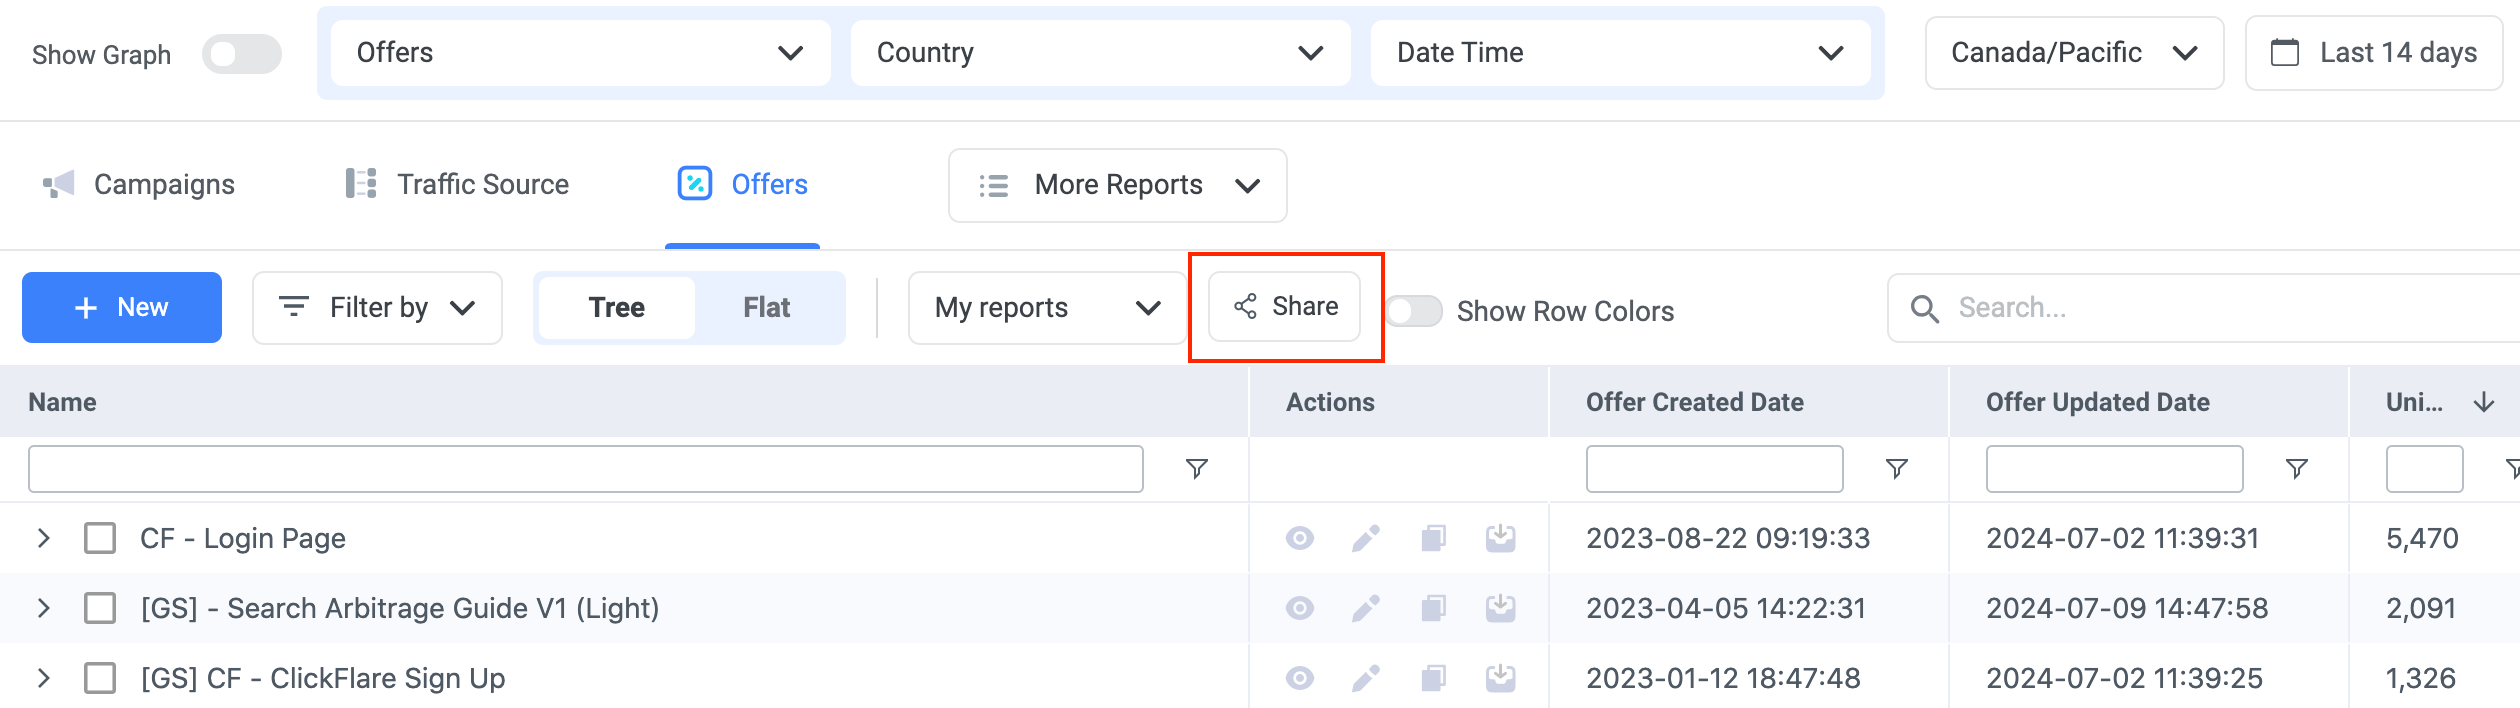 * **Step 2:** Give your report a **name**, and specify whether or not you want this name to be shown on the shared report.
* **Step 3:** Determine the **timezone** of the report.
* **Step 4:** Select the **time range**. You can select **fixed dates** (e.g., from *July 1st - July 7th*), or you can select a **dynamic range** such as *Last 14 Days*, which will automatically update each time to reflect the range. You can show the time range on the report.
* **Step 4:** Decide which columns of data to include in the report. You can choose between hundreds of different metrics, and you can easily add or remove metrics.
* **Step 5:** Click on **Create Link**.
* **Step 2:** Give your report a **name**, and specify whether or not you want this name to be shown on the shared report.
* **Step 3:** Determine the **timezone** of the report.
* **Step 4:** Select the **time range**. You can select **fixed dates** (e.g., from *July 1st - July 7th*), or you can select a **dynamic range** such as *Last 14 Days*, which will automatically update each time to reflect the range. You can show the time range on the report.
* **Step 4:** Decide which columns of data to include in the report. You can choose between hundreds of different metrics, and you can easily add or remove metrics.
* **Step 5:** Click on **Create Link**.
 ## **How to Share Your Link**
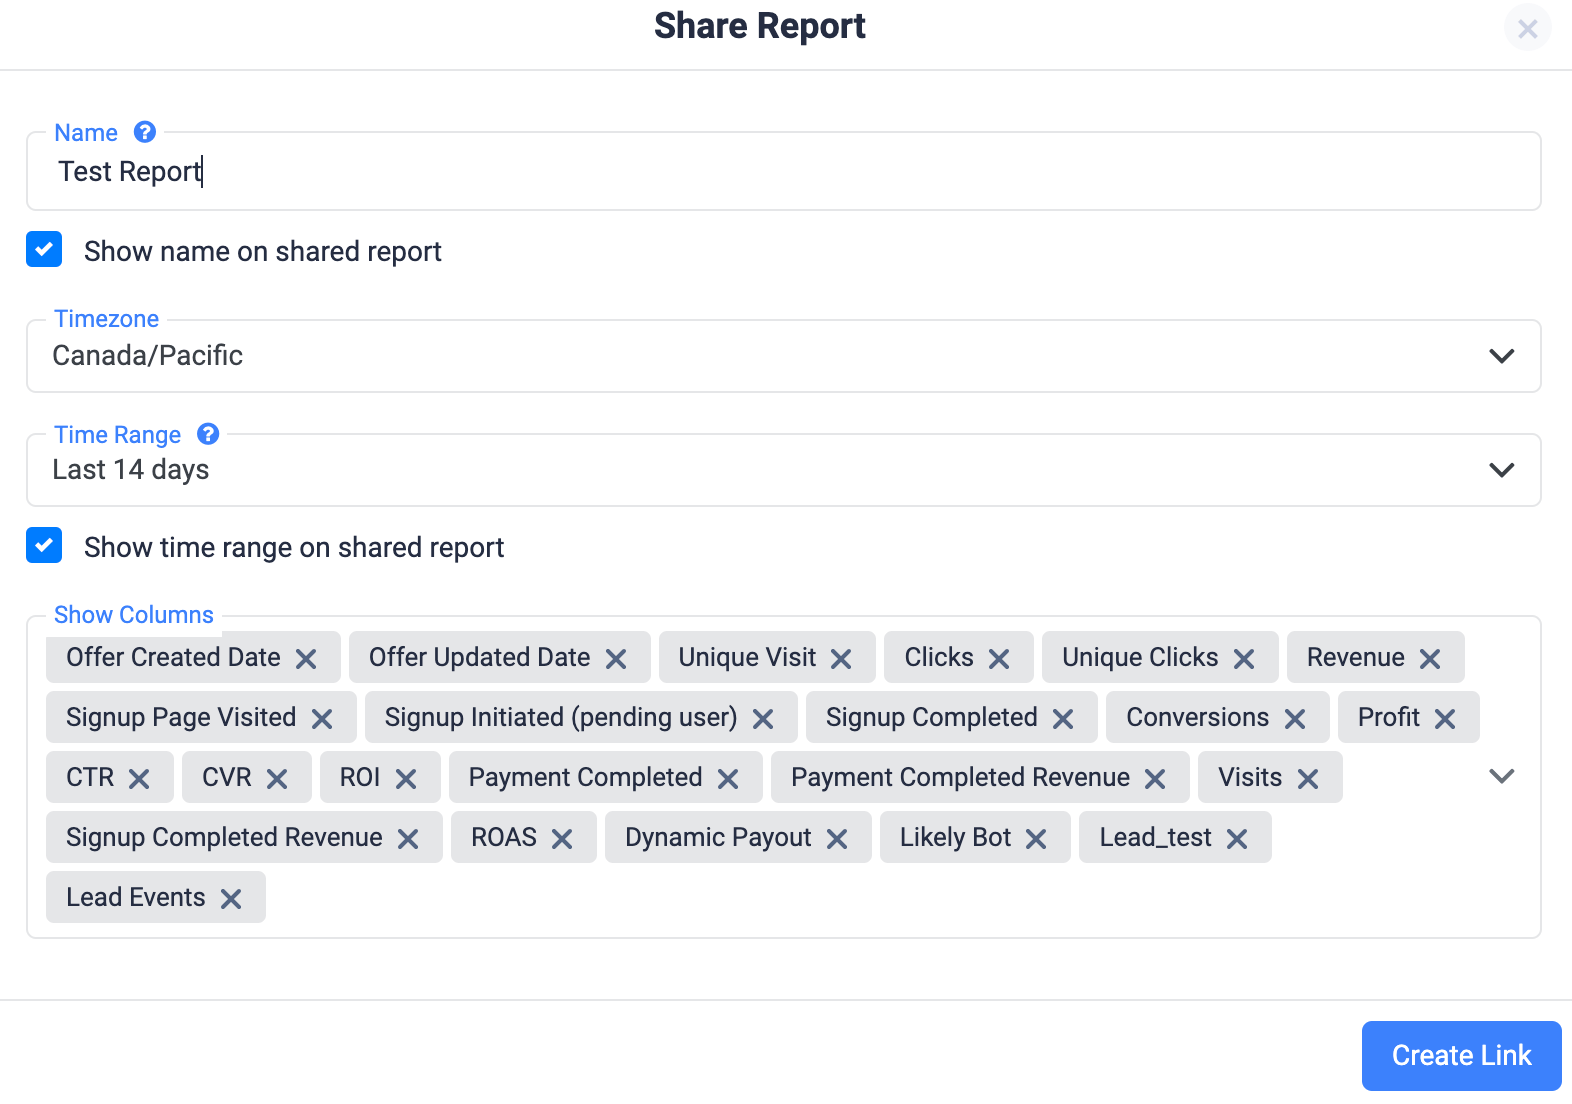
At this point, ClickFlare will provide you with a link you can copy and easily share with anyone, regardless of whether they have access to your account or not.
## **How to Share Your Link**
At this point, ClickFlare will provide you with a link you can copy and easily share with anyone, regardless of whether they have access to your account or not.
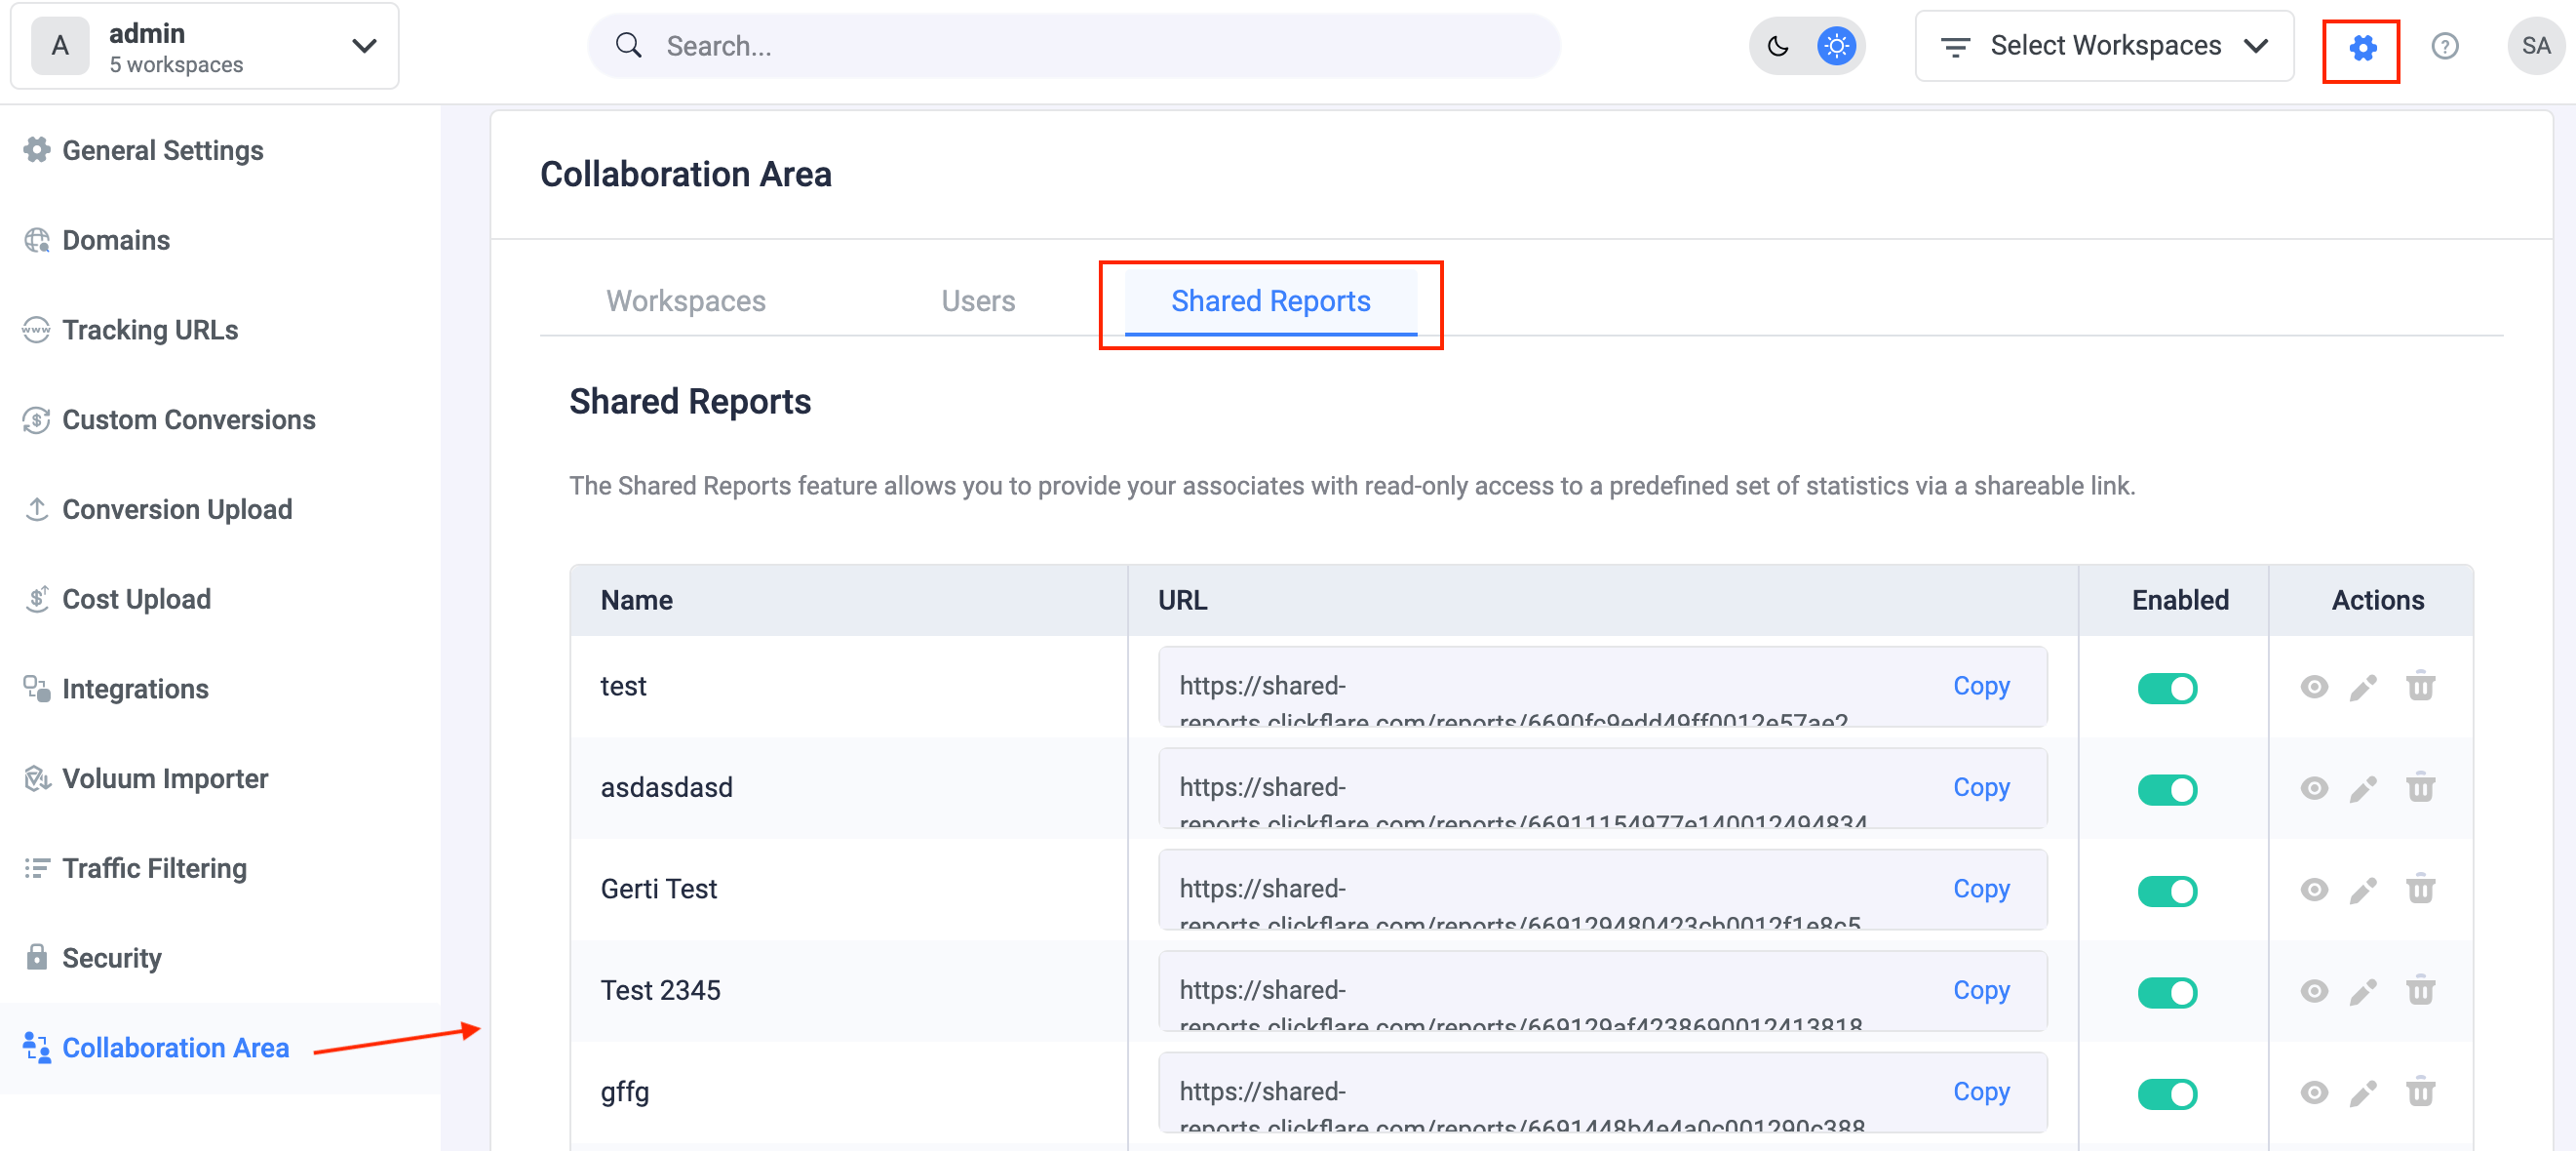
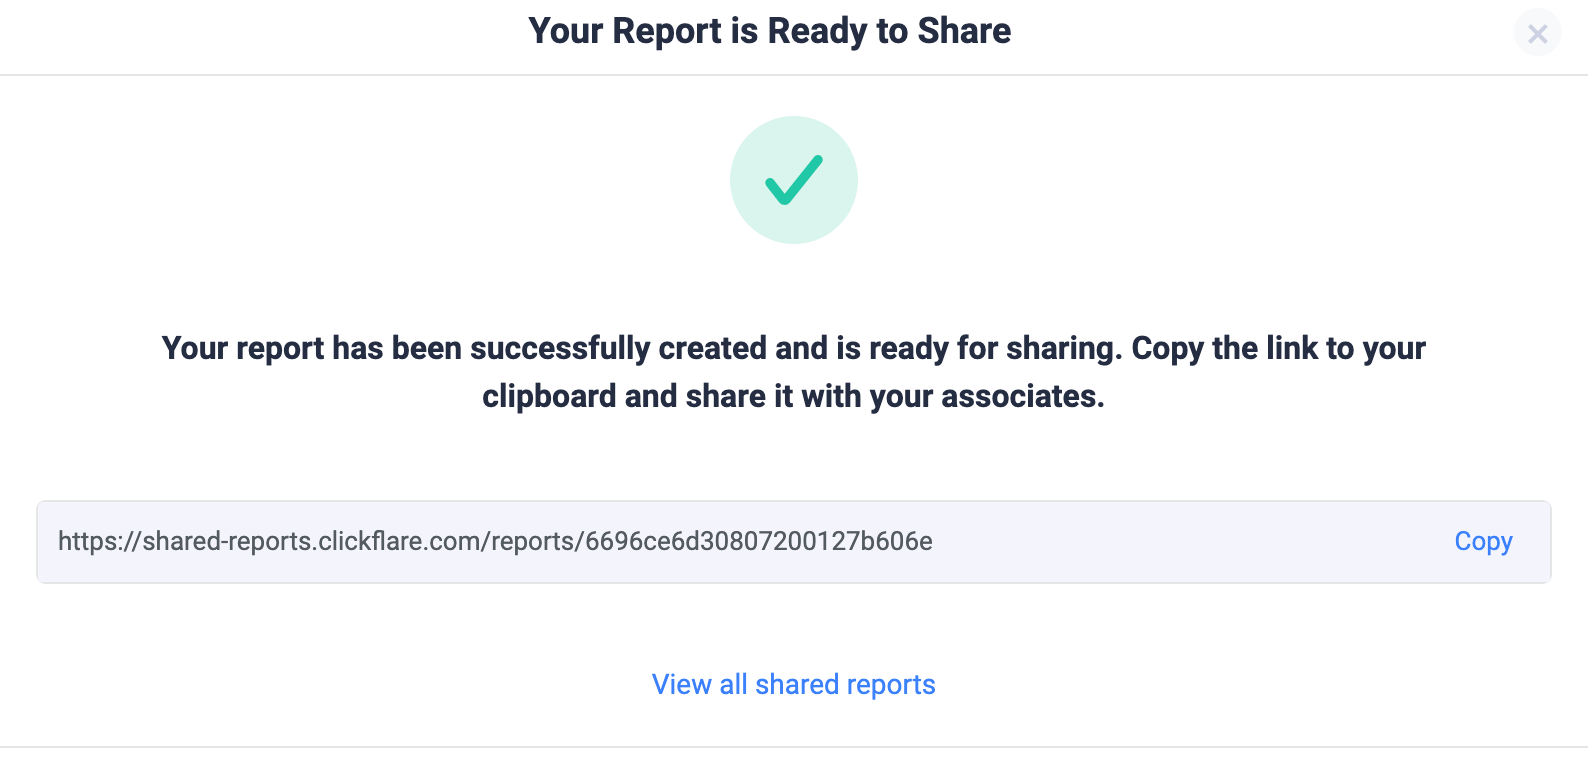 You can also access all your reports under your ClickFlare Collaboration Area. Here is how it works:
* **Step 1:** Go to **Settings** (top-right of your screen).
* **Step 2:** Head over to your **Collaboration Area**.
* **Step 3:** Click on **Shared Reports**.
* **Step 4:** Copy and share any of the links displayed here.
* **Step 5:** In this tab, you can also **Preview** your report, **Edit** it, or **Delete** it.
You can also access all your reports under your ClickFlare Collaboration Area. Here is how it works:
* **Step 1:** Go to **Settings** (top-right of your screen).
* **Step 2:** Head over to your **Collaboration Area**.
* **Step 3:** Click on **Shared Reports**.
* **Step 4:** Copy and share any of the links displayed here.
* **Step 5:** In this tab, you can also **Preview** your report, **Edit** it, or **Delete** it.
 Congratulations, you have just created and shared your report.
## **Related Articles**
Have you received a ClickFlare shared report? Find out more about [How to View Shared Reports](/docs/en/multi-user-access-workspaces/how-to-view-shared-reports-from-click-flare).
Congratulations, you have just created and shared your report.
## **Related Articles**
Have you received a ClickFlare shared report? Find out more about [How to View Shared Reports](/docs/en/multi-user-access-workspaces/how-to-view-shared-reports-from-click-flare).