> ## Documentation Index
> Fetch the complete documentation index at: https://clickflare.com/docs/llms.txt
> Use this file to discover all available pages before exploring further.
# Cloudflare
> Setting up a Custom Domain with Cloudflare
In order to use a custom tracking domain with Cloudflare, you'll firstly need to have one purchased and then start the configuration procedure as detailed below.
Before starting, it is important that you add the custom domain in ClickFlare, so that you have all the necessary DNS information to start the configuration on Cloudflare. For more details, see [how to add a custom domain](/docs/en/settings/custom-domains).
Let's begin by:
1. Logging into your Cloudflare account and choosing the **account** you want to use (if you have more than one).
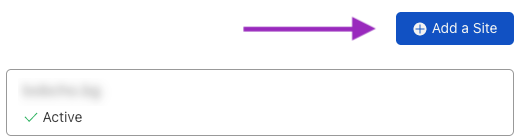
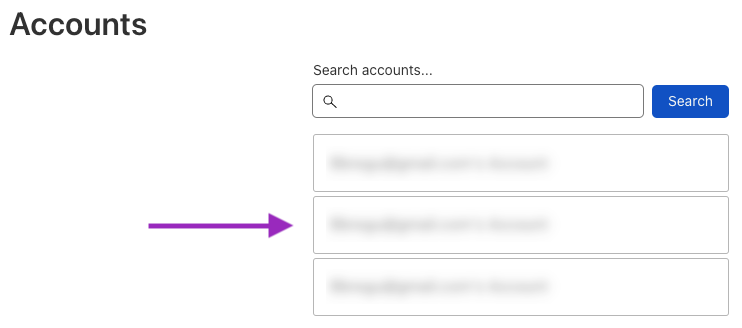 2. Inside your account, you’ll see a list of all your domains. Click on the **Add a Site** button and insert your domain (site).
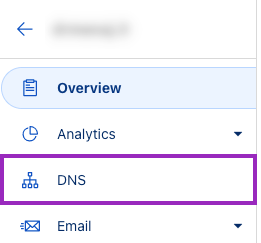
 3. Click on **DNS** on the left sidebar.
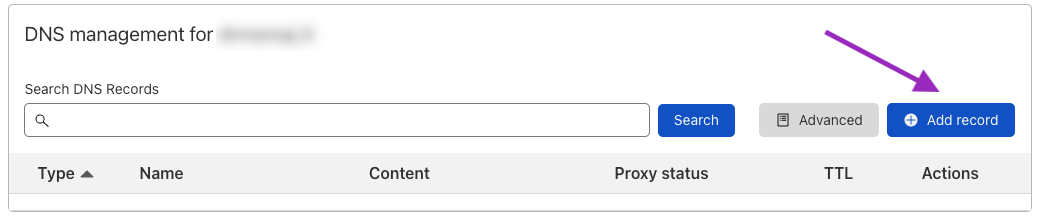
 4. On the DNS page, you’ll see the list of all DNS records of this domain (if any). Click on the **Add Record** button.
 5. **CNAME Setup**: Select **CNAME** from the type dropdown menu, and then proceed by entering the **Name** and **Target** (called value in ClickFlare). Finally, click on **Save**.
 6. **Domain Verification**: In type, from the dropdown menu select **TXT** and then proceed by entering the **Name** and **Content** (called value in ClickFlare). Select 1 min for **TTL** and click on **Save**.
> **Note:** The Domain Verification step below (a TXT record) applies to domains added before the **29th of July, 2026**. If you're adding a new custom domain now, this step isn't needed, verification is handled through the CNAME record alone.
6. **Domain Verification**: In type, from the dropdown menu select **TXT** and then proceed by entering the **Name** and **Content** (called value in ClickFlare). Select 1 min for **TTL** and click on **Save**.
> **Note:** The Domain Verification step below (a TXT record) applies to domains added before the **29th of July, 2026**. If you're adding a new custom domain now, this step isn't needed, verification is handled through the CNAME record alone.
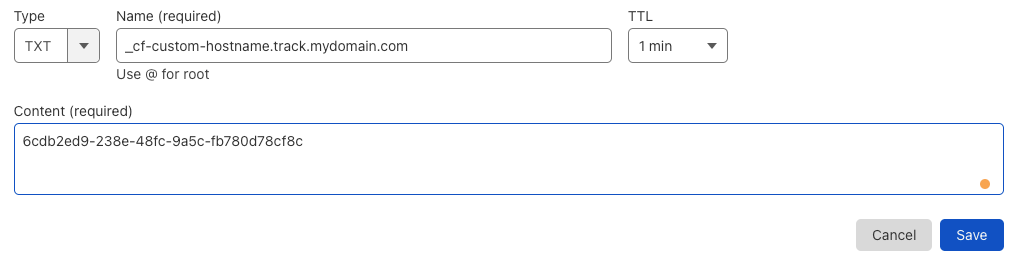 7. **SSL Verification**: Like before, select **TXT** from the type dropdown menu and then proceed by entering the **Name** and **Content** (called value in ClickFlare). Select 1 min for **TTL** and click on **Add Record**.
> **Note:** The SSL Verification step below (a second TXT record) also applies to domains added before the **29th of July, 2026**. For new domains, SSL is issued automatically once the CNAME record is in place, no separate step required.
The final configuration should look like this:
**Note: If you're adding this domain after the 29th of July 2026, you do not need the two TXT records. Only the CNAME is necessary.**
7. **SSL Verification**: Like before, select **TXT** from the type dropdown menu and then proceed by entering the **Name** and **Content** (called value in ClickFlare). Select 1 min for **TTL** and click on **Add Record**.
> **Note:** The SSL Verification step below (a second TXT record) also applies to domains added before the **29th of July, 2026**. For new domains, SSL is issued automatically once the CNAME record is in place, no separate step required.
The final configuration should look like this:
**Note: If you're adding this domain after the 29th of July 2026, you do not need the two TXT records. Only the CNAME is necessary.**
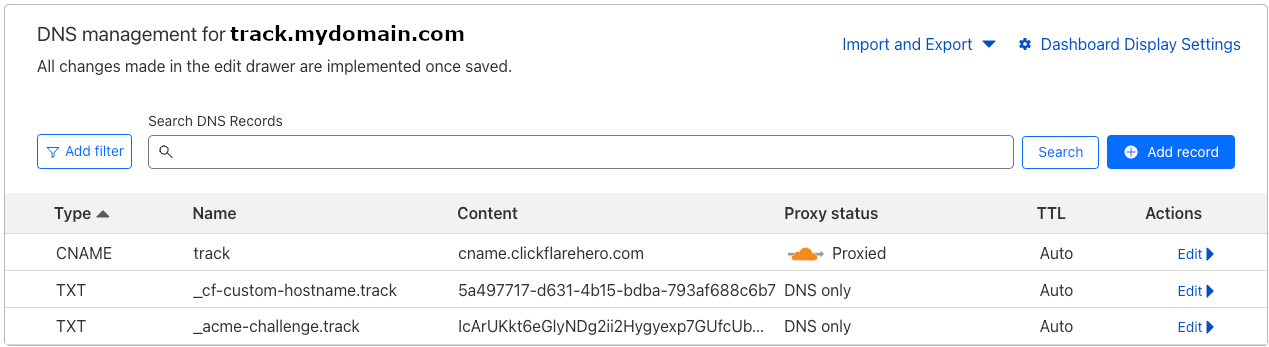 Note: In all the fields for both the TXT and CNAME records, enter the exact names and values, you were prompted when adding your custom tracking domain in ClickFlare. For more details on this, see the “[How to Add a Custom Domain in ClickFlare](/docs/en/settings/custom-domains)” section.
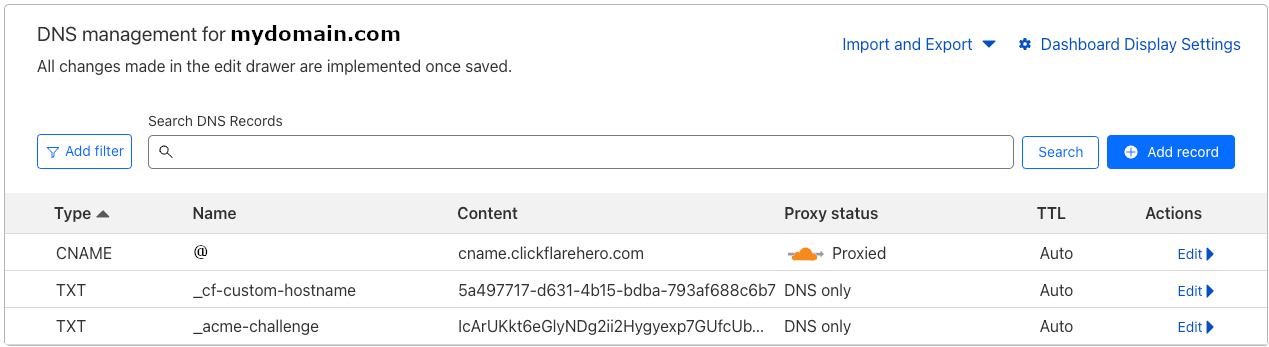
Note: If you want to use the root domain (in our example mydomain.com) instead of a subdomain, then in the name field, for the CNAME record, just enter **@**. The “@” symbol is used to point to the root domain.
Note: In all the fields for both the TXT and CNAME records, enter the exact names and values, you were prompted when adding your custom tracking domain in ClickFlare. For more details on this, see the “[How to Add a Custom Domain in ClickFlare](/docs/en/settings/custom-domains)” section.
Note: If you want to use the root domain (in our example mydomain.com) instead of a subdomain, then in the name field, for the CNAME record, just enter **@**. The “@” symbol is used to point to the root domain.
 **Done!**
When you go back to **ClickFlare** and see a **green** active tag next to your domain name, it means that your domain is ready to be used.
**Done!**
When you go back to **ClickFlare** and see a **green** active tag next to your domain name, it means that your domain is ready to be used.
