> ## Documentation Index
> Fetch the complete documentation index at: https://clickflare.com/docs/llms.txt
> Use this file to discover all available pages before exploring further.
# About triggers
> Mastering Tag Triggers: A Comprehensive Guide to ClickFlare Tag Manager's Trigger Setup
Tags fire in response to events. In ClickFlare Tag Manager, a *trigger* listens to your web page or mobile app for certain types of events like form submissions, button clicks, or page views. The trigger tells the tag to fire when the specified event is detected. Every tag must have at least one trigger in order to fire.
Triggers are evaluated when code on the page or app is executed, and associated tags are fired or blocked when the trigger conditions are met.
## Create a new trigger
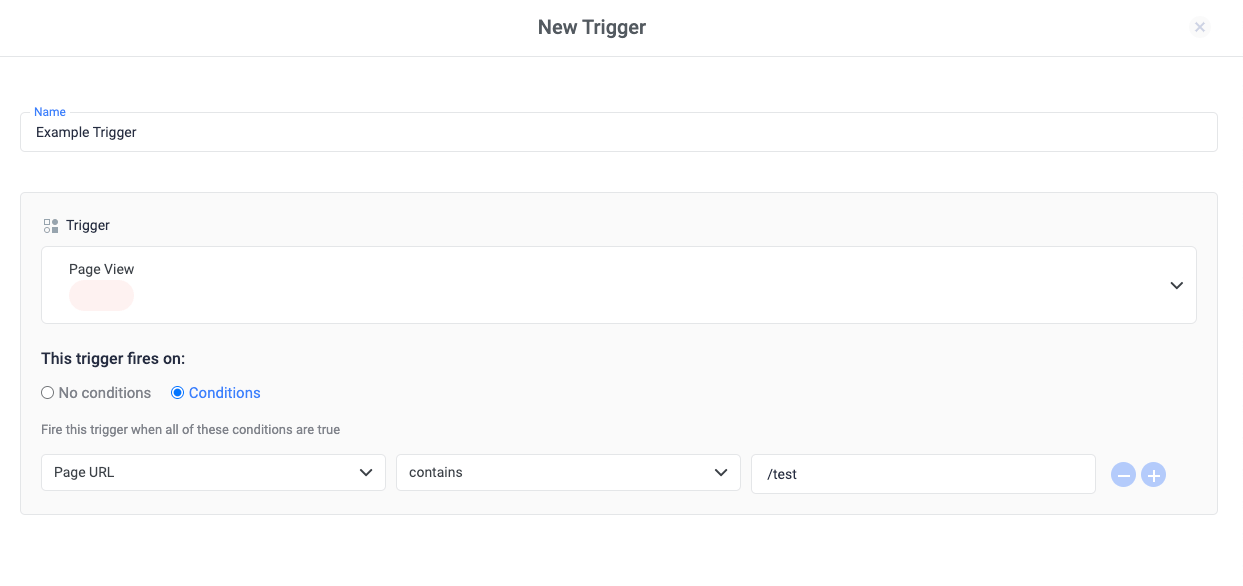
To create a new trigger, follow these steps:
1. Navigate to **Tag Manager** in the left-side menu.
2. Choose the container by clicking its name.
3. Inside the container, navigate to the "Triggers" tab.
4. Click on **+ New Trigger**.
5. Pick the [trigger type](/docs/en/tag-manager-1/trigger-types) you want to create.
6. If necessary, choose a condition for when the trigger should activate.
7. Click **Save**.
 ## Create a trigger from a tag definition
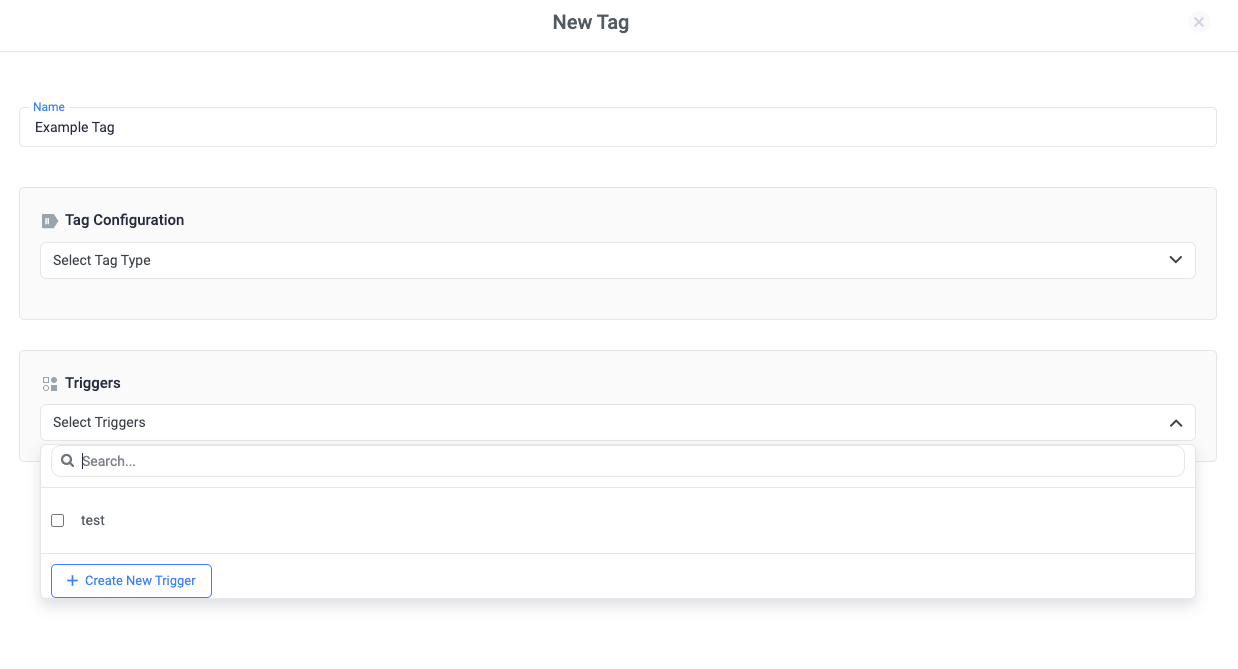
You can create a new trigger during tag configuration. From any *tag configuration* page:
1. In the *Triggers*' section, click on the select Triggers dropdown.
2. Click + **Create New Trigger**.
3. Select the trigger type you would like to create.
4. Complete the setup for the selected [trigger type](/docs/en/tag-manager-1/trigger-types).
5. Click **Save**.
## Create a trigger from a tag definition
You can create a new trigger during tag configuration. From any *tag configuration* page:
1. In the *Triggers*' section, click on the select Triggers dropdown.
2. Click + **Create New Trigger**.
3. Select the trigger type you would like to create.
4. Complete the setup for the selected [trigger type](/docs/en/tag-manager-1/trigger-types).
5. Click **Save**.
 ## Edit a trigger
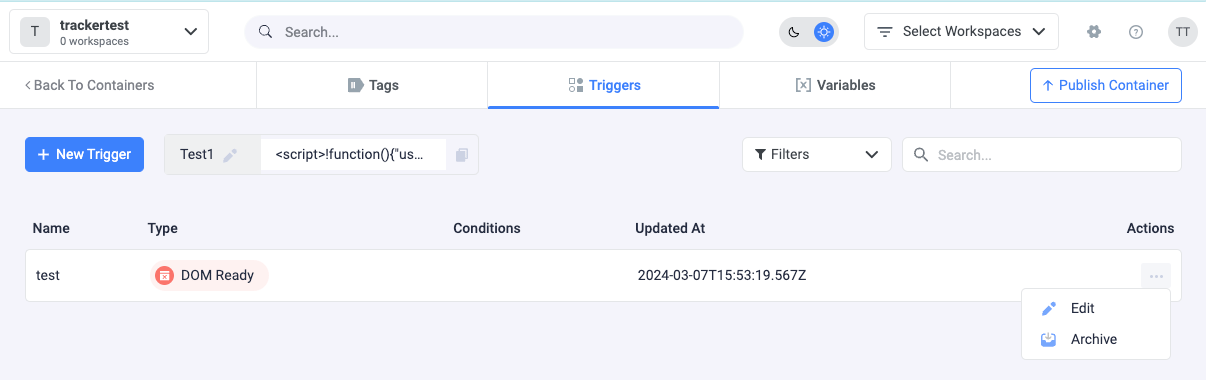
To edit an existing trigger:
1. Click **Triggers**.
2. Click the 3 dots, next to the trigger name.
3. Click **Edit**.
4. Make the necessary changes and click on **Save.**
## Edit a trigger
To edit an existing trigger:
1. Click **Triggers**.
2. Click the 3 dots, next to the trigger name.
3. Click **Edit**.
4. Make the necessary changes and click on **Save.**
 Note: Depending on the trigger, it might be made up of a [***Variable***](/docs/en/tag-manager-1/about-variables), an ***Operator***, and a ***Value***:
### Related Resources:
* [Trigger types](/docs/en/tag-manager-1/trigger-types)
* [Components of ClickFlare Tag Manager](/docs/en/tag-manager-1/components-of-google-tag-manager)
* [Getting started with ClickFlare Tag Manager](/docs/en/tag-manager-1/getting-started)
Note: Depending on the trigger, it might be made up of a [***Variable***](/docs/en/tag-manager-1/about-variables), an ***Operator***, and a ***Value***:
### Related Resources:
* [Trigger types](/docs/en/tag-manager-1/trigger-types)
* [Components of ClickFlare Tag Manager](/docs/en/tag-manager-1/components-of-google-tag-manager)
* [Getting started with ClickFlare Tag Manager](/docs/en/tag-manager-1/getting-started)