> ## Documentation Index
> Fetch the complete documentation index at: https://clickflare.com/docs/llms.txt
> Use this file to discover all available pages before exploring further.
# How to Create a Flow in ClickFlare
> A step-by-step guide to creating a new flow
A **Flow** is a collection of one or more **paths**, where each path contains its own combination of **landing pages and offers**. Flows allow you to control how visitors are routed and make it easy to reuse the same setup across multiple campaigns.
One of the main advantages of using Flows is that you can define a specific **redirect mode** for each path and create **conditional routing** based on visitor attributes
**Tip:** Once a Flow is created, it can be reused across multiple campaigns, saving time and ensuring consistency.
## Creating a New Flow
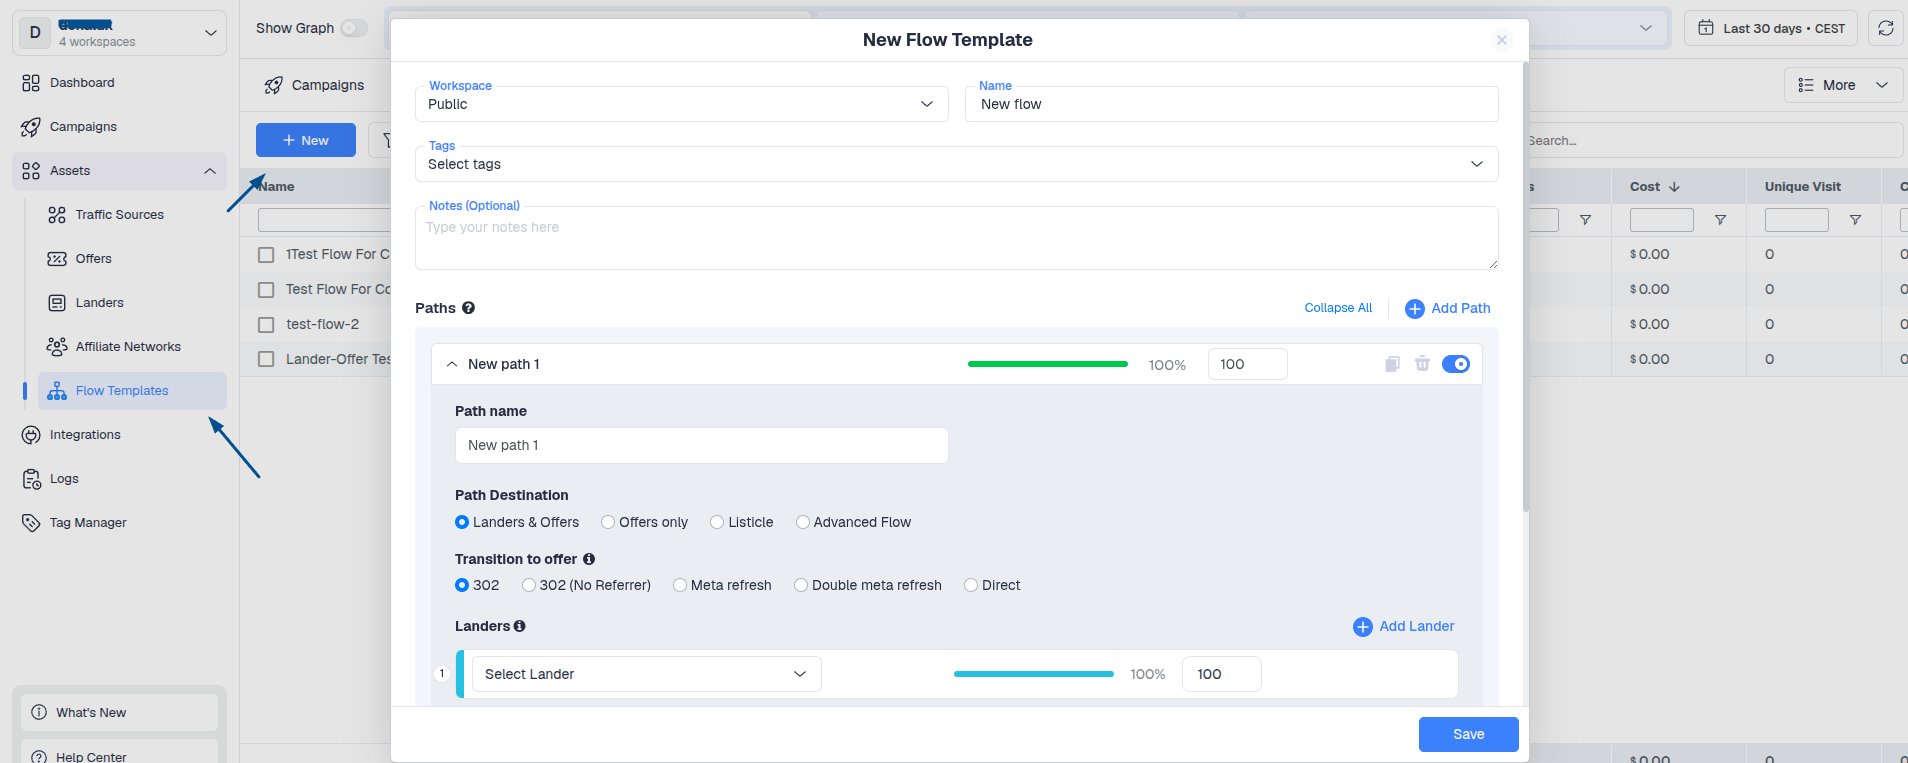
1. In your ClickFlare account, navigate to **Flows** from the left sideBar menu.
2. Click **+ New Flow**.
3. Enter a **Flow Name** that clearly identifies its purpose.
4. Select the desired **Default Transition** for the paths in your Flow.
5. Add either a:
* **Default Path** – used for all traffic unless a condition is met.
* **Conditional Path** – used to redirect visitors who match specific rules.
 ## Adding a Default Path
A **Default Path** is required for every Flow. Any visitor who does not meet the criteria of a conditional path will be directed here.
1. Click **Add Default Path**.
2. Select the destination type (for example, **Lander & Offer** or **Offer Only**).
3. Choose the landing page and/or offer you want to use.
4. Save your changes.
## Adding a Conditional Path
A **Conditional Path** allows you to redirect visitors based on rules such as:
* Country
* Device type
* Operating system
* Browser
* ISP
* Custom tracking fields
* And many other available conditions
To create one:
1. Click **Add Conditional Path**.
2. Select **Add Condition**.
3. Configure the conditions you want to use.
4. Click **Apply**.
5. Add the destination path by selecting the appropriate lander and/or offer.
6. Save your changes.
Visitors matching the configured conditions will follow the conditional path, while all other traffic will continue through the default path.
## Save Your Flow
Once you've finished configuring your paths, click **Save**.
Your new Flow will now appear in the **Flows** list, where you can:
* Edit
* Clone
* Archive
Your Flows at any time.
## Exporting Flows
If needed, you can export your list of Flows by downloading it in either **CSV** or **Excel** format.
## Adding a Default Path
A **Default Path** is required for every Flow. Any visitor who does not meet the criteria of a conditional path will be directed here.
1. Click **Add Default Path**.
2. Select the destination type (for example, **Lander & Offer** or **Offer Only**).
3. Choose the landing page and/or offer you want to use.
4. Save your changes.
## Adding a Conditional Path
A **Conditional Path** allows you to redirect visitors based on rules such as:
* Country
* Device type
* Operating system
* Browser
* ISP
* Custom tracking fields
* And many other available conditions
To create one:
1. Click **Add Conditional Path**.
2. Select **Add Condition**.
3. Configure the conditions you want to use.
4. Click **Apply**.
5. Add the destination path by selecting the appropriate lander and/or offer.
6. Save your changes.
Visitors matching the configured conditions will follow the conditional path, while all other traffic will continue through the default path.
## Save Your Flow
Once you've finished configuring your paths, click **Save**.
Your new Flow will now appear in the **Flows** list, where you can:
* Edit
* Clone
* Archive
Your Flows at any time.
## Exporting Flows
If needed, you can export your list of Flows by downloading it in either **CSV** or **Excel** format.