

Why should I use the Conversion API for Whop?
Whop reports ad results as they are attributed by the Whop pixel, not by the ad network. Browser-side tracking alone loses conversions to ad blockers, cookie restrictions and conversions that happen away from the page, such as a sale confirmed by an affiliate network hours after the click. Sending events from ClickFlare’s server to Whop closes that gap:- Conversions that ClickFlare records through postbacks reach Whop even though no browser was involved.
- Whop’s delivery and optimization learn from the conversions you actually care about, not only the ones a pixel happened to catch.
- You decide which ClickFlare events count as which Whop events, so reporting in Whop matches your funnel.
What you’ll need for the integration
ClickFlare account
An active account
Whop Ads business
A business running ads
Whop API key
Created in Whop
One key per business. Whop generates API keys per business, and the same key powers both the Whop Conversion API and the Whop cost integration. If you run several Whop businesses, create a key in each and register each business in ClickFlare separately.
Where to find your Whop API key
1
Open the right business
Log in to Whop and select the business you run ads from in the business switcher at the top left. The key you create belongs to the business that is open, so check this first.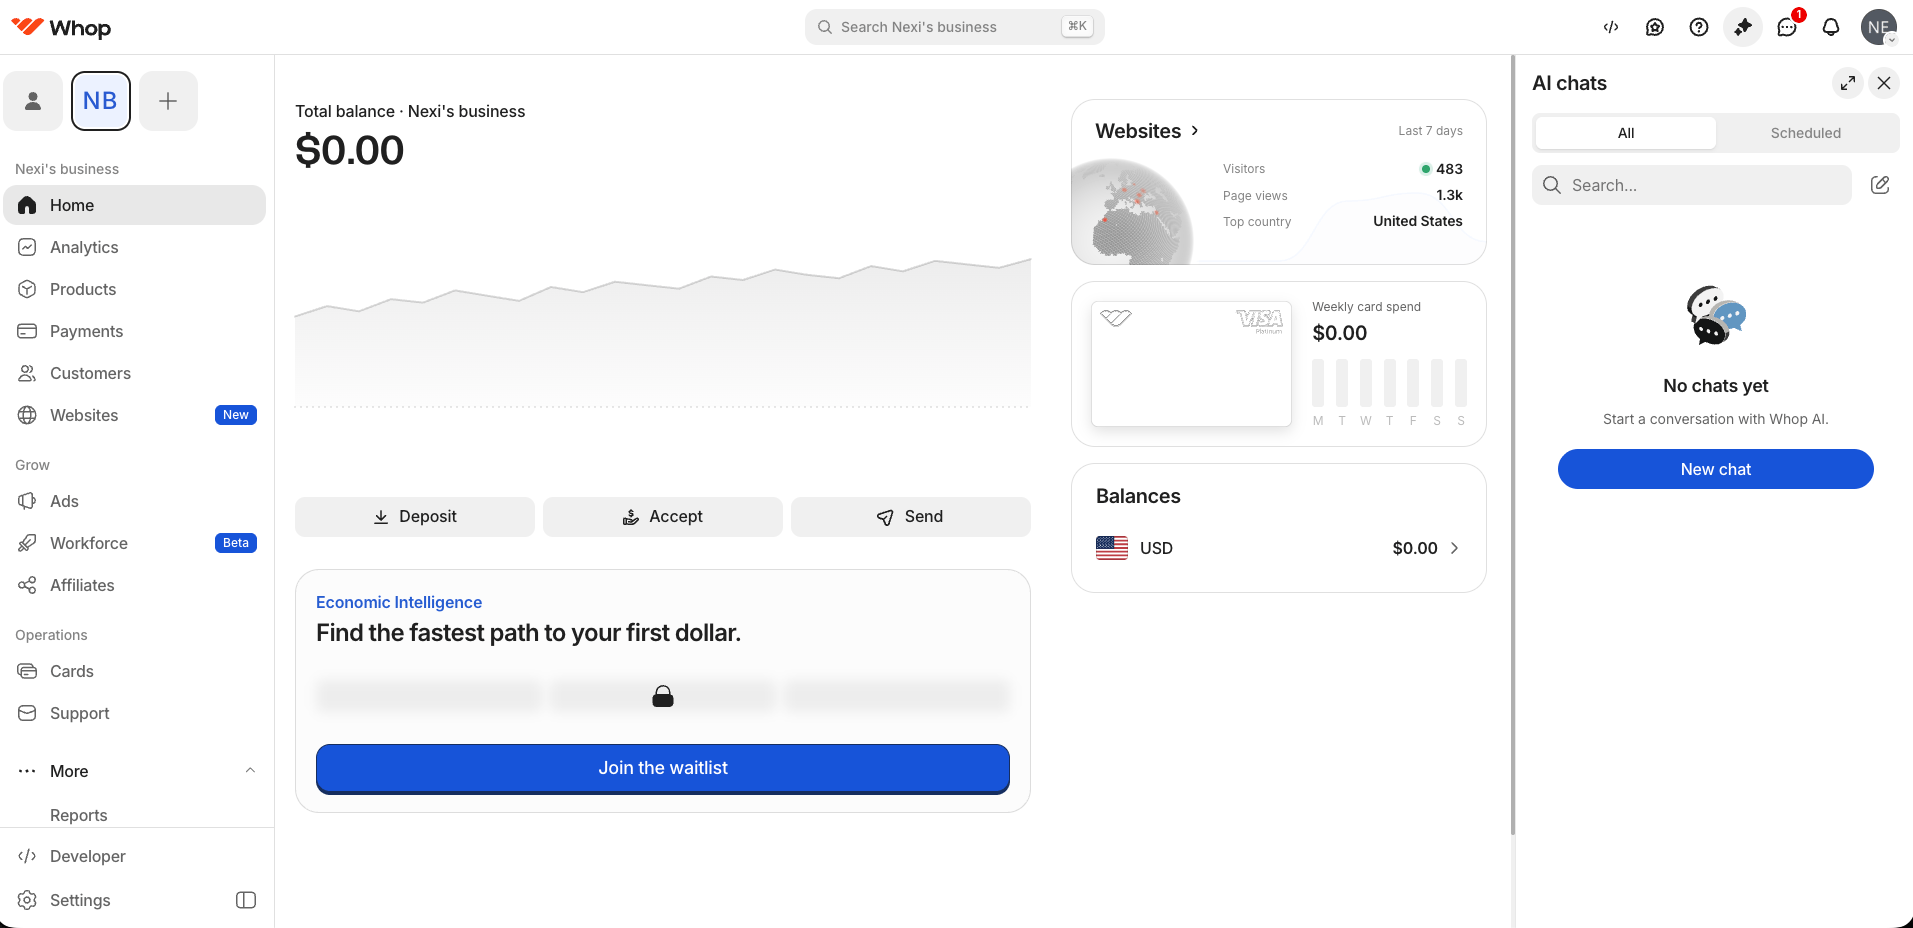
2
Go to Developer
Click Developer at the bottom of the left sidebar. The Company API keys section lists the keys that already exist for this business.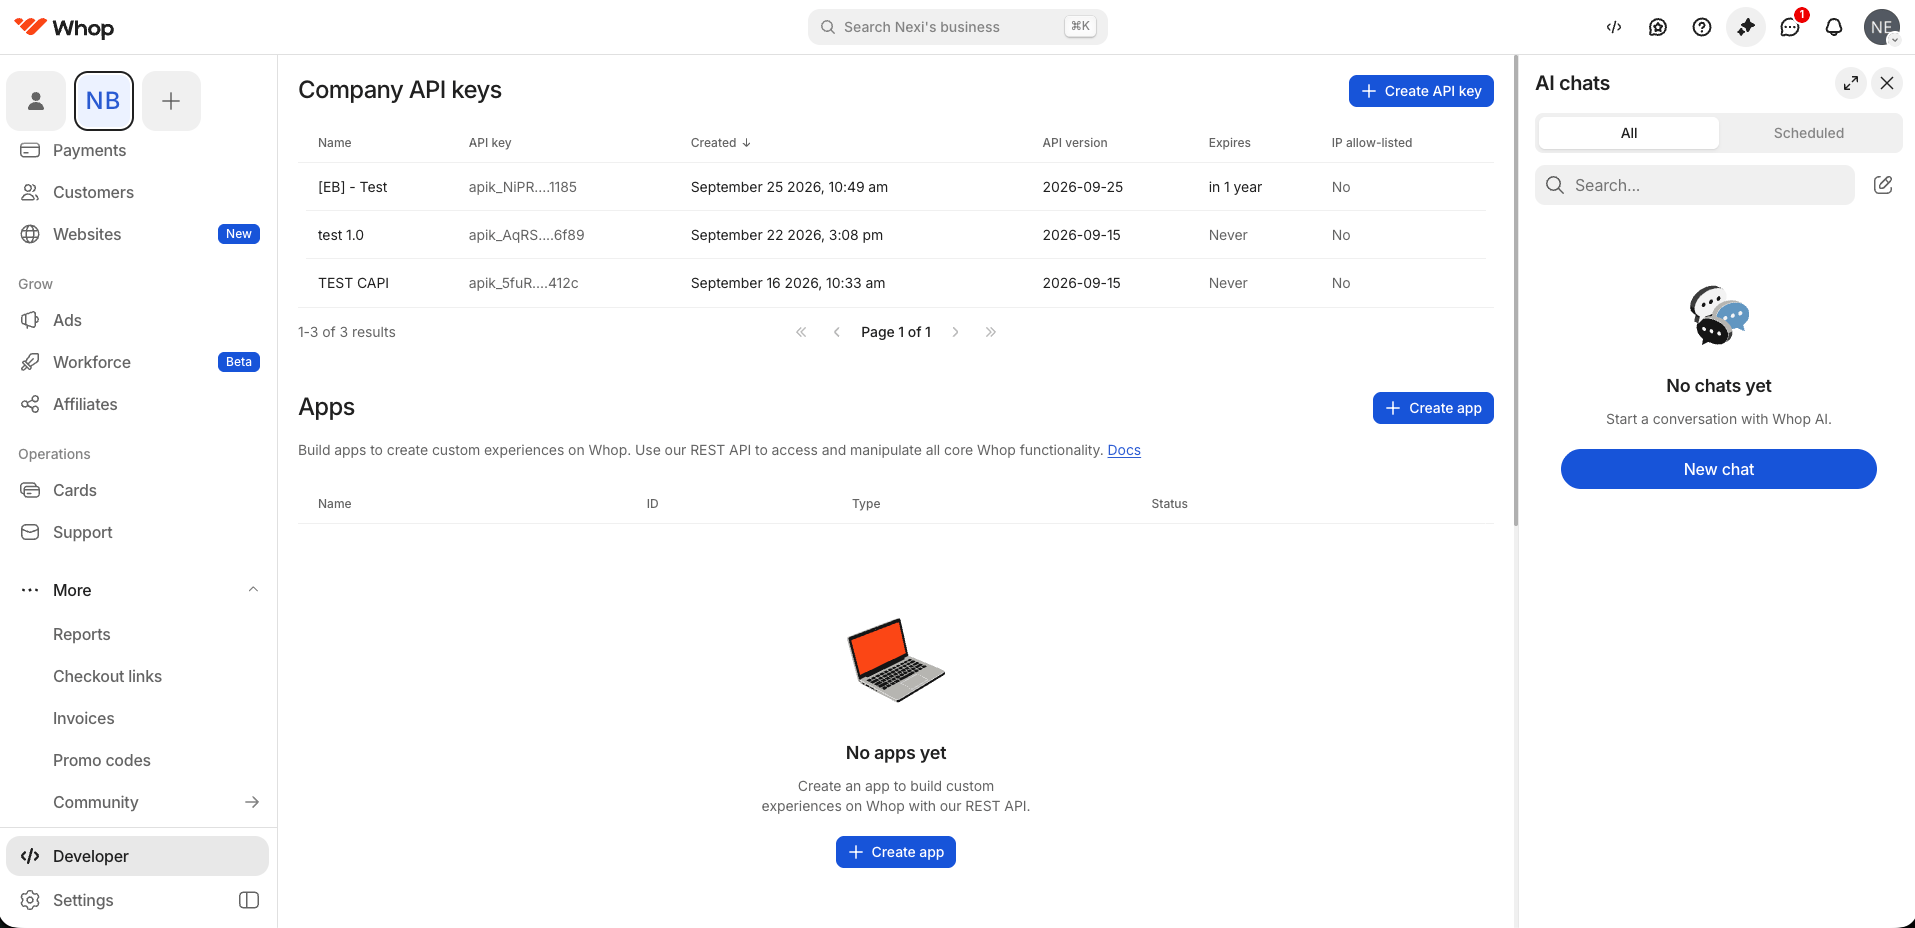
3
Create the key
Click Create API key and fill in the form: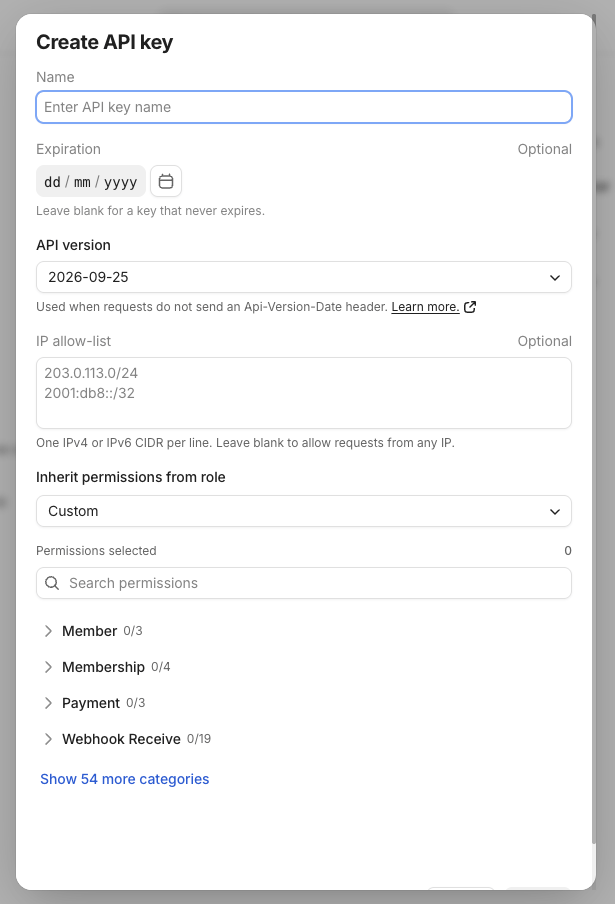
4
Choose the permissions
Open Inherit permissions from role and choose Custom.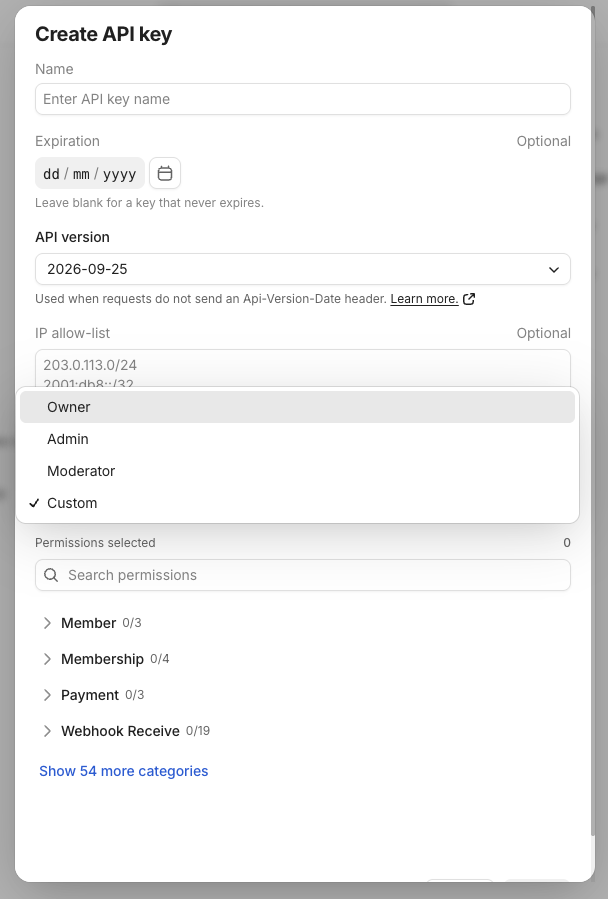
Select all three even if you only set up one integration today. The same key then works for both.
5
Copy the key
Save the key and copy it straight away. Once you leave the page, the list shows only a masked version such as
apik_NiPR…1185.Integrating Whop Conversion API in ClickFlare
1
Open the Conversion API integrations
In ClickFlare, go to Integrations in the left-side menu and open the Conversion API tab. Click Add integration.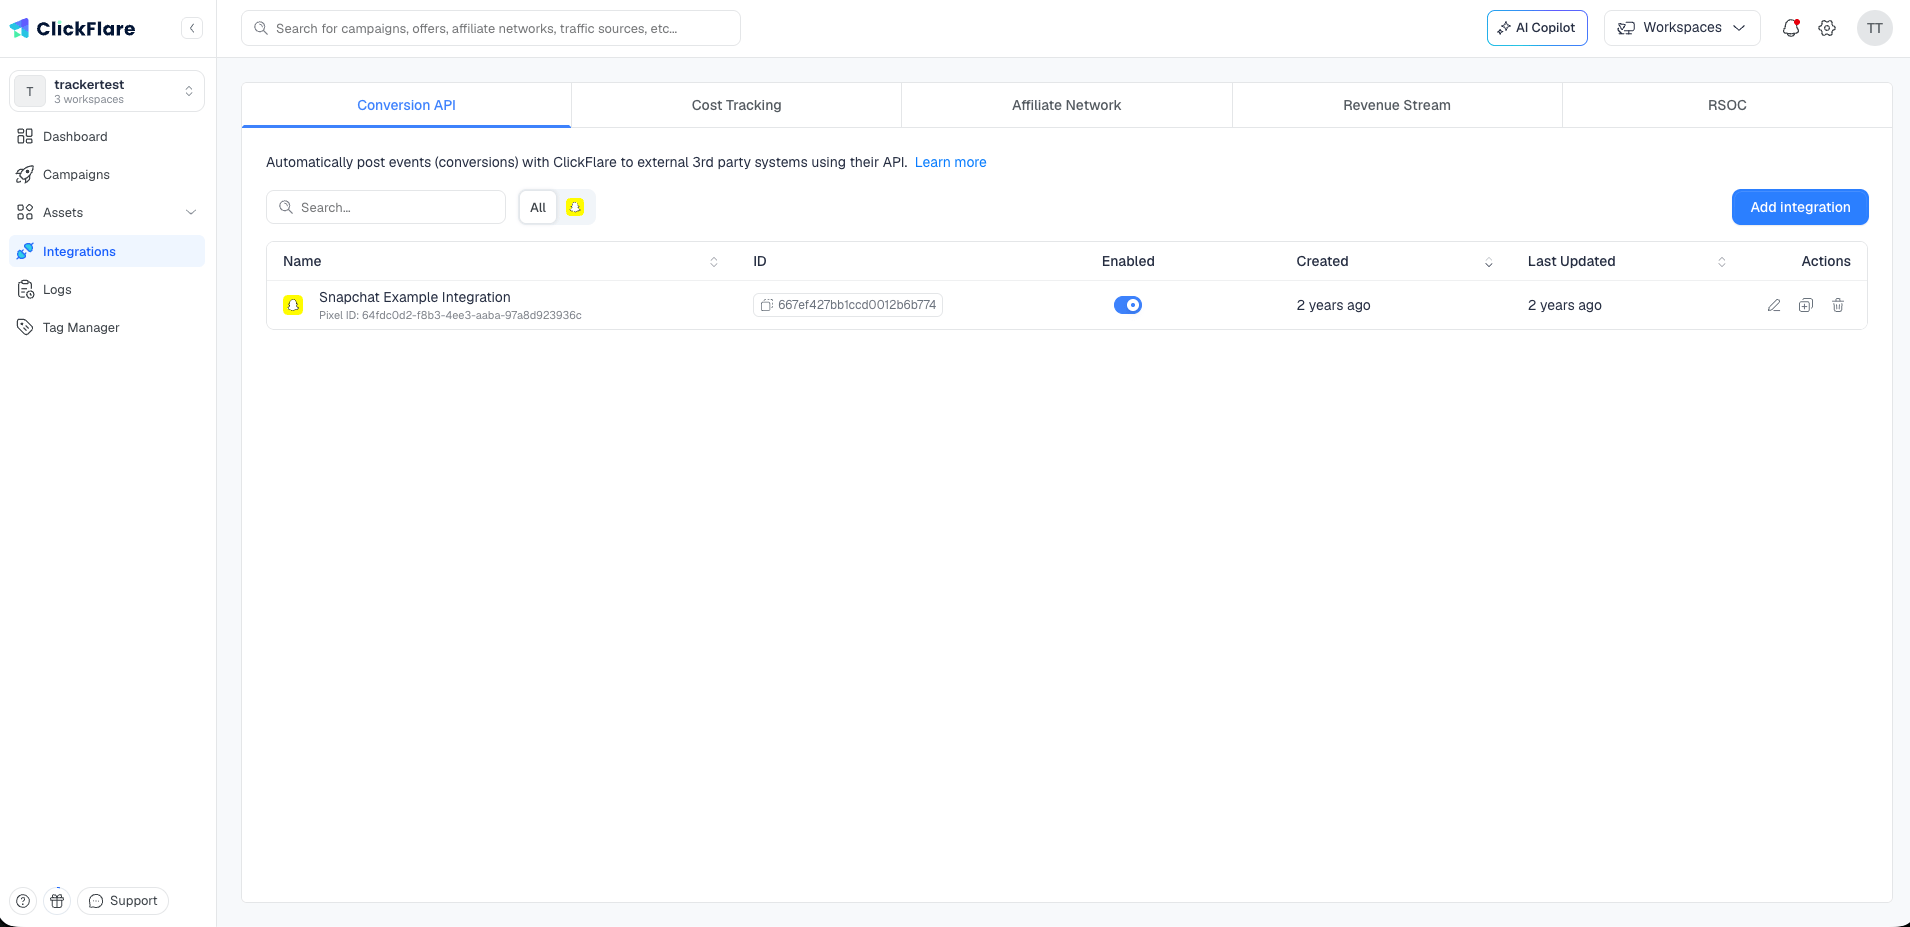
2
Select Whop
Select Whop from the list of available integrations.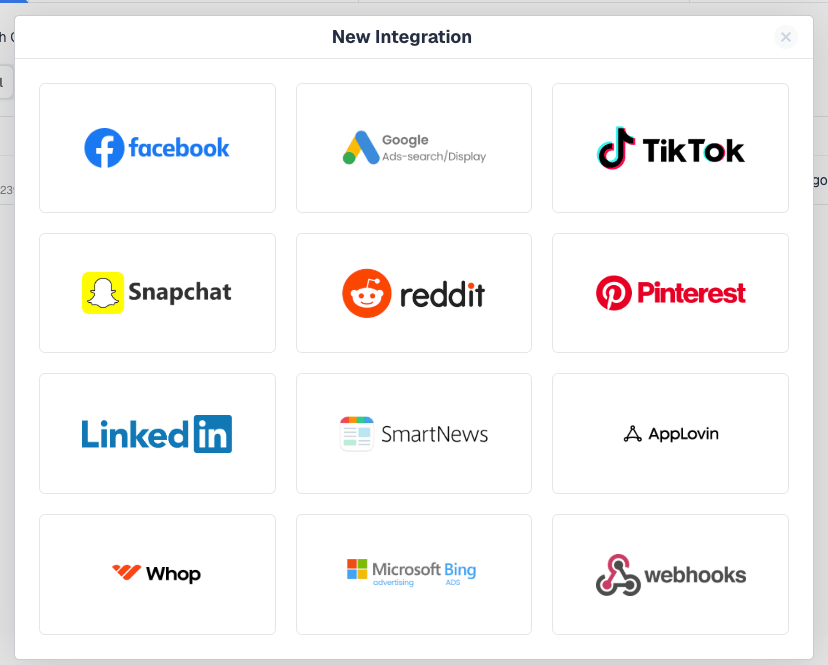
3
Name the integration and pick a workspace
Give the integration a Name and choose the Workspace it belongs to. Public makes it available across your account; pick a specific workspace to keep it to one team. See Managing cost and CAPI integrations in workspaces.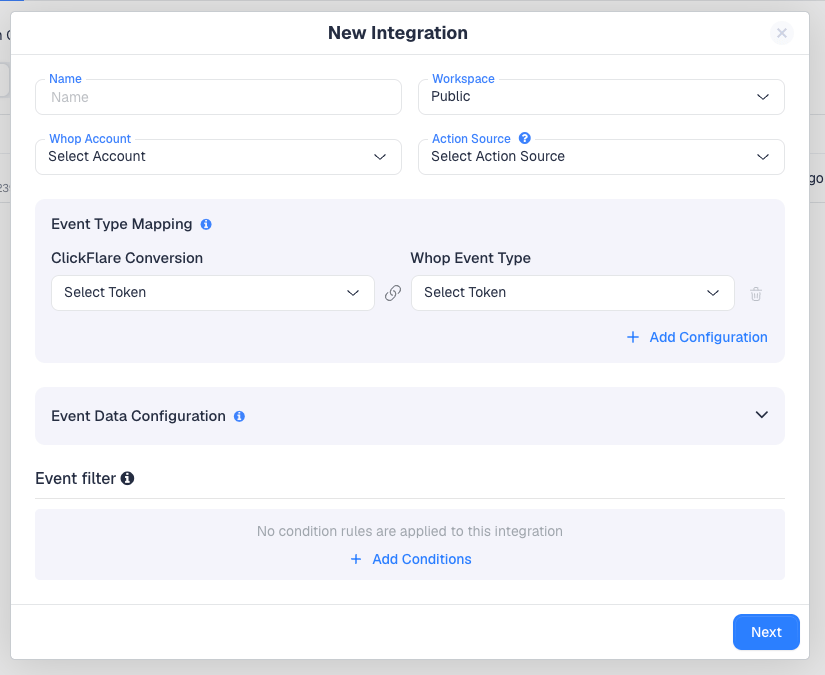
4
Register your Whop business
Open the Whop Account dropdown. The first time, it is empty. Click New Pixel.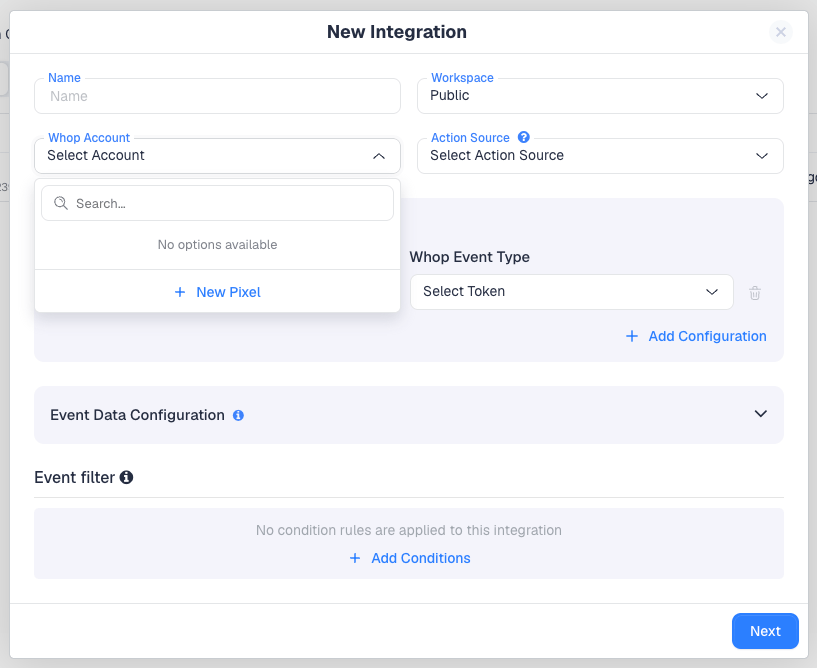
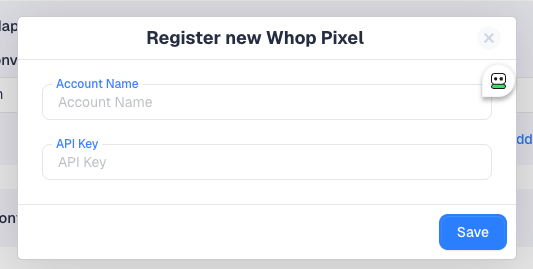
- Account Name — a label for this Whop business in ClickFlare, for example the business name.
- API Key — the company API key you created in Whop.
5
Set the Action Source
Whop asks where each conversion happened. Pick the Action Source that describes your funnel: Website for a landing page or site, App for an app, Phone Call for pay-per-call, and so on. Most ClickFlare campaigns use Website.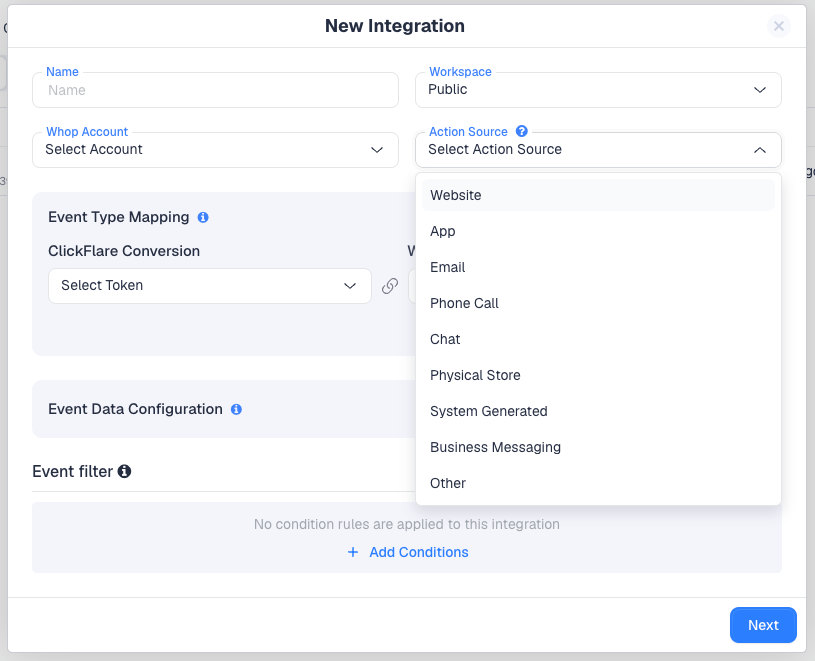
6
Map ClickFlare events to Whop events
Under Event Type Mapping, choose a ClickFlare Conversion on the left and the Whop Event Type it should become on the right. Click Add Configuration to map more events. Only the events you map are sent.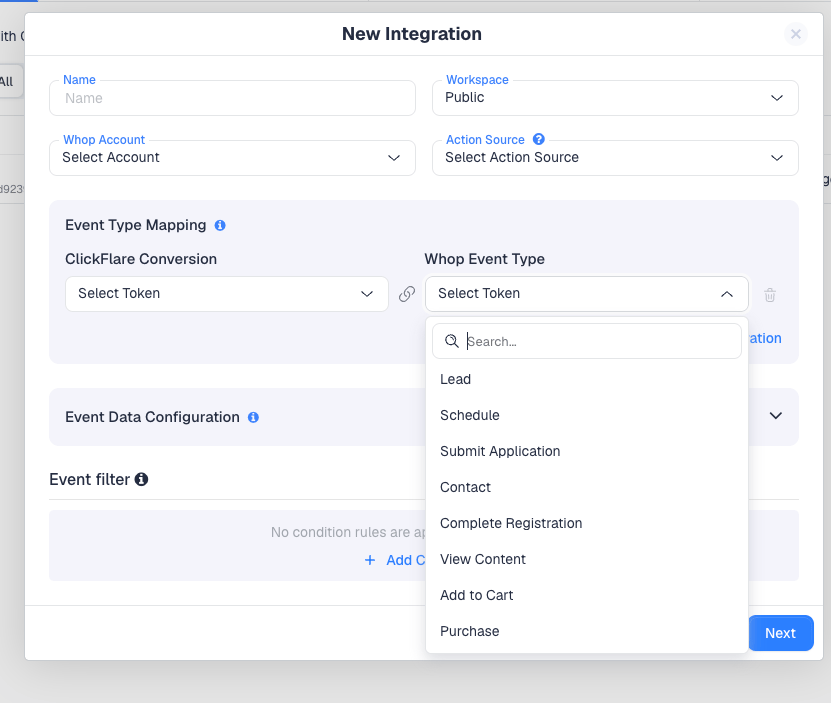
7
Configure the event data
Expand Event Data Configuration to see what ClickFlare sends with each event. Each row pairs a Whop Parameter with the ClickFlare Token that fills it. A new integration comes pre-filled with the defaults below. Keep them: they are what Whop uses to match the event and record its value.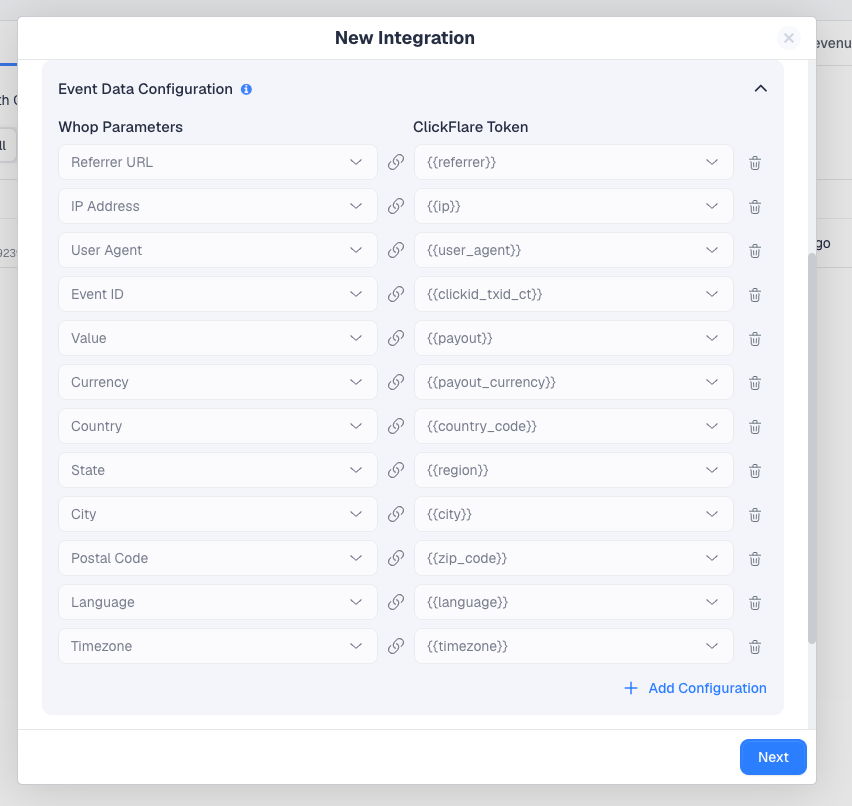
8
Optionally, add an event filter
Event filter sends an event only when it meets conditions you set, for example only conversions above a certain payout or from certain countries. Without conditions, every mapped event is sent. See Event Filter.
9
Save
Click Next and save the integration. It now appears on the Conversion API tab.
10
Connect it to your campaign
A Conversion API integration sends conversions only for the campaigns it is connected to. Open your Whop campaign in the campaign editor and select the Whop integration under Conversion API Integrations, then save the campaign.You can also select the integration on your Whop traffic source. That makes it the default for campaigns that use the traffic source, but the campaign’s own setting is what counts, so always check it there.
Whop event types
The Whop Event Type dropdown offers Whop’s eight standard events.
A Purchase needs a value greater than zero, so map it to a ClickFlare conversion that carries a payout. Whop rejects a purchase without one.
More Whop parameters
Beyond the defaults, you can add any of these in Event Data Configuration. None is required. Add the ones you have data for.Event details
Event details
Event Name, Event Time, URL, Title, Product ID, Plan ID, Value Manual, Event ID Manual.
Visitor identity
Visitor identity
Anonymous ID (
_wuid), External ID, Whop User ID, Whop Member ID, Whop Membership ID, Email, Phone, First Name, Last Name, Username.Email and phone help Whop match a conversion to a person when nothing else links it to the ad click. Send them as they were entered. Whop does its own matching and drops hashed emails as invalid.UTMs and Whop ad IDs
UTMs and Whop ad IDs
UTM Source, UTM Medium, UTM Campaign, UTM Content, UTM Term, Whop Campaign ID (
wacid), Whop Ad Group ID (wasid), Whop Ad ID (waid).The Whop traffic source template already captures fbclid as {external_id} and wacid, wasid and waid as {trackingField1} to {trackingField3}, so you can map these parameters straight to those tokens.How Whop handles the events you send
Attribution
Attribution
Whop works out which ad drove a visit from the parameters on the landing page URL:
wacid, wasid and waid are the Whop campaign, ad group and ad IDs, alongside the network’s own IDs and fbclid. Create your traffic source from the Whop template so ClickFlare captures them, and do not strip query parameters from the ad’s destination URL.The 28-day limit
The 28-day limit
Whop rejects events more than 28 days old, and treats timestamps in the future as now. A conversion that reaches ClickFlare later than that, such as a delayed affiliate postback, is not accepted by Whop.
Duplicates
Duplicates
Whop keeps one copy of events that share the same event name and event ID. The default Event ID mapping gives each conversion a stable ID, so a conversion that is re-sent is not counted twice. Keep that mapping in place.
Troubleshooting
For the general checklist, see CAPI or pixel not firing.
Frequently asked questions
Is it the same API key as the cost integration?
Is it the same API key as the cost integration?
Yes. One company API key per Whop business covers both, as long as it has all three permissions:
company:basic:read, event:create and ad_campaign:basic:read.Can I send a custom event name?
Can I send a custom event name?
No. Whop’s event types are the eight standard ones in the dropdown. Map each ClickFlare conversion to the closest match.
I have several Whop businesses. What do I do?
I have several Whop businesses. What do I do?
Create a key in each business, then register each one through New Pixel with a clear Account Name. Pick the matching account in each integration.
Do I still need the Whop pixel on my landing page?
Do I still need the Whop pixel on my landing page?
Whop requires its pixel on external landing pages before an ad can go live. The Conversion API does not replace it. It adds the conversions the pixel cannot see.
Which Action Source should I pick?
Which Action Source should I pick?
The one that describes where the conversion happened. For a landing page or website funnel, choose Website. For pay-per-call, Phone Call.