

Before You Begin
We recommend reviewing your traffic source’s tracking documentation first to identify:- Supported postback parameters
- Required click ID parameter
- Additional required parameters (such as campaign IDs or account IDs)
- Supported event types
Understanding Click IDs
Most traffic sources generate a unique click ID for each visitor. This value is used to attribute conversions back to the original click. In ClickFlare:- Traffic source click IDs are stored as External IDs.
- The {external_id} token is used to dynamically pass the traffic source click ID back in the postback URL.
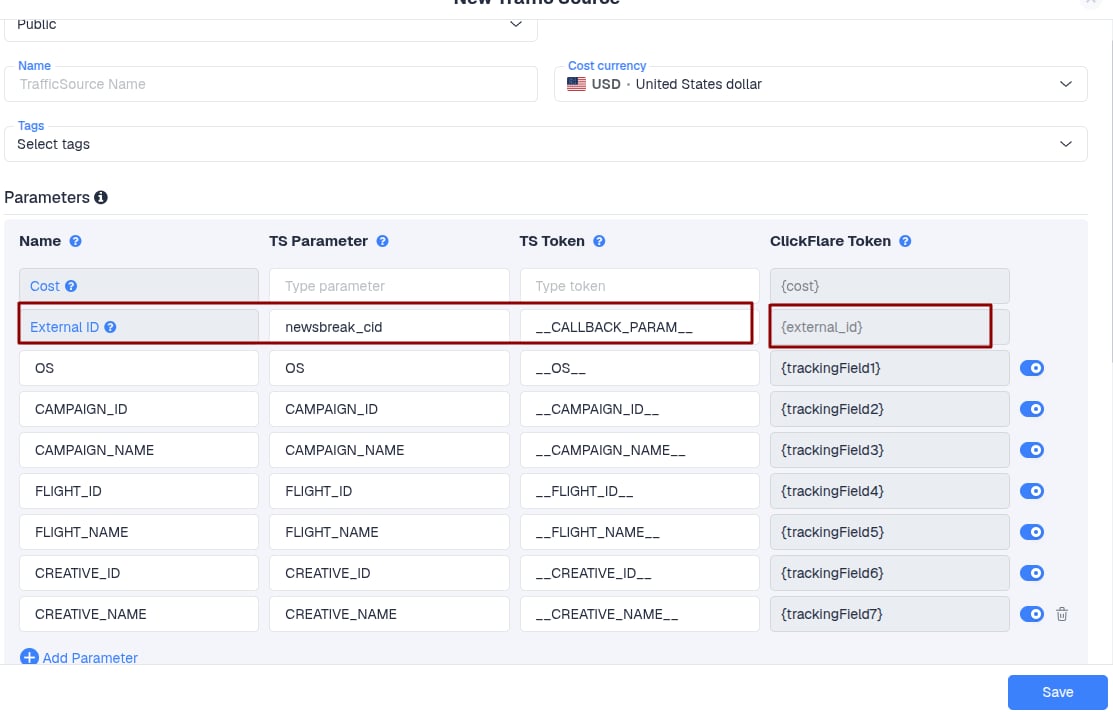
Example: How {external_id} Works
Suppose your traffic source sends the following click ID when a visitor clicks your ad:Build your postback URL
Use ClickFlare’s tokens to populate the URL dynamically. Here’s a common example: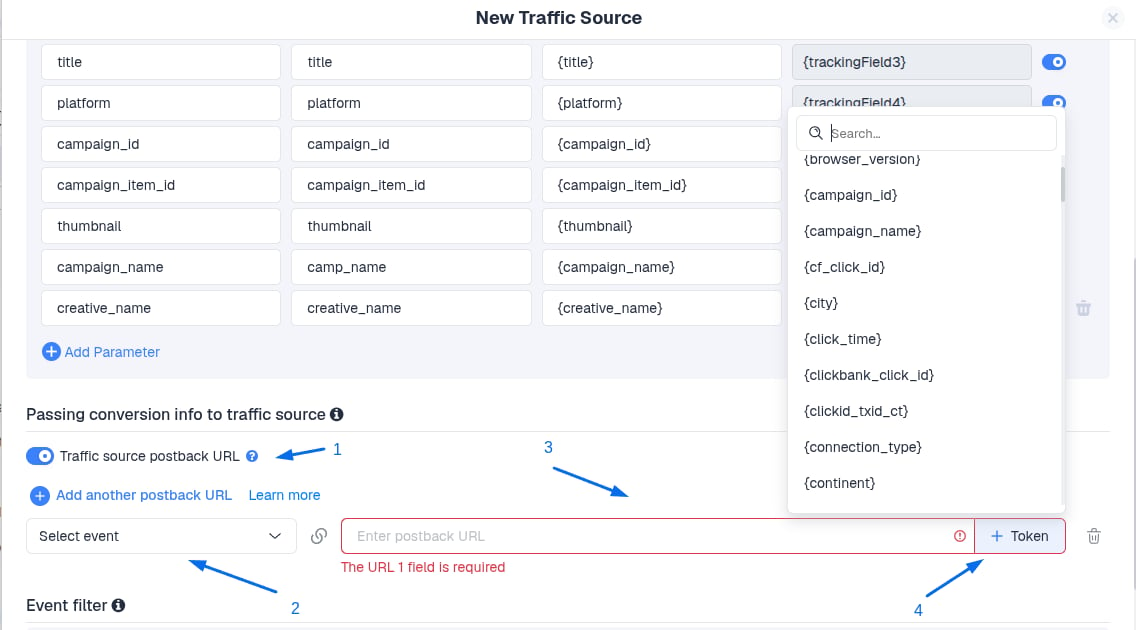
Configuration Steps
Enable the Postback URL option.
Navigate to your Traffic Source settings and enable the Postback URL option.Select the Event to Send
Choose the ClickFlare event that should trigger the postback. Before selecting an event, verify which events are being logged in your campaign by reviewing: Logs → Event Logs Common examples include:- Conversions
- Custom conversions: lead sale purchase
Add the Traffic Source Postback URL
Paste the postback URL provided by your traffic source. If your traffic source does not provide a ready-made postback URL, build one according to their documentation using the required parameters.Use ClickFlare Tokens
Use the Tokens section to insert dynamic values into the postback URL.- Click IDs
- Payout values
- Transaction IDs
- Campaign IDs
- Custom tracking parameters
Available ClickFlare Tokens
Traffic Source Data
Conversion Data
ClickFlare Element IDs
Visitor Data
Geo Data
Device Data
Important Notes
- Always verify your traffic source documentation to ensure the required parameters are included.
- After configuring the postback URL, test a conversion and review the Postback Logs to confirm that the traffic source is receiving the data successfully.