

Tip: To differentiate conversion types, you can add parameters such as conversion type or transaction ID to each upload. The logic behind uploading a conversion is the same as receiving a postback from an affiliate network; a valid Click ID is required.
Note: Make sure you are currently sending the unique Click IDs to the affiliate network or monetization platform. If not, arbitrary assignment may lead to unreliable optimization decisions.
How to Upload Conversions
-
Go to the Settings Menu (gear icon at the top right).

- Select Conversion Upload (between Custom Conversions and Integrations).
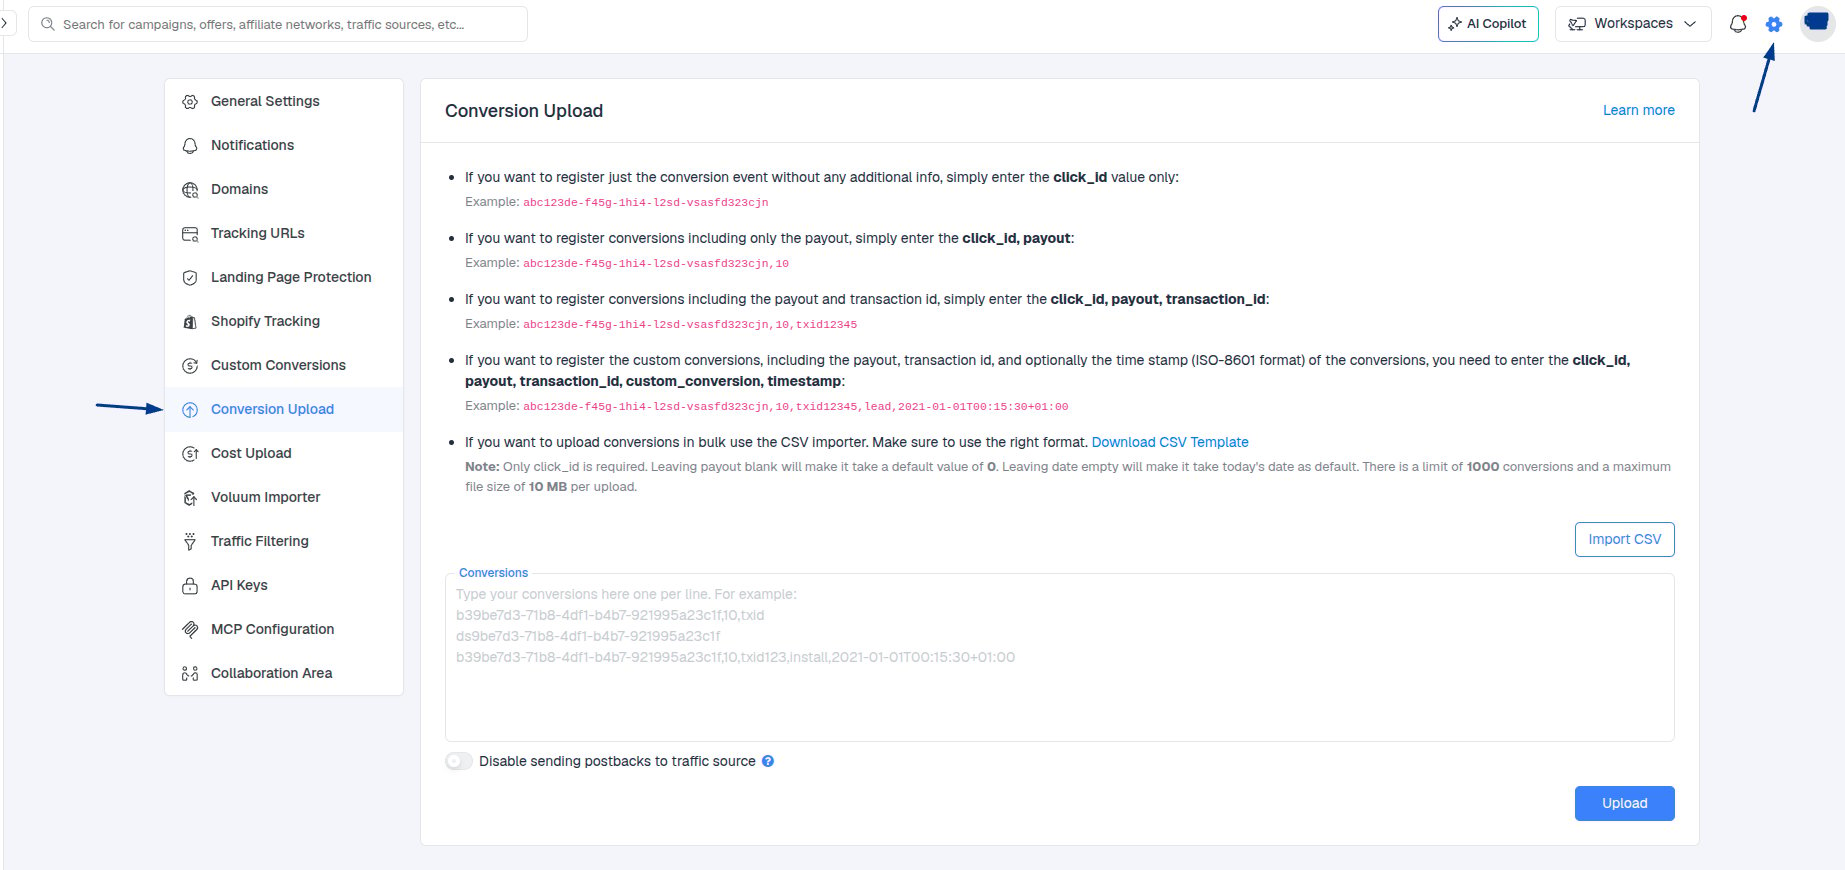
- Enter one entry per line in the following format:
click_id, payout,transaction_id,conversion_type,timestamp
- click_id – Unique Click ID passed from ClickFlare to the affiliate network.
- payout – Revenue generated by the conversion (numerical, e.g., 3.9).
- transaction ID - Unique ID assigned to each tracked conversion by the network. Some networks may not provide this.
- conversion type - Value to distinguish different types of conversions (e.g., sale, upsell, cross-sell).
- timestamp - Time of conversion. If not specified, the upload time is used. Must follow ISO-8601 format, e.g., 2025-10-02T14:30:00+02:00.
Note: All values should be separated by commas.
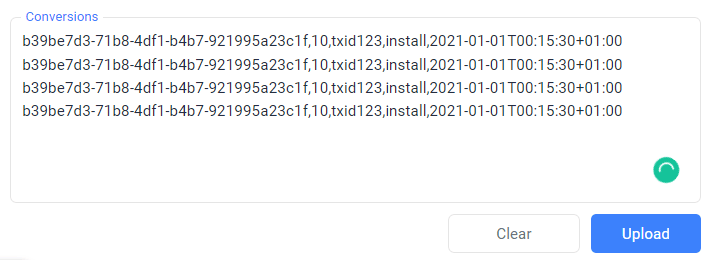
Conversion Upload Examples
- Using Click ID only, without conversion revenue.
- Click ID + Revenue
- Click ID + Revenue + Transaction ID
- Click ID + Revenue + Transaction ID + Conversion Type
- Click ID + Revenue + Transaction ID + Conversion Type + Timestamp
- 2025-10-02 → Date (YYYY-MM-DD)
- T → Separator between date and time
- 14:30:00 → Time (HH:MM:SS)
- +02:00 → Timezone offset from UTC