

How does it work?
When creating a new campaign in ClickFlare and selecting the Listicle tracking option, you need to choose a pre-lander from the list of existing ones. The number of CTAs in this pre-lander determines how many lander-offer pairs you can link to it. Once you select your pre-lander, you must choose the appropriate number of landers, with each lander paired with a single, unique offer.Meaning that you cannot rotate offers or use multi-offer click URLs in this setup.
How It Works
-
Pre-Lander Selection
When creating a new campaign and selecting the Listicle tracking option, choose a pre-lander from your existing list.
- The number of CTAs in the pre-lander determines how many lander-offer pairs you can link to it.
-
Landers & Offers
After selecting your pre-lander, you need to add the corresponding number of landers, each paired with one unique offer.
- You cannot rotate offers or use multi-offer click URLs in this setup.
-
URLs Generated
Once set up, you will get:
- Standard campaign URL: Redirects visitors from ads to the pre-lander.
- Intermediate click URL: Redirects visitors from the pre-lander to a lander.
- Classic click URL: Redirects visitors from a lander to the final offer.
Rules to Keep in Mind
- A listicle can include up to 20 landers.
-
Each offer and lander can only be used once.
- A lander cannot link to multiple offers.
- An offer cannot be linked from multiple landers.
- The maximum number of landers a visitor can go through is two.
**Step 1 - **Pre-Lander Selection
- Go to the Landers section on the left-hand menu
- Select +New.
-
*Make sure to toggle the “Is Prelander” option (as seen in the pic below).
 *
*
-
Fill in:
- Name of the pre-lander.
- URL of the pre-lander.
- Number of CTAs (determines how many landers you can use).
- Select the number of CTAs. This number will define how many landers you’ll be able to use. So if you have selected 3 CTAs, then you’ll be able to use 3 landers.
- Copy all generated links into a document for reference.
- Once done, click Save.
Step 2 - Adding Landers & Offers
- Add the same number of landers and offers as the number of CTAs you selected for the pre-lander.
- Ensure each lander is paired with a single, unique offer.
Step 3 - Creating a Listicle Campaign
- Start creating a new campaign.
- Enter the General Info for your campaign.
-
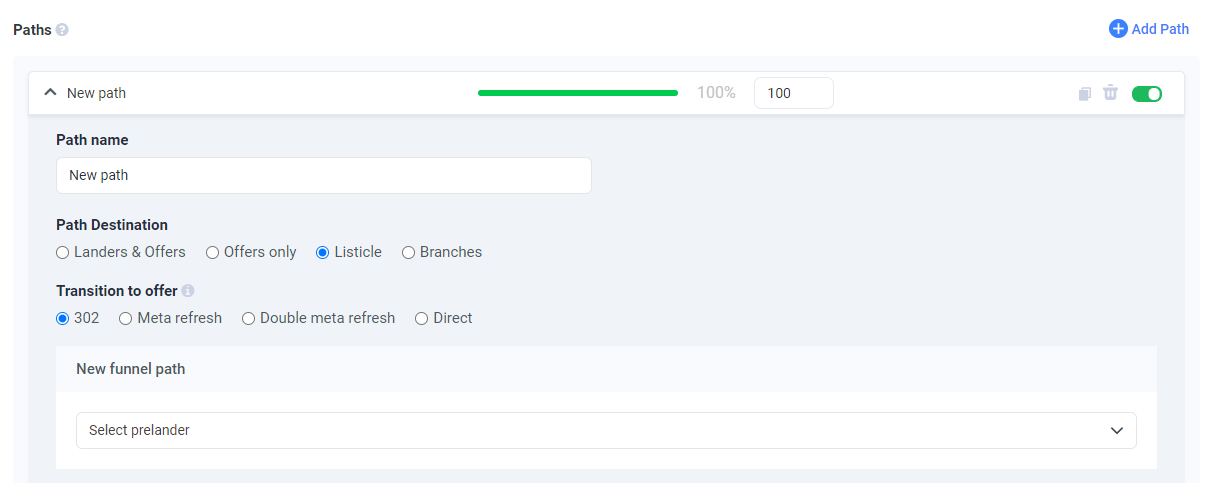
- Choose the path for your listicle and give it a name.
- Select Listicle as the path destination.
- Select the pre-lander you created. Move to Destination Info:
-
-
Example: If the pre-lander has 3 CTAs:
- Lander 1 → Offer 1
- Lander 2 → Offer 2
- Lander 3 → Offer 3 Pair landers with offers according to the number of CTAs:
-
Example: If the pre-lander has 3 CTAs:
- Once done, click Save.
- In the Tracking tab, copy the campaign & click URLs.
Step 4 - Setting up your landing pages
To complete the setup, you also need to update your landing pages with the appropriate click URLs.-
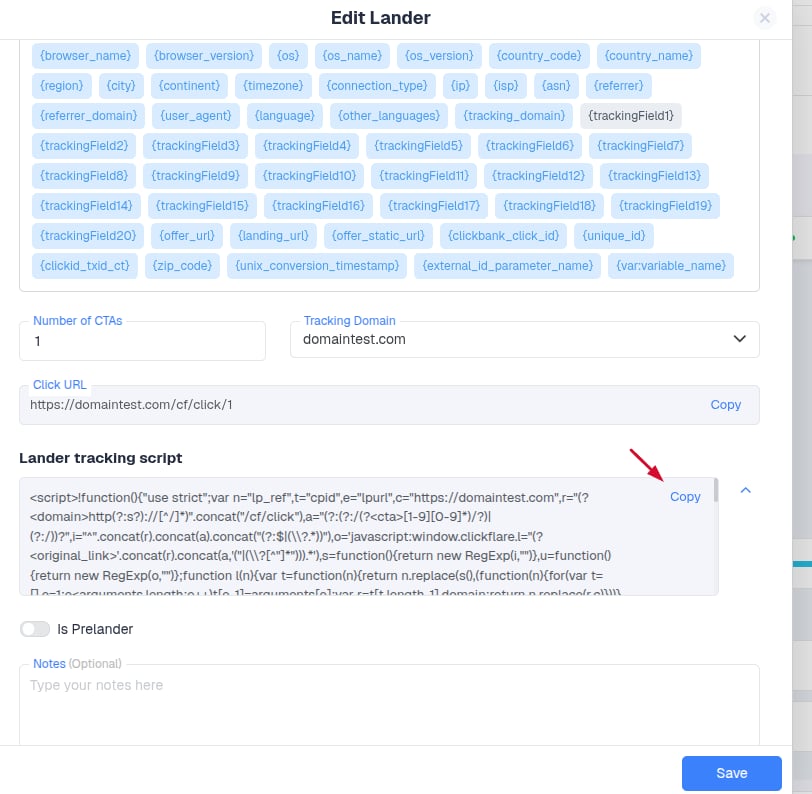
For the prelander, place all intermediate click URLs that you have copied from the prelander’s setup into the <body> section of this landing page:
Make sure to include the lander script on the first page the visitor is redirected to after clicking the ad (pre-lander). This ensures the visitor journey is tracked correctly.
-
For the landers, place the same click URL that you have copied from the campaign’s setup into each of your landers’ <body> section:
- Correct tracking of the visitor journey.
- Each visitor goes through the intended funnel (pre-lander → lander → offer).
- Offers and landers are not reused incorrectly.