


If you have an online store, Shopify conversion tracking is an essential part of your growth strategy. Without it, you're flying blind when it comes to what’s working and what’s wasting your budget.
The main problem is that Shopify’s in-platform tracking only goes so far. In this article, we’ll walk you through how to get accurate conversion tracking using ClickFlare to optimize smarter, spend less, and grow your business.
Shopify conversion tracking is the process of measuring important visitor actions on your store, such as “Add to Cart” or “Purchase”, to understand how well visitors convert into buyers.
This is especially important if you are running paid ads to promote your Shopify store. You can attribute conversions to specific ads, campaigns, or landing pages. With this data, you can optimize smartly by pausing campaigns or pages that are not working, and doubling down on the ones that are. This helps you cut down on your ad budget and boost ROI.
With all this data, you can also improve the customer experience. By pinpointing where exactly your visitors drop off, you can optimize your funnel and improve your overall performance.
Shopify already offers in-platform data, but is this enough?
Shopify offers built-in tracking that shows basic data such as sales by channel (e.g., Facebook, Google, TikTok), Average Order Value (AOV), or basic campaign performance if you’ve integrated your ad networks. But there are a few limitations:
These limitations can heavily hinder your optimization strategy. This is why most Shopify store owners are using third-party trackers to gain more insights.
ClickFlare is a third-party tracker that addresses all the Shopify built-in tracking limitations, and it provides an easy way to integrate your Shopify store and ad networks in just a few steps.
This means that you will see a full data overview from both Shopify and ad platforms like Facebook, TikTok, Google, native platforms etc, in just one dashboard.
ClickFlare offers a server-side tracking solution which tracks first-party data independent of ad blockers or browser limitations. With ClickFlare, you can automatically send this data back to your ad platforms via API for better performance. According to a recent study, using first-party data can generate double the revenue from a single ad placement.
With ClickFlare, you can also rotate and test landing pages before sending traffic to your Shopify store.
Finally, ClickFlare tracks click-level data so you can drill down into a specific visitor’s journey.
So, how does the setup with Shopify and ClickFlare work?
Let’s start with the ClickFlare setup first:
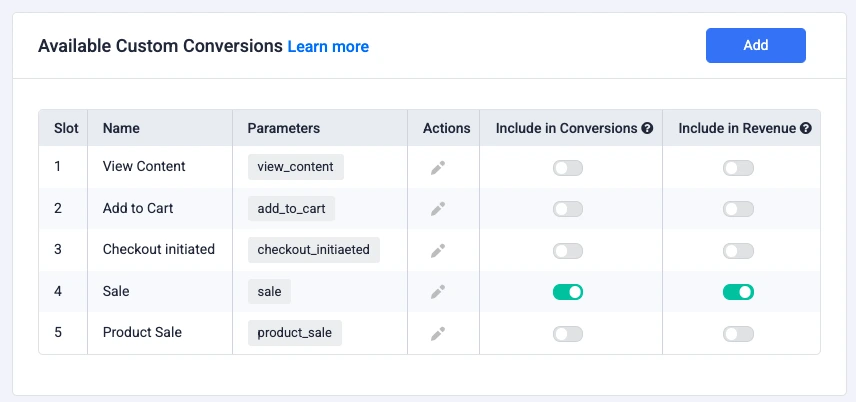
First, you need to create a custom conversion on ClickFlare for each of the events you’ll be tracking on Shopify.
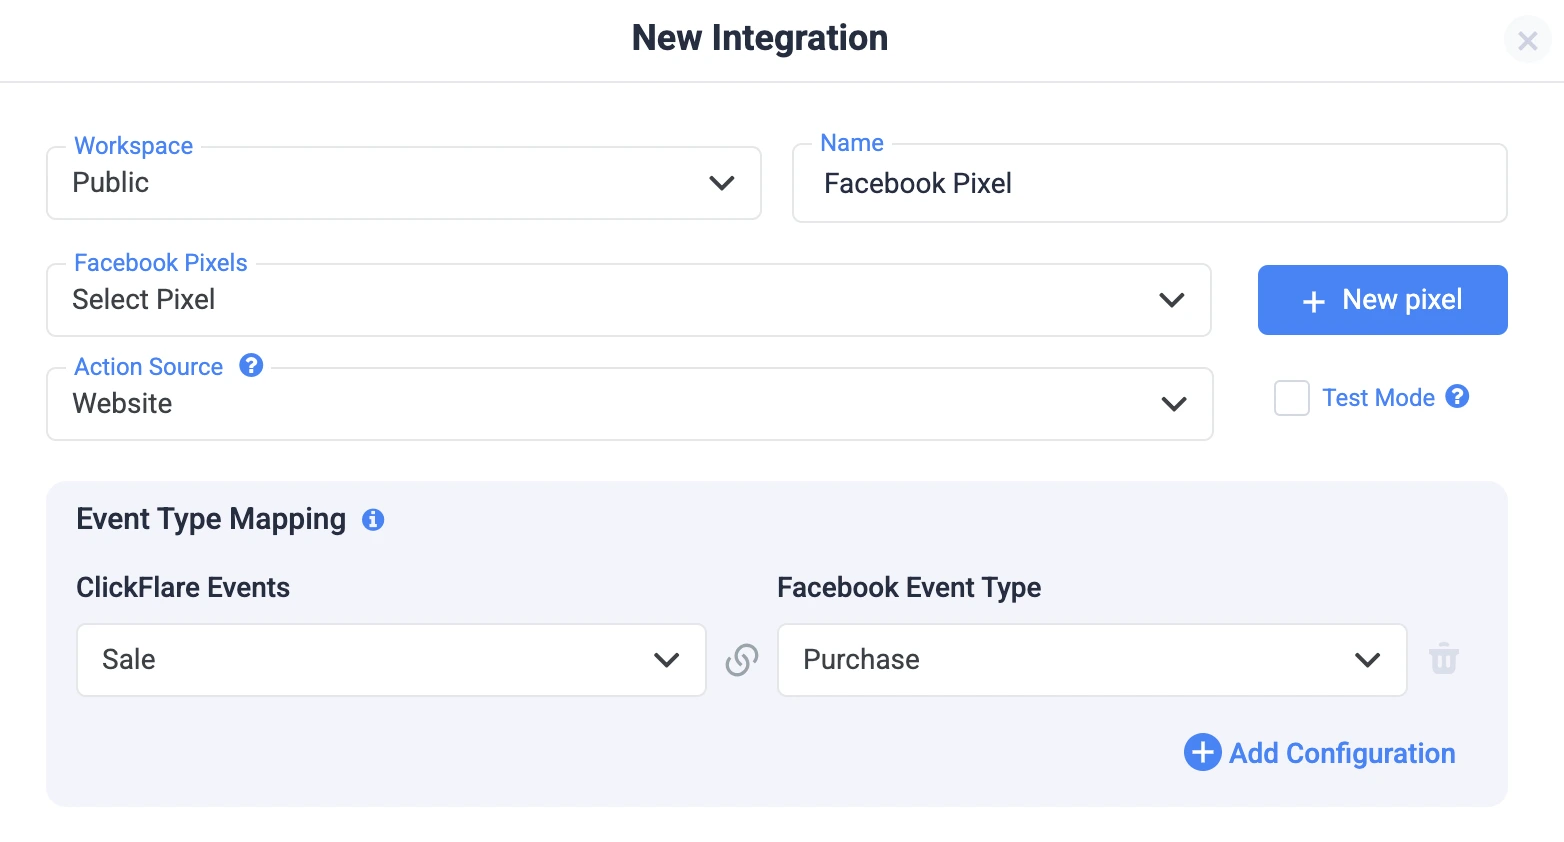
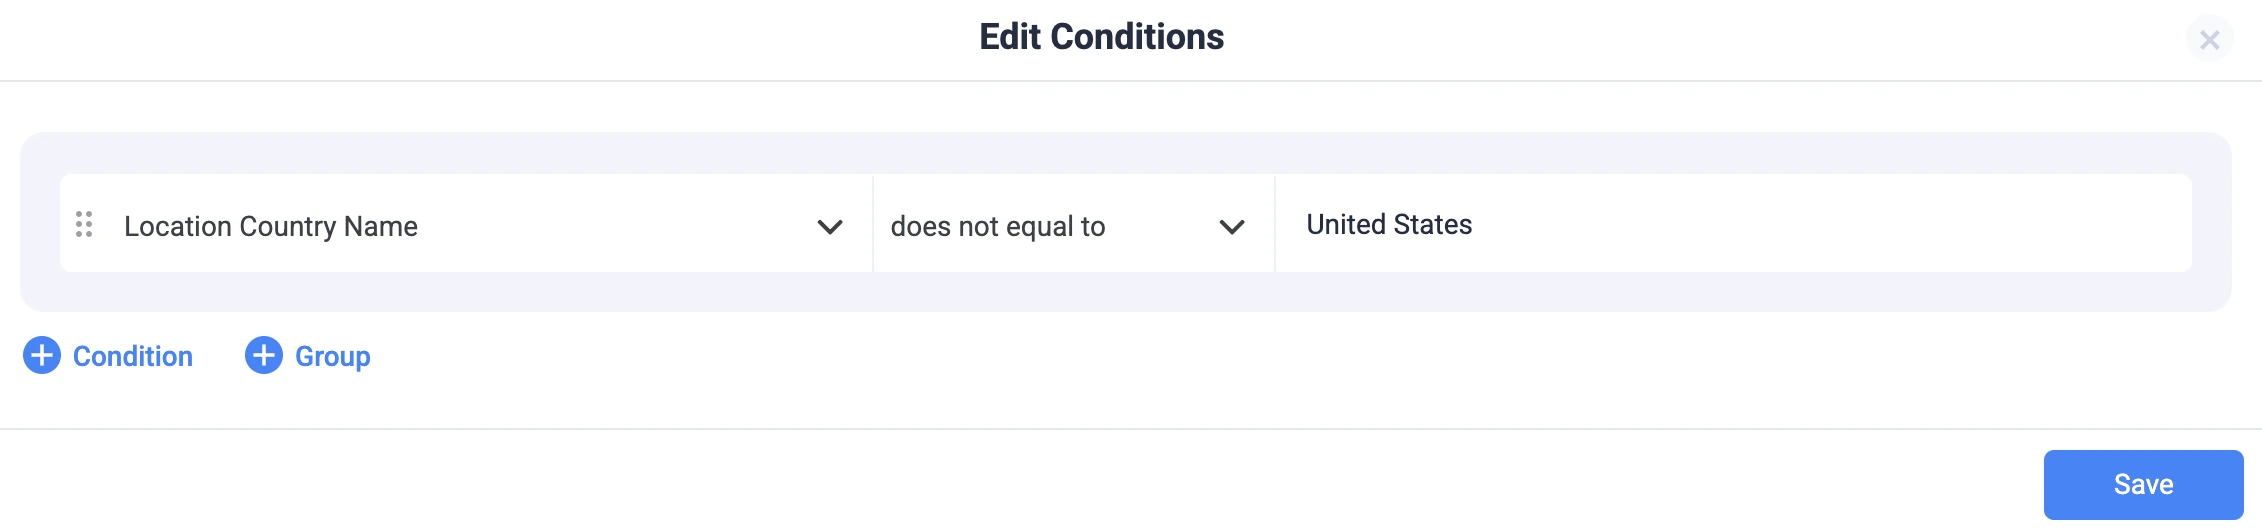
For many ad networks, you will need to connect your pixel and create the Conversion API. This will ensure that we’re posting conversions back to your ad platforms to improve your ad performance.
You need to do this step if your ad network is Meta, TikTok, Google, Snapchat, or Microsoft Bing. If you’re running ads on native platforms, you can skip this step. Instead, we will send conversions via postback.
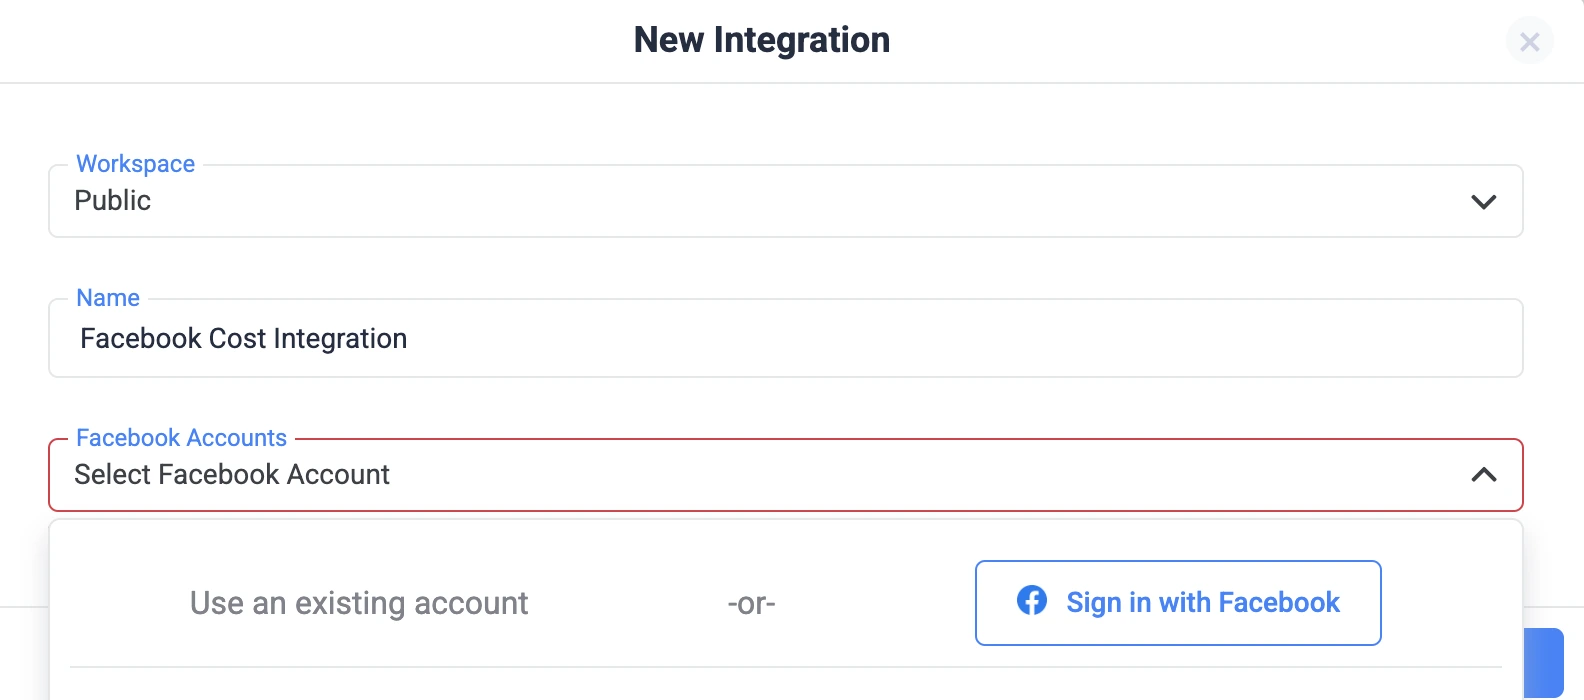
With ClickFlare, you can easily integrate your ad account and automatically pull cost via API on all campaign levels (campaigns, ad sets, ads).
You can do this for Facebook, Google, TikTok, Snapchat, Taboola, Outbrain, Bing, NewsBreak, Bigo Ads, Rumble, MediaGo, RevContent and MGID.
For most social platforms, you simply need to sign in with your account, give permission for ClickFlare to access the data, and select which ad accounts you want to pull costs from. For native platforms, you might have to provide an authentication key.
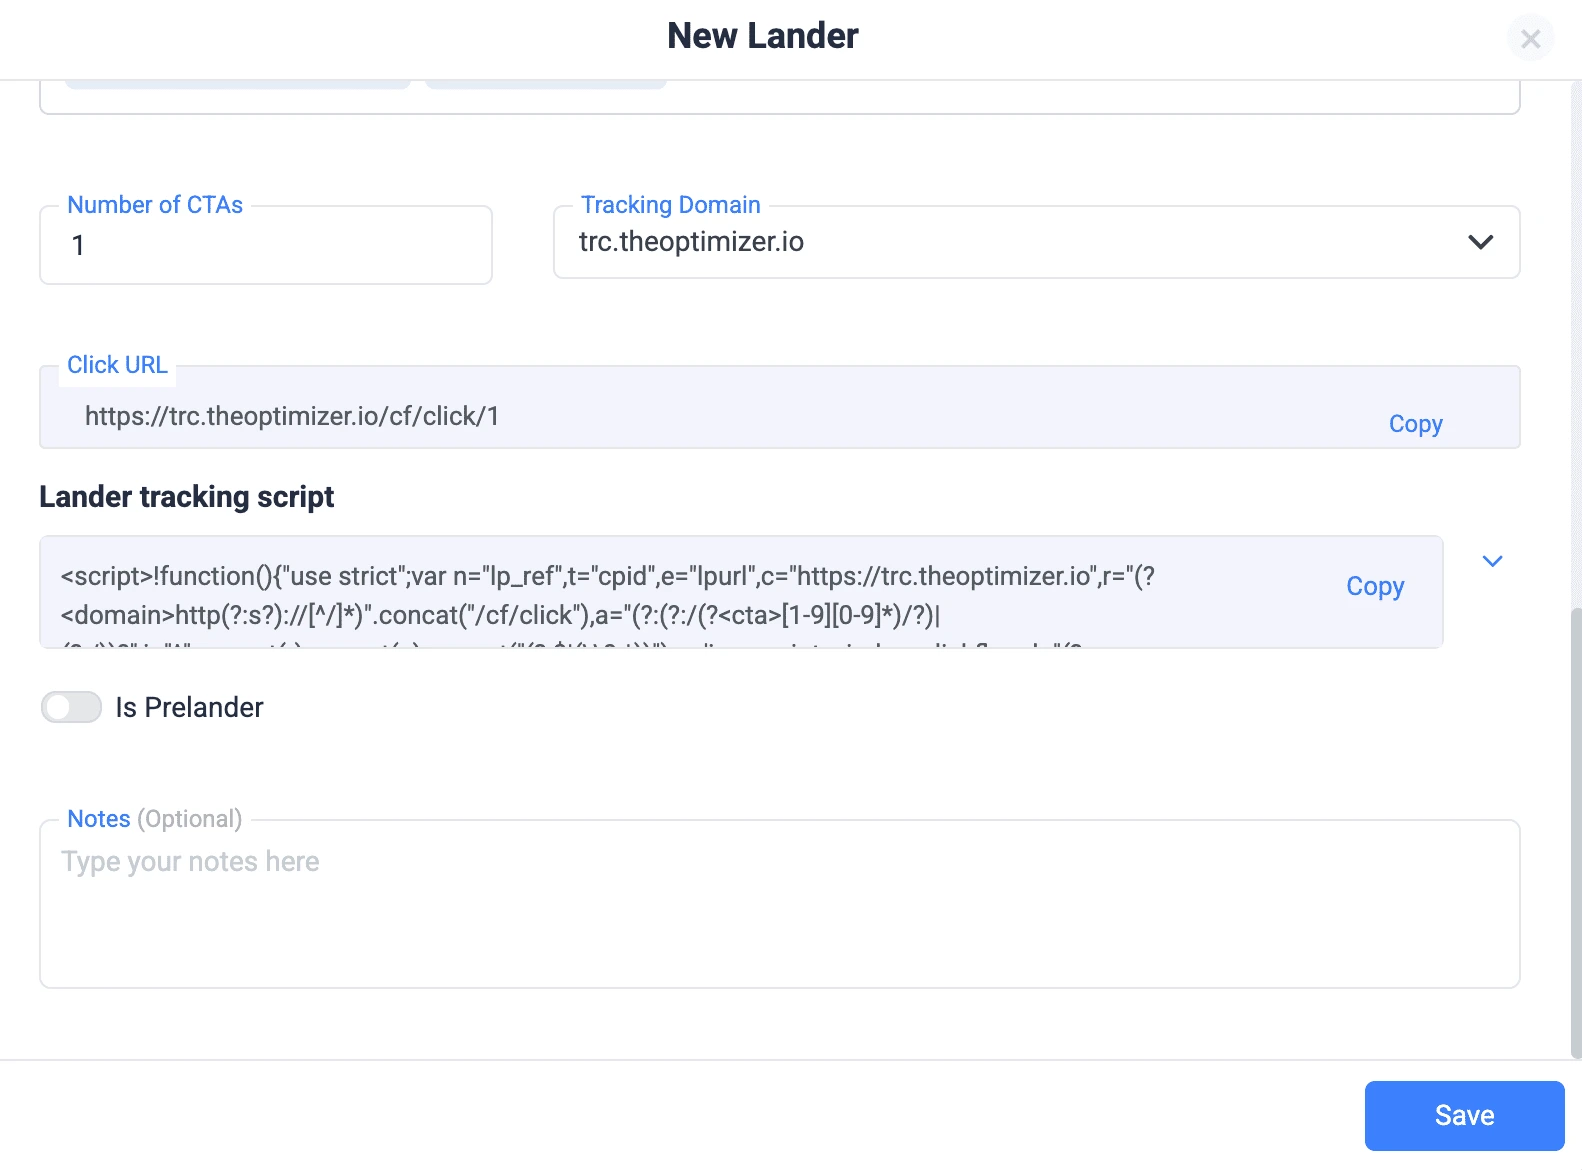
If you’re sending traffic to a landing page before Shopify, you need to add this lander on ClickFlare for accurate tracking. If you send traffic directly to your Shopify page, you can skip this step.
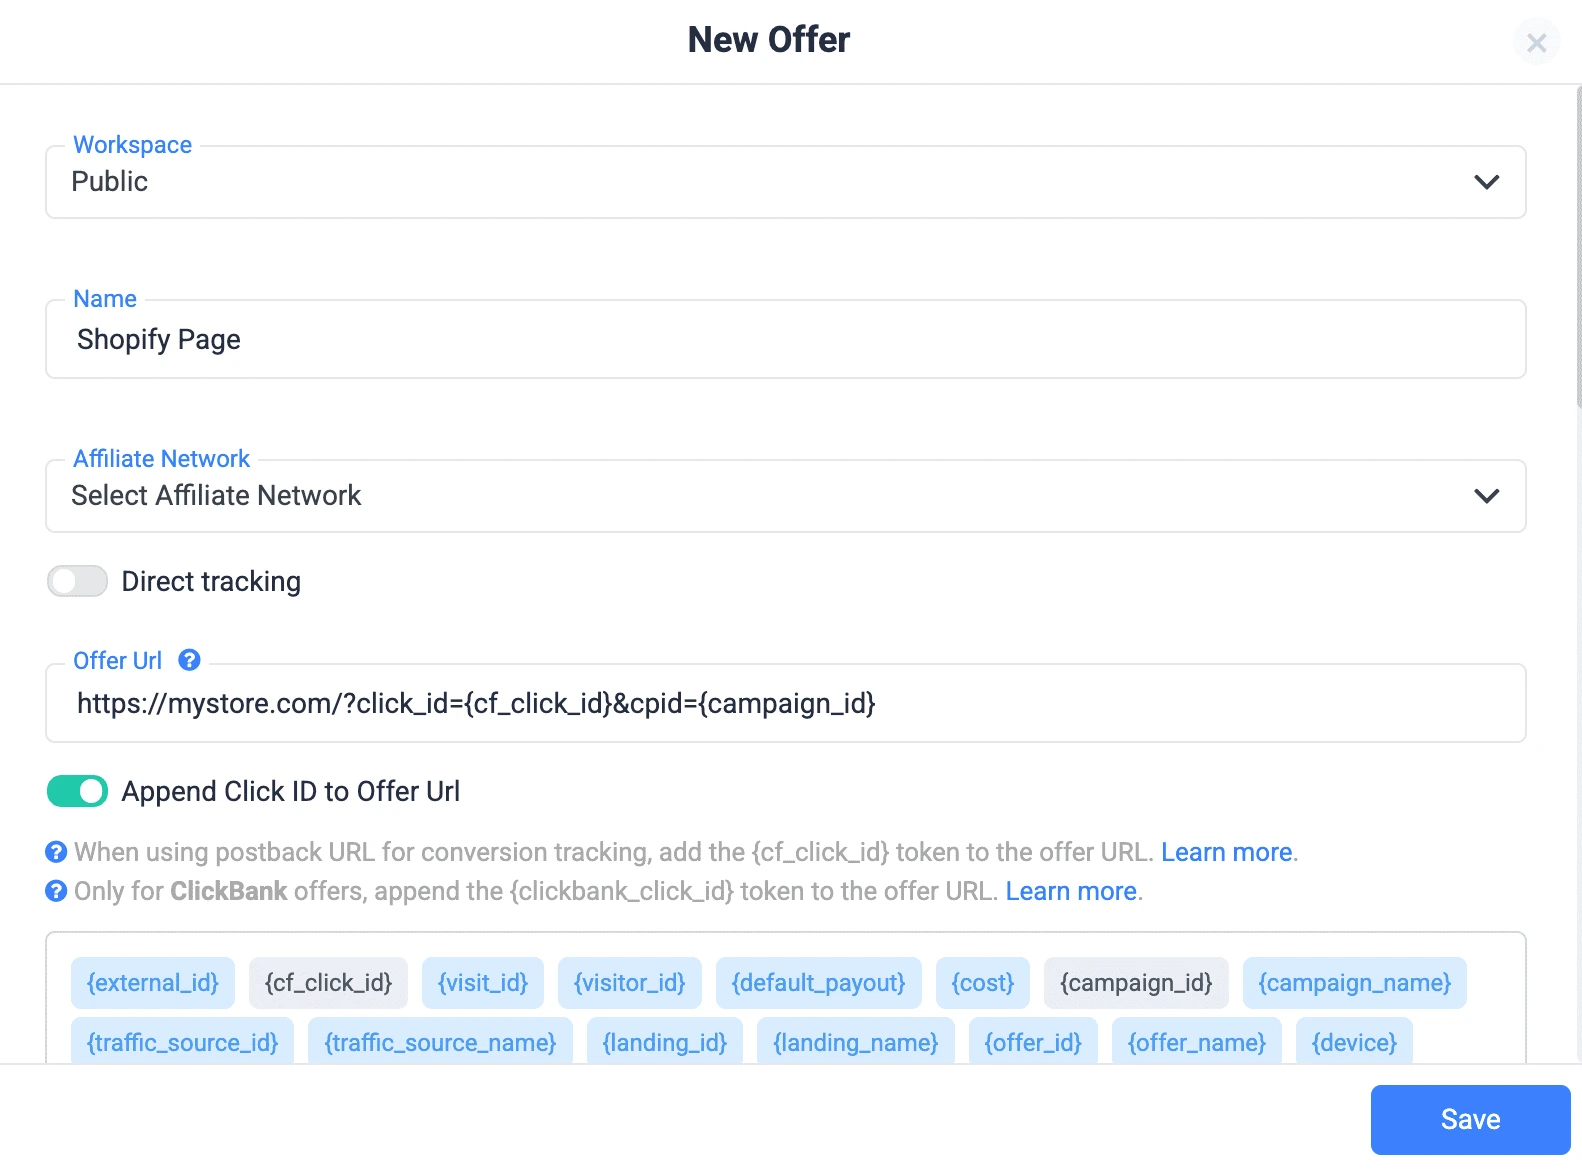
In ClickFlare, an Offer stands for the page where your visitors convert. In this case, this would be your Shopify page.
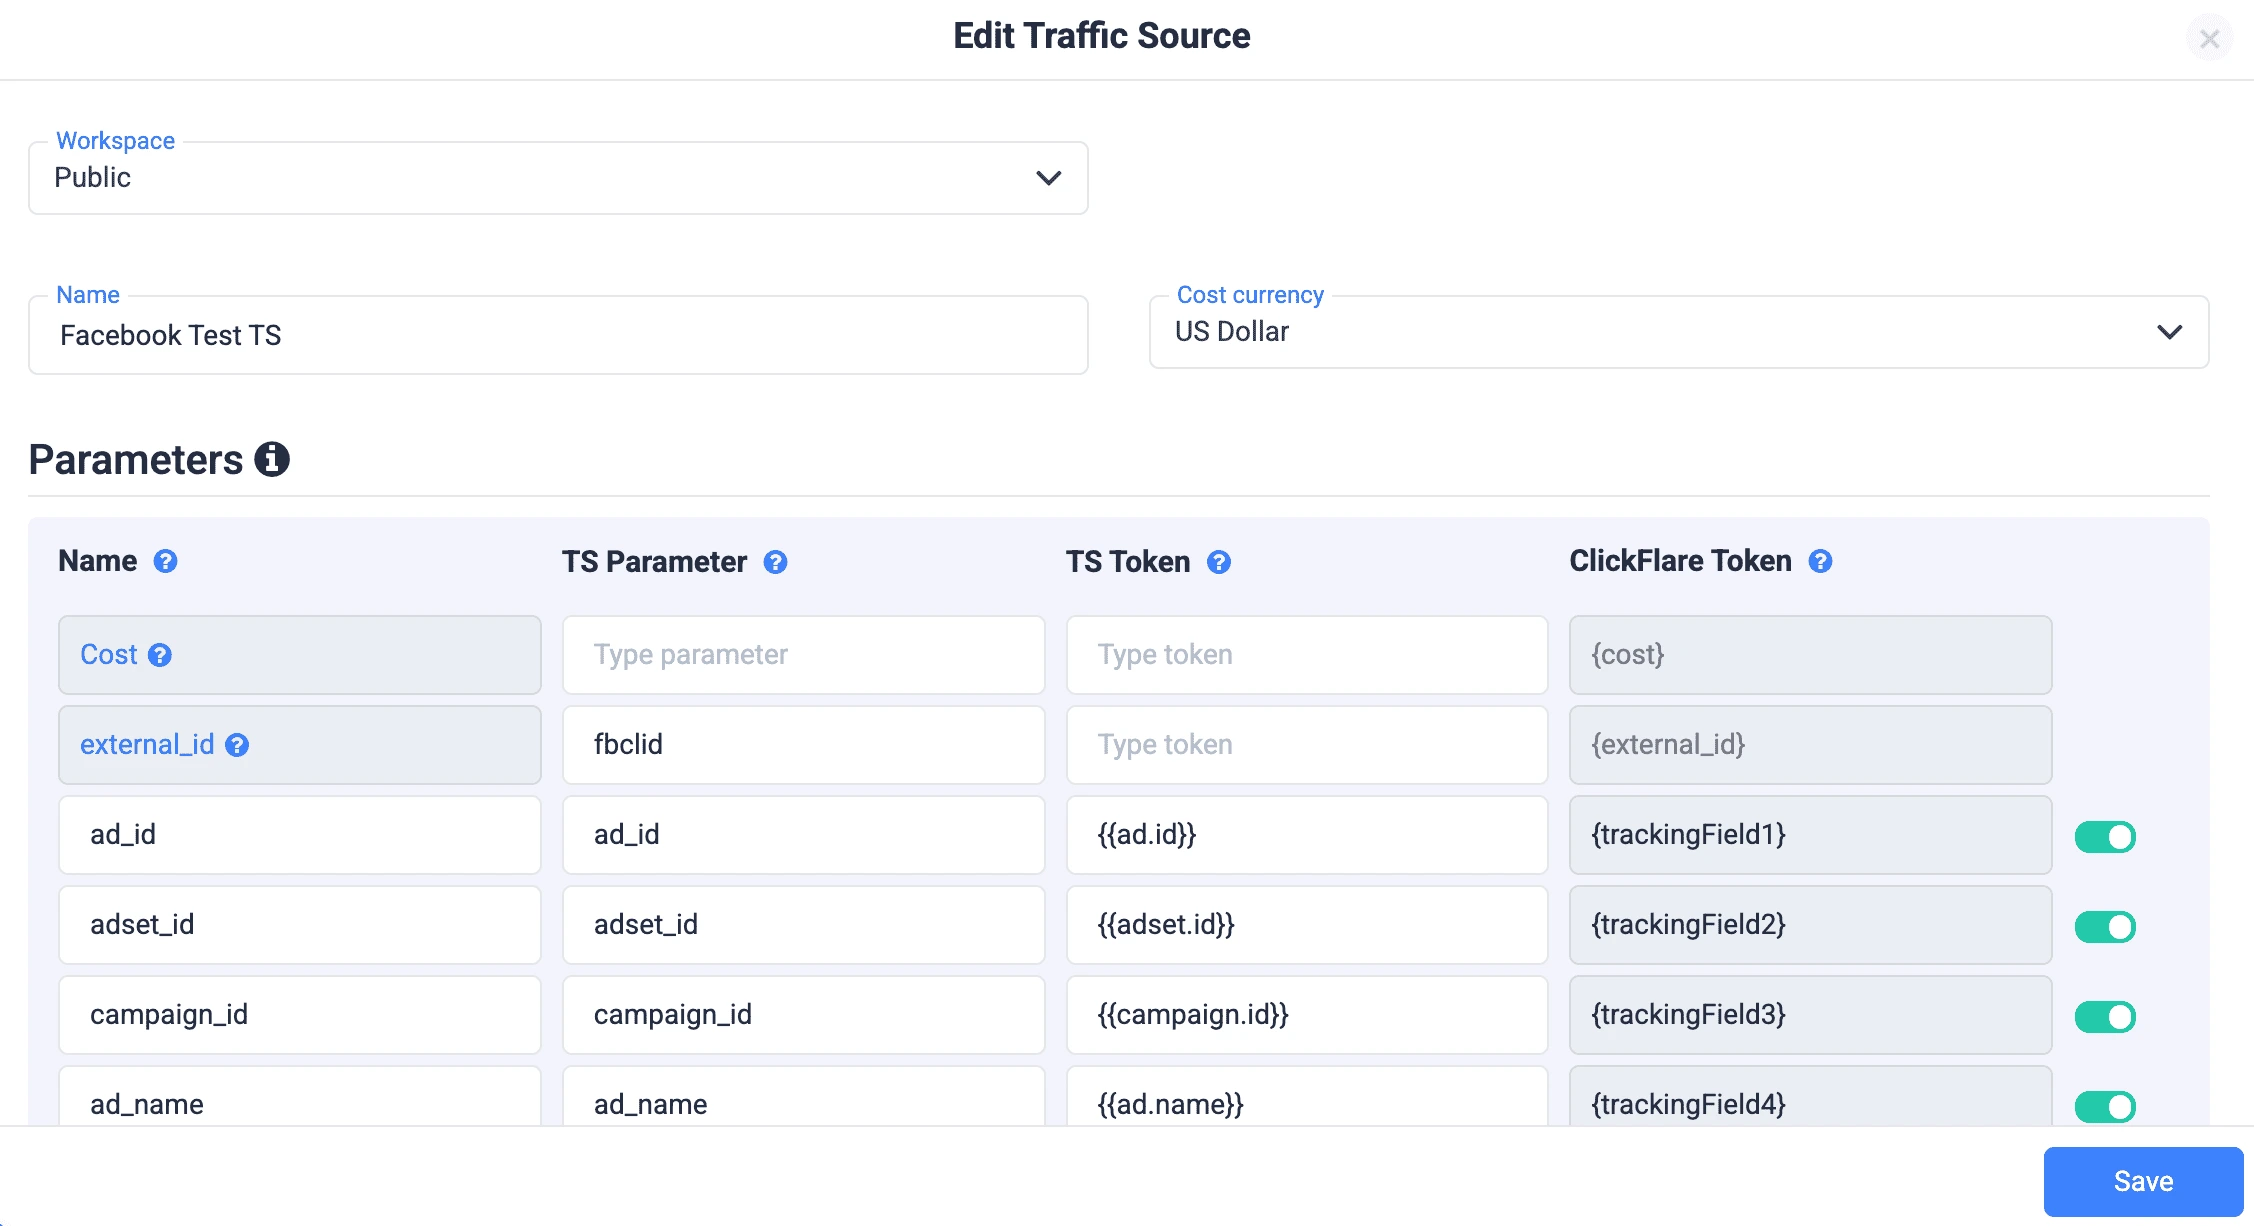

8. If you are using the Conversion API, select your pixel under Conversion API Integrations;
9. Select your cost integration under Cost Integration;
10. Save.
The final step inside ClickFlare is to create your campaign.
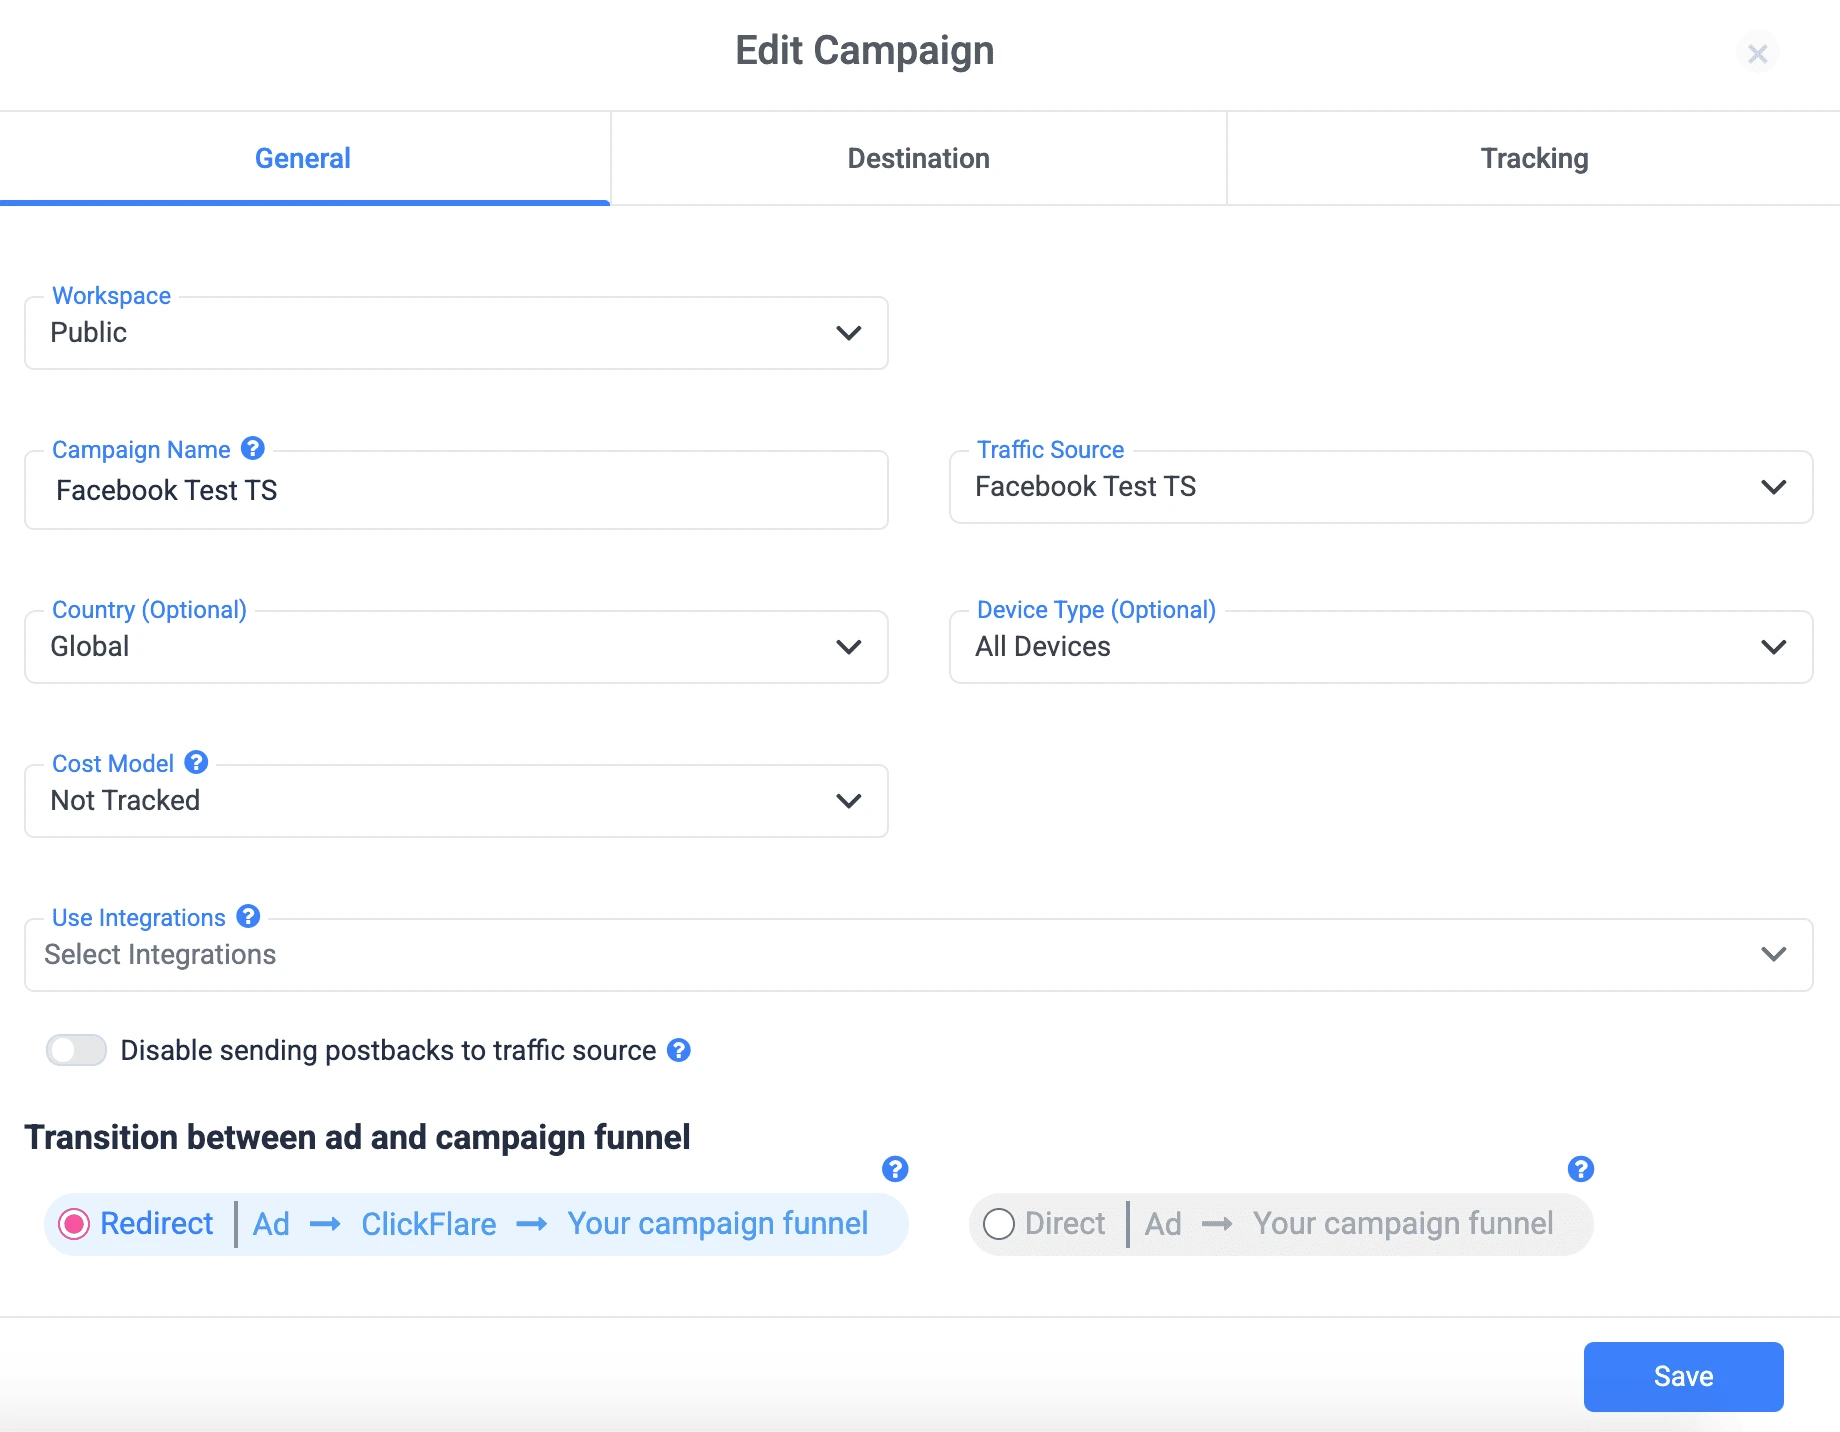
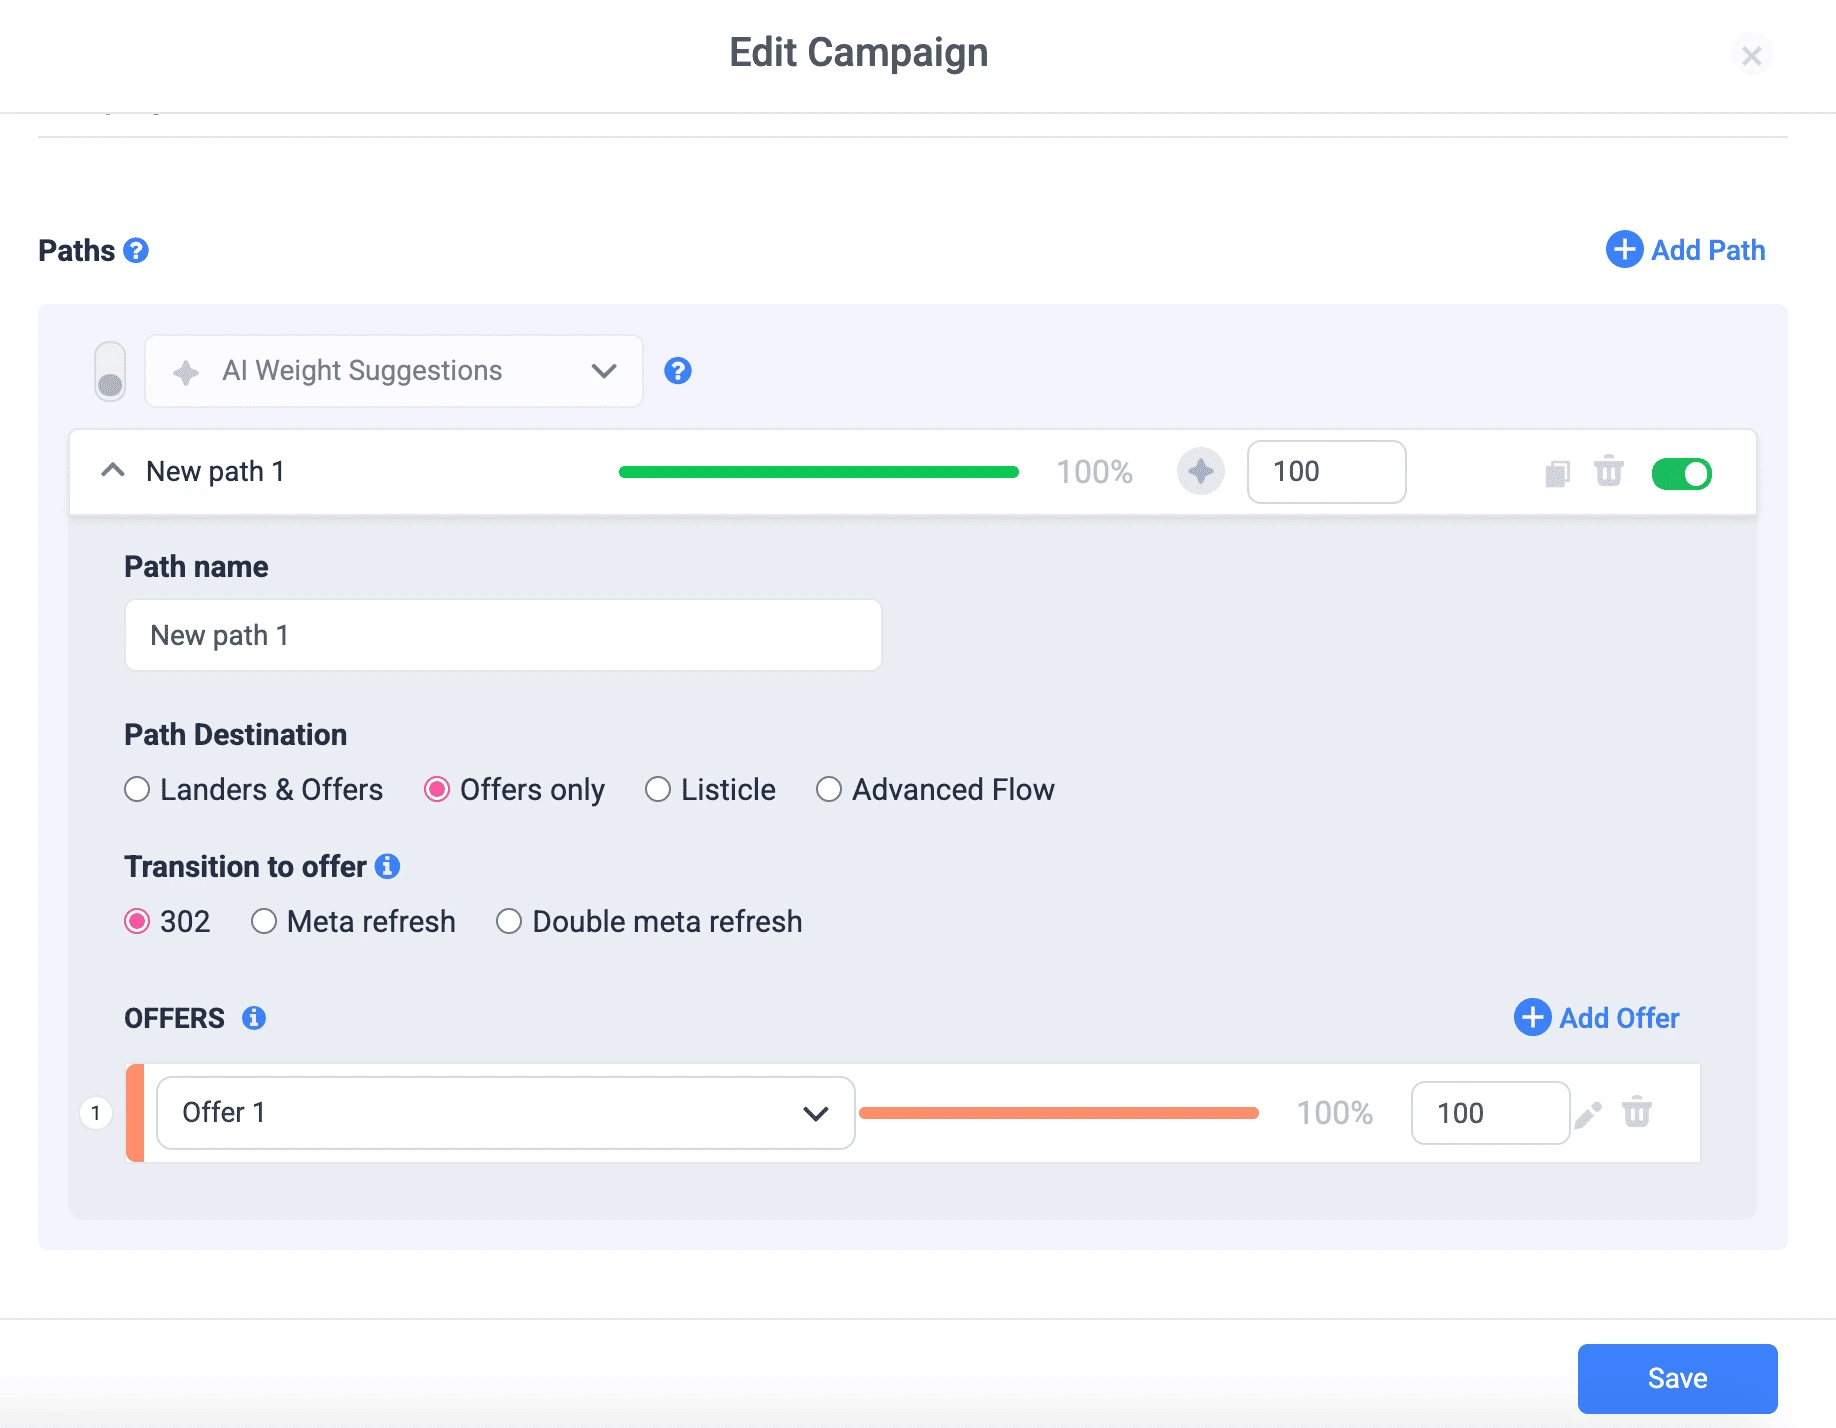
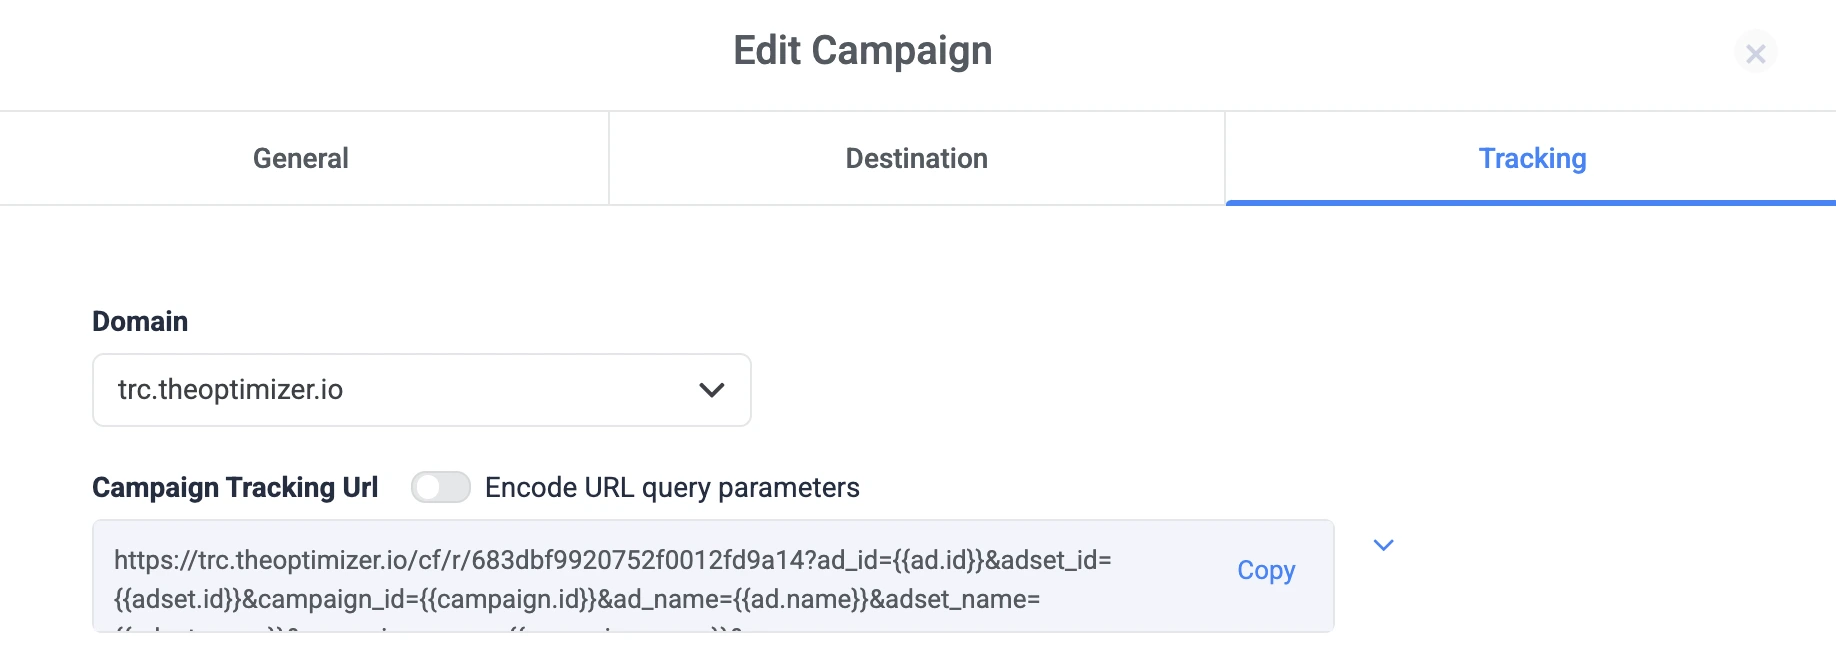
10. Under the Tracking tab, ClickFlare will generate your Campaign Tracking URL. You need to use this link as the ad destination on your ad network.
We recommend creating an organic traffic campaign to capture direct visits, email, influencers, or SEO traffic that would otherwise go untracked.
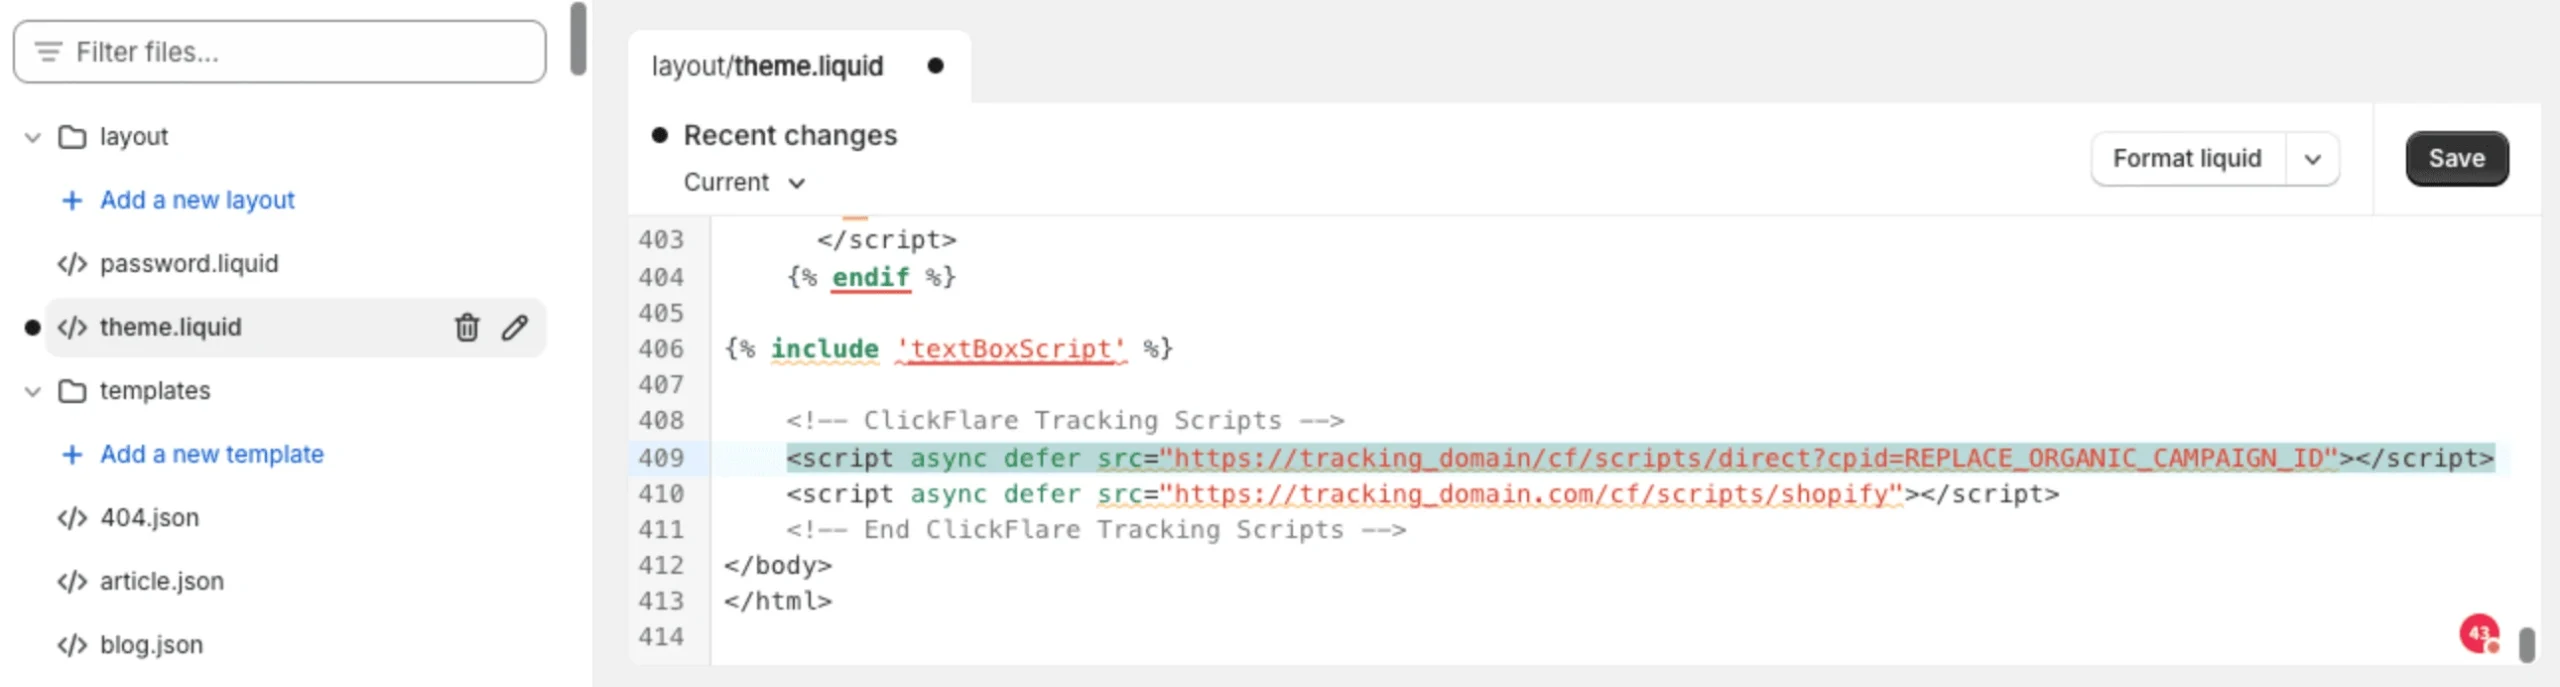
If this is a direct campaign, you need to inject the ClicFlare direct tracking script in the page inside theme.liquid:
https://trackin_domain.com/cf/scripts/direct?cpid=CLICKFLARE_ORGANIC_CAMPIGN_ID
The rest of the setup takes place inside Shopify:
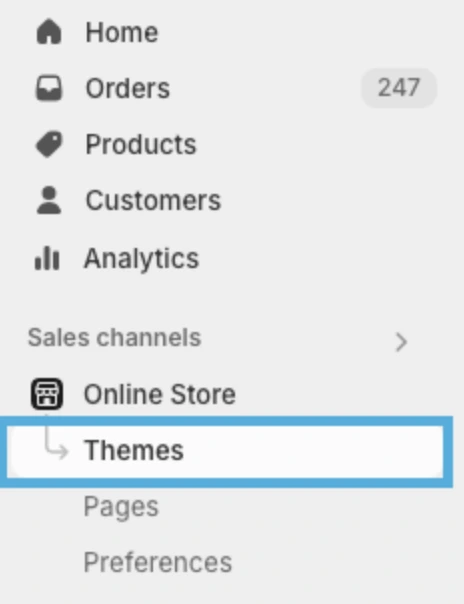
2. Click on the three dots next to your active theme and then on Edit code;
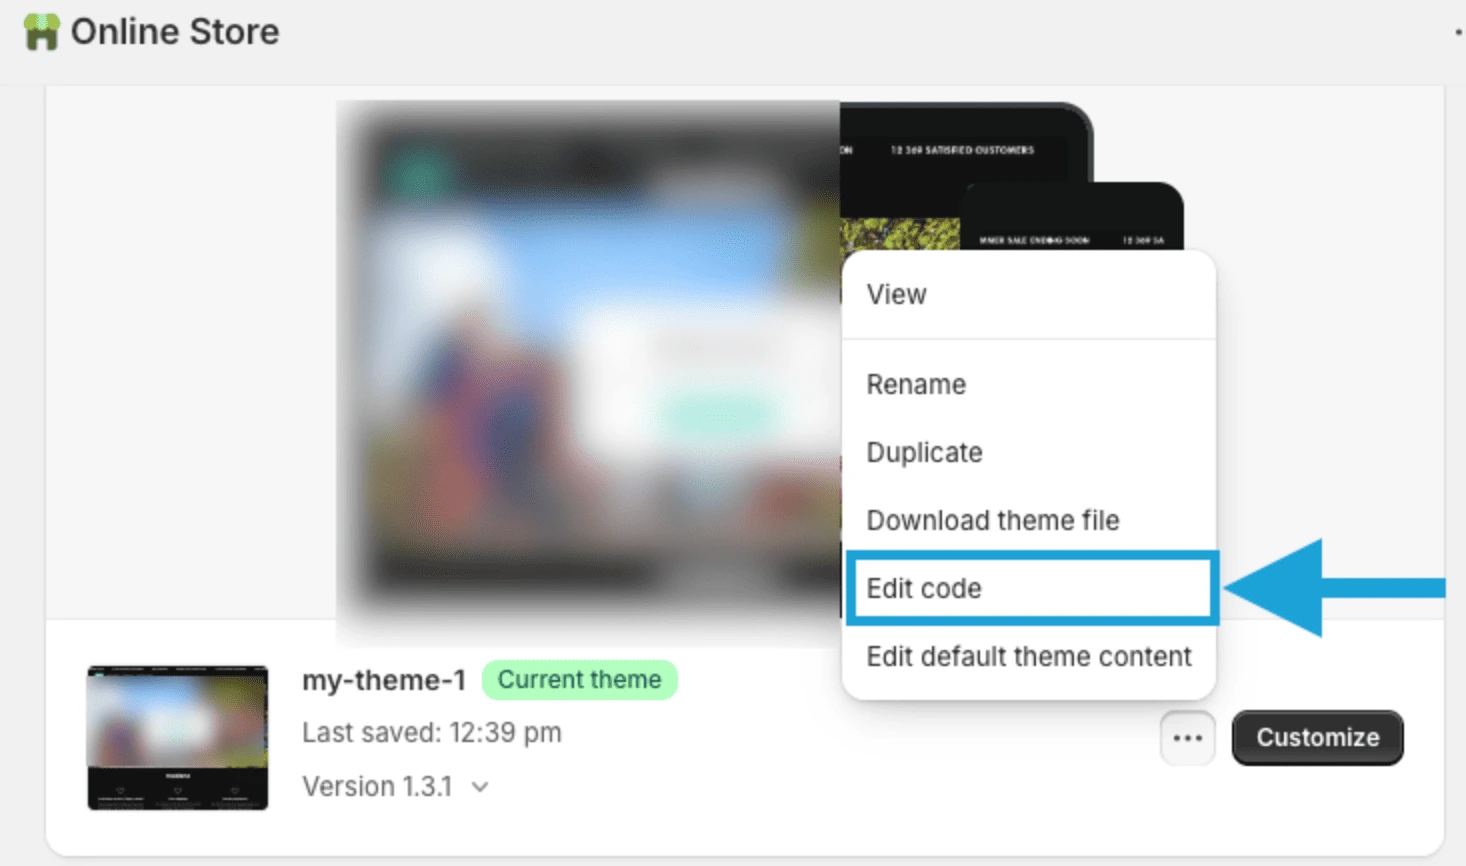
3. Click on the Layout folder and open theme.liquid;
4. Scroll down to the bottom of the file and paste this script before the closing </body> tag. Make sure to replace the part that says “tracking_domain.com” with your own tracking domain.
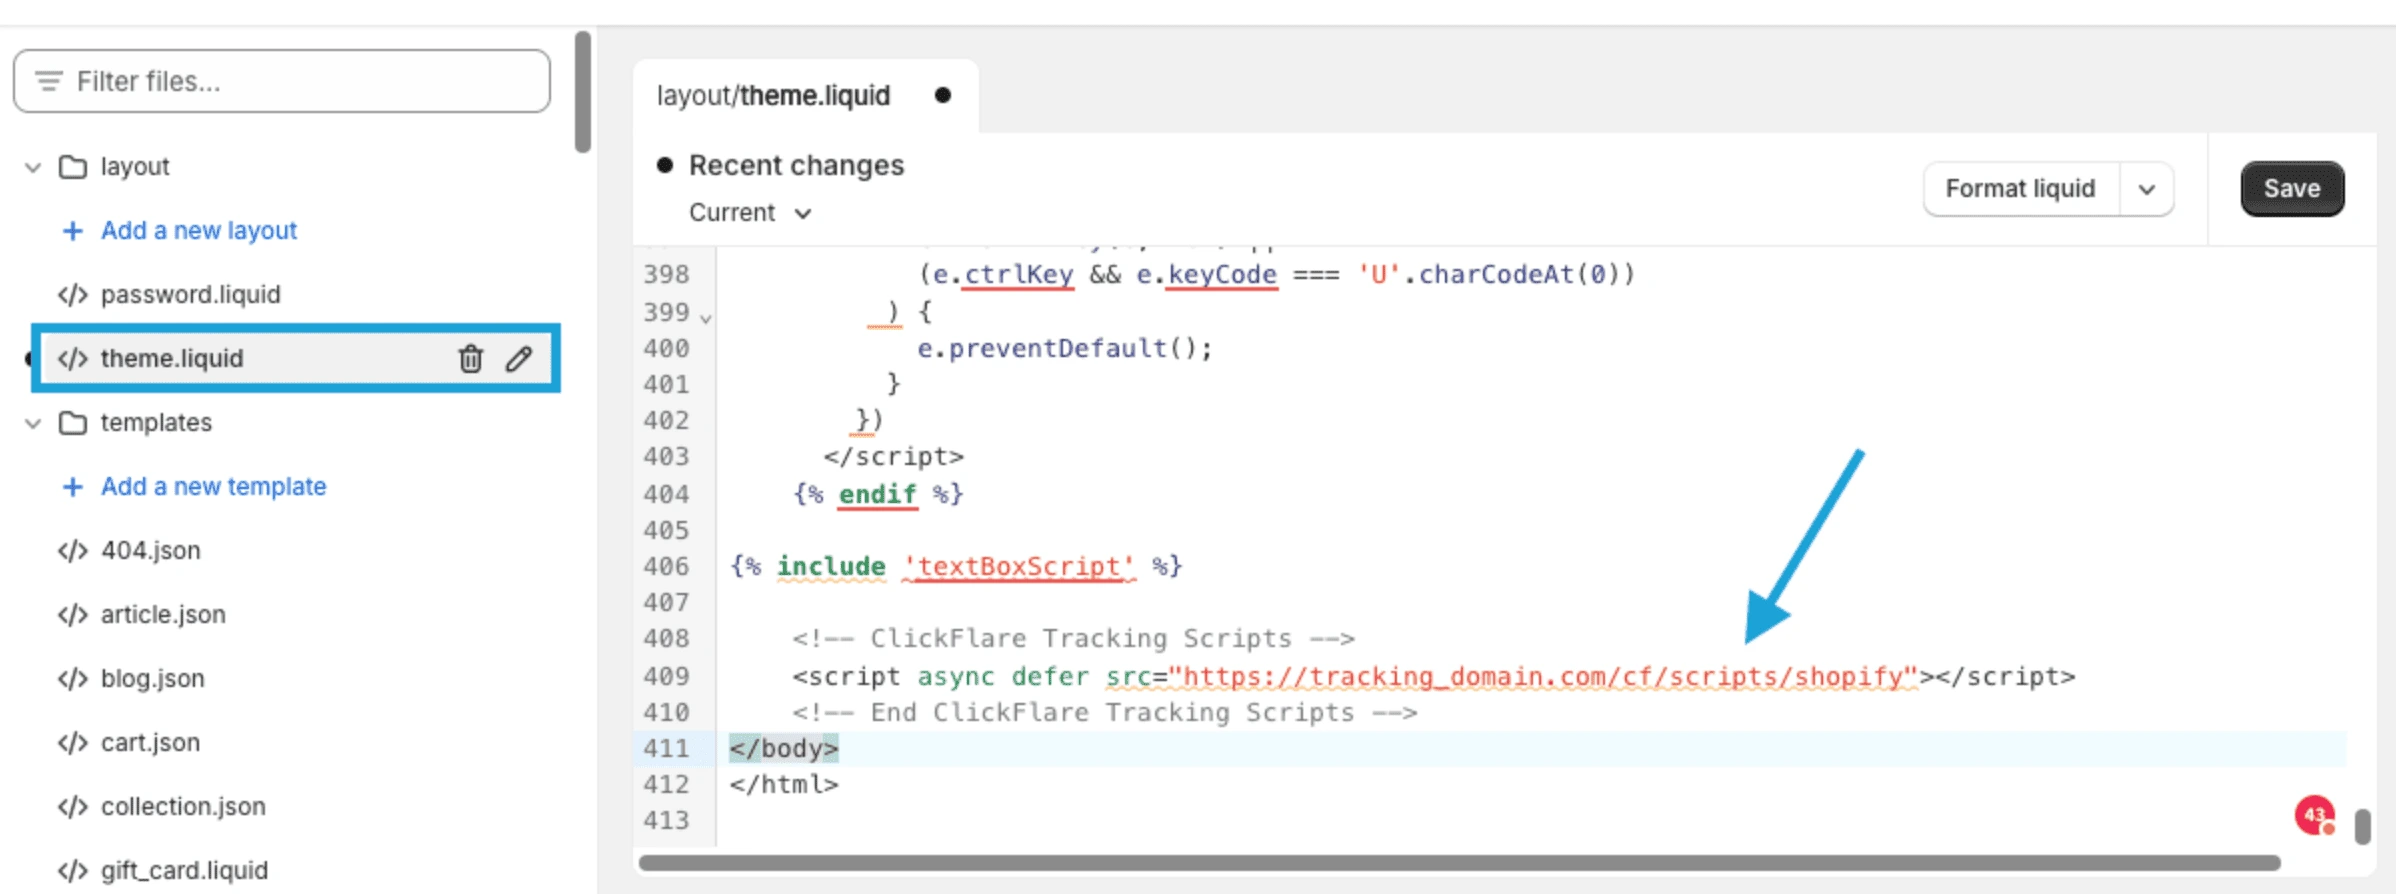
<script async defersrc="https://tracking_domain.com/cf/scripts/shopify"></script>
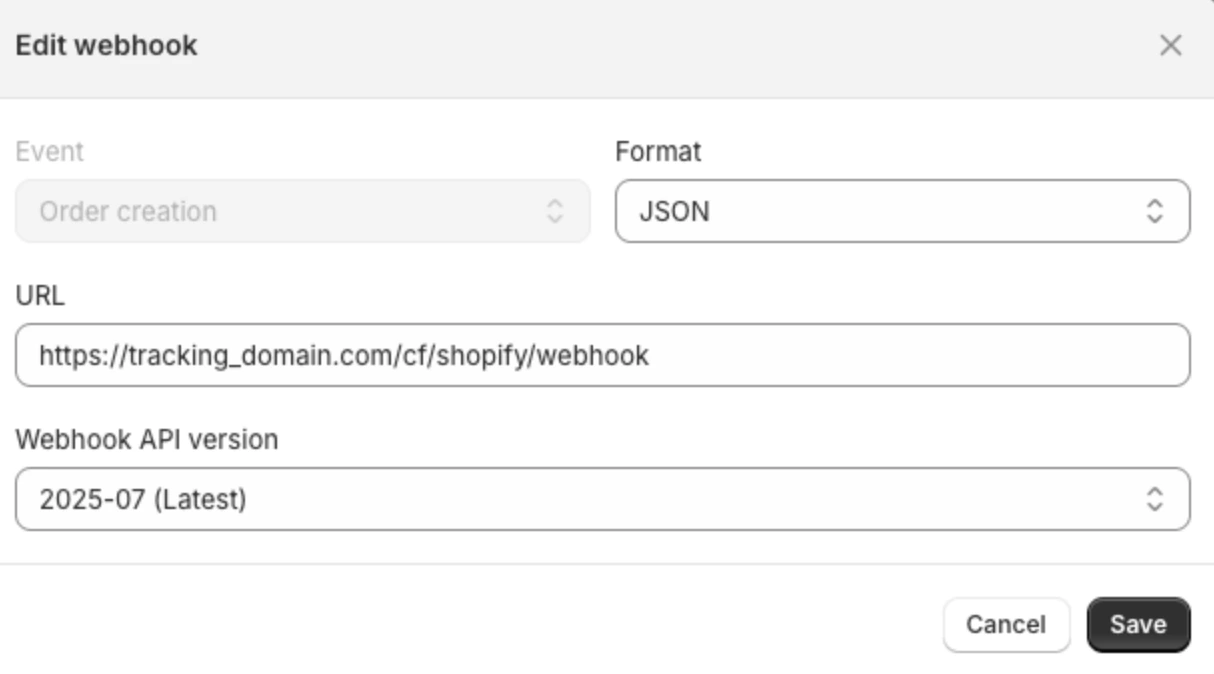
This is a crucial step, because these webhooks notify ClickFlare when events like purchases or checkout initiation happen. If you do not add them, conversions will not be recorded.
✅ Webhook 1: Checkout Initiated
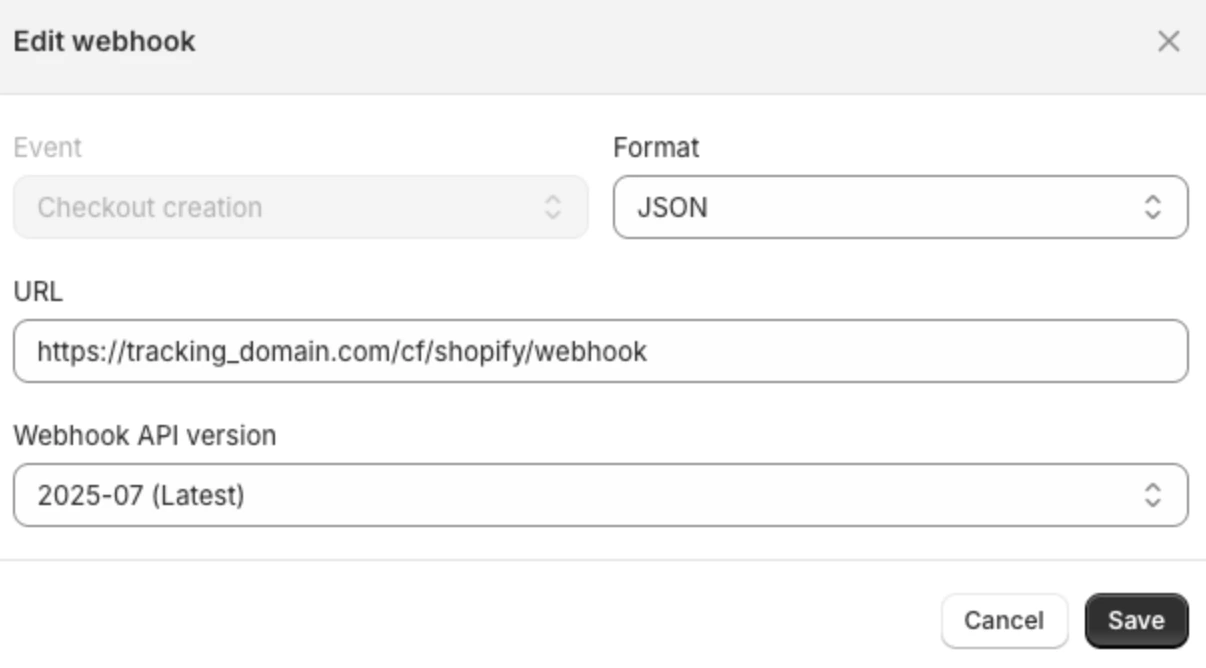
✅ Webhook 2: Order Completed (Sale)
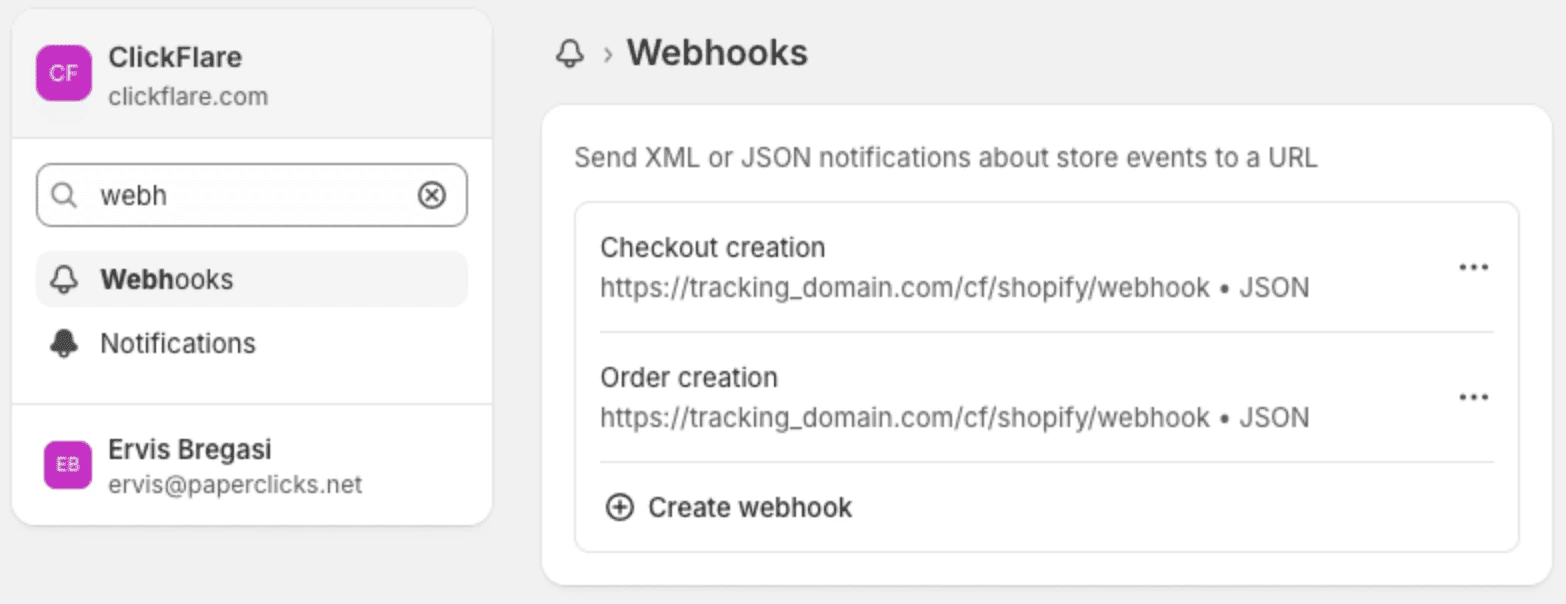
After adding these webhooks, they will appear in your Webhook list like this:
Here are a few common Shopify conversion tracking mistakes, and how you can avoid them:
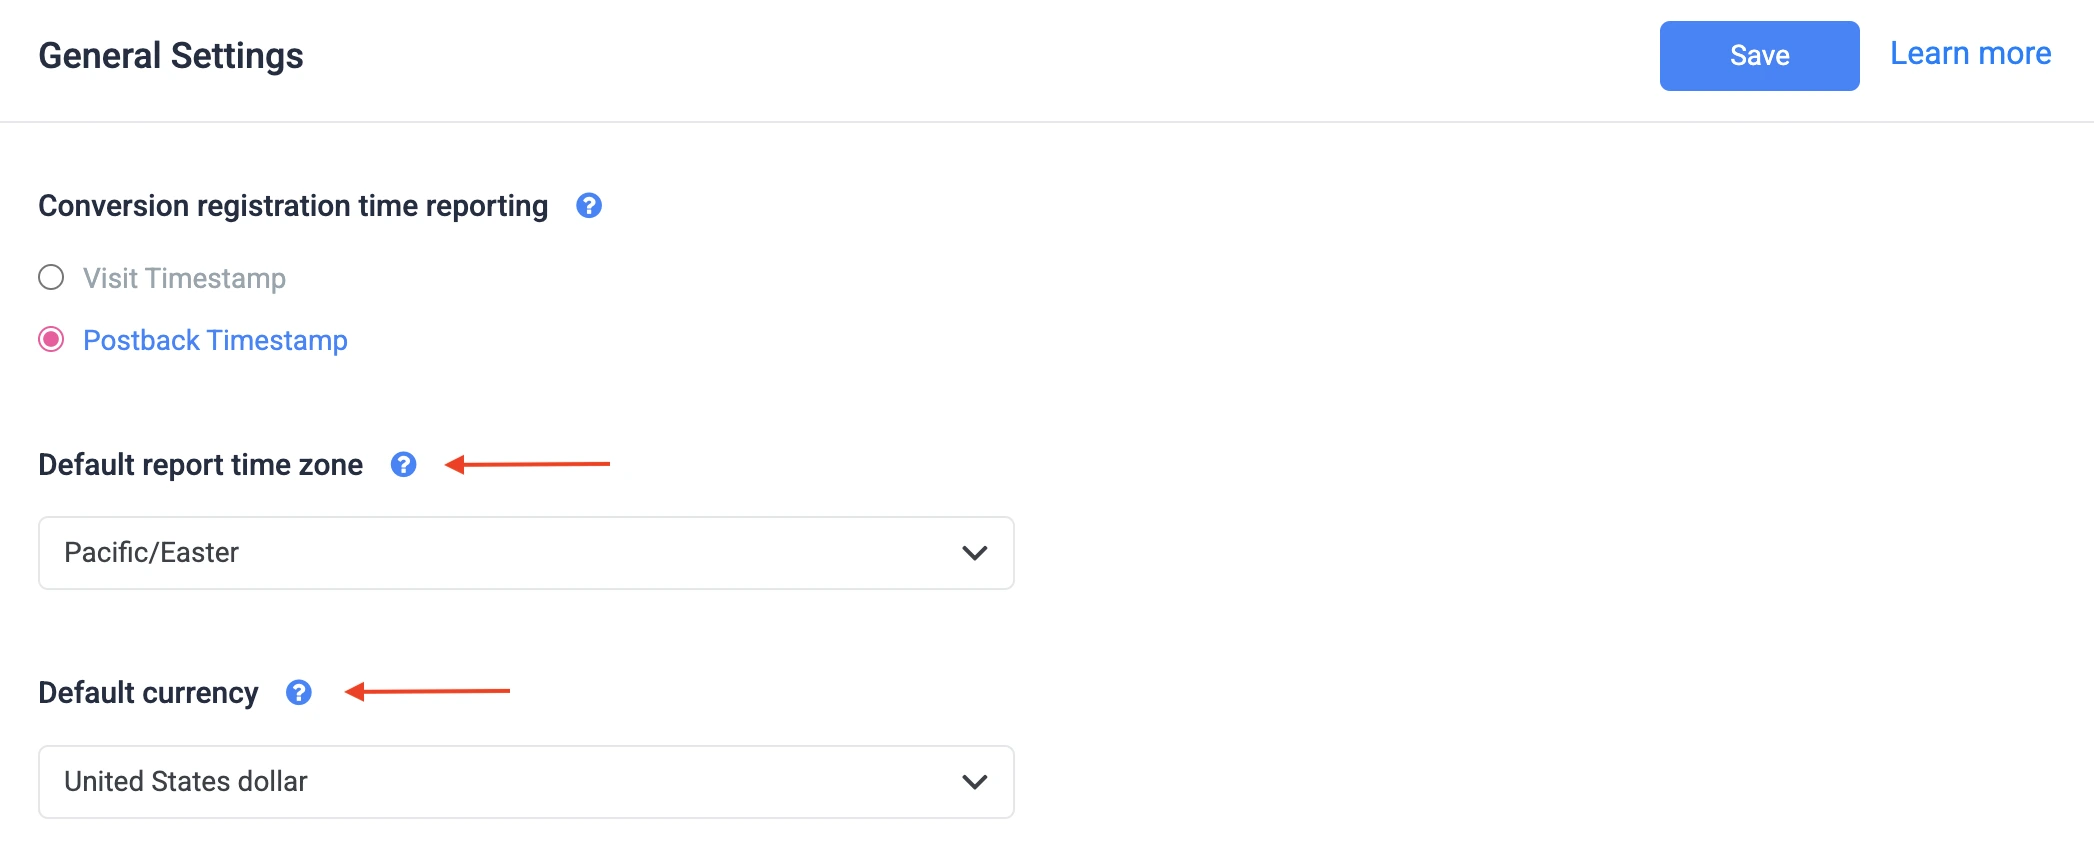
2. Having Mismatching Timezones & Currencies: When you are using different accounts (e.g., Shopify, different ad accounts and networks, ClickFlare), it’s common to run into accounts having different timezones or currencies. This can make it hard to match conversions to ad spend and get correct data. With ClickFlare, you can select a default timezone & currency, and all your reports will be automatically converted.
3. Missing Conversions: As discussed above, Shopify’s pixel-tracking leads to missed conversions and lost data. ClickFlare’s server-side tracking together with the Conversion API ensures you receive correct conversion data and allows you to send this data back to your ad platform automatically.
4. Manual Tracking Link Errors: Creating manual tracking links often leads to errors, because it’s very easy to miss a parameter, have an extra space, or have a typing mistake. ClickFlare auto-generates and manages your tracking links with dynamic parameters, minimizing errors and saving time.
Shopify’s built-in tracking is a good starting point, but for larger brands running paid traffic, it’s simply not enough. It lacks click-level data, accurate attribution, and the ability to see all your data in one place.
This is why most ecom advertisers opt-in for third-party trackers, like ClickFlare. With ClickFlare you can track click-level data, see unified cost and revenue in one report, and get complete conversion data, independent of ad blockers or other privacy limitations.
The integration between Shopify and ClickFlare is seamless, and you can do everything in just a few steps. Whether you want to cut wasted spend or boost ROAS, this solution is for you.